Rule Steps and Logic (Points)
On the Steps tab of the Haulage Rule dialog, logic points or "steps" can be added as one way to define a haulage route. Steps can be added singly or multiple steps can be digitised.
Add Step
To create a new Step:
-
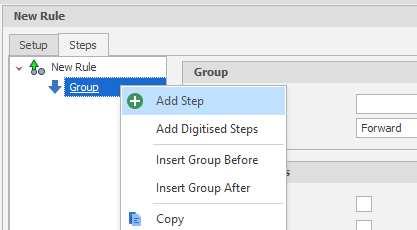
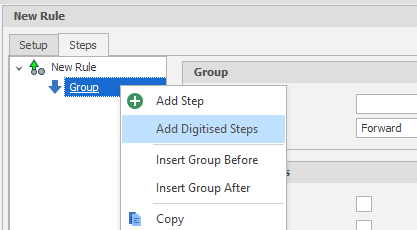
Right-click on a Group and click Add Step:
A central concept of Haulage Logic is grouping, where the steps in a rule are grouped and ordered (see Groups & Direction). If a Group does not yet exist, right-click on the name of a Rule and click Add Group. Once you have at least one Group, you can add steps to that group.
-
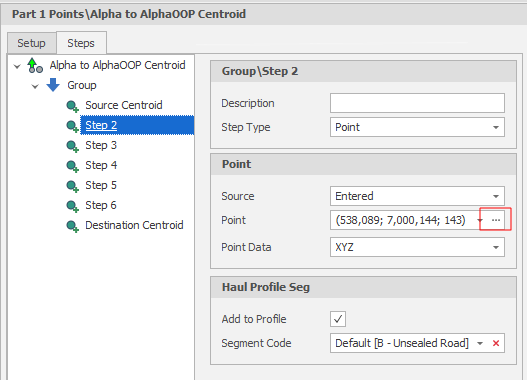
An Entered point is the default point source. To add a point in the Animation Preview pane, click the ellipsis button to the right of the Point input box:
Dynamic rather than Static points
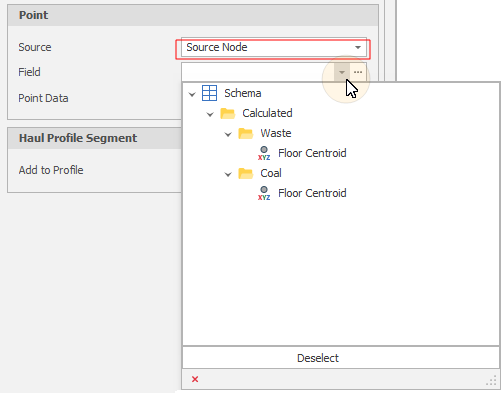
To set a Point Step as a dynamic Source or Destination Point, change the Point Source to Source Node/Destination Node and choose a relevant Centroid:
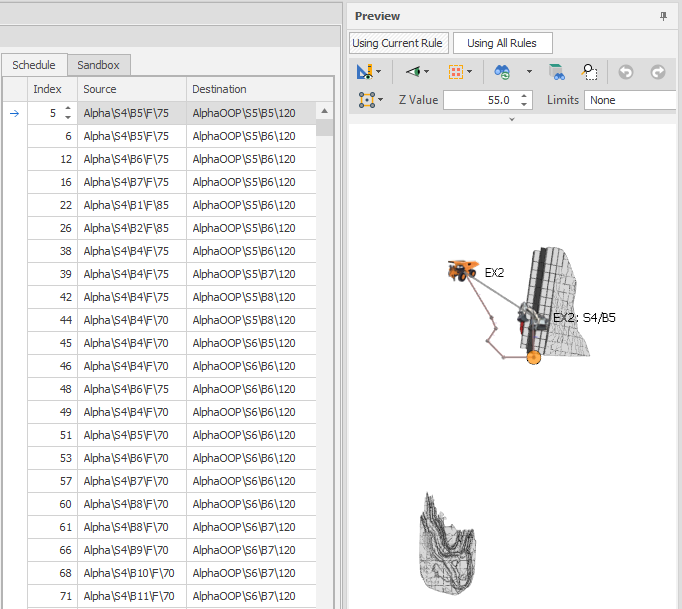
Animation Preview
The Animation Preview pane (which is unpinned on the right-hand side of the application window by default) allows a point to be digitised based on the spatial data. You can then set a point based on your solids or topography. An orange dot (see the example below) represents the current Step you have selected:
When digitising points, the various snap options are useful to help keep data in line with existing shapes. If you are having problems adding points or drawing with accuracy, check you have the right snap option set.
|
|
Snap to Cursor (the default) uses your current camera view and a fixed Z value (or grade after first click as an option) to snap to the tip of the cursor and determine the coordinates of the point under the mouse. The other three options relate to using the position of objects on the screen like Solids and Triangulations. |
|
|
Snap to Segment: Snaps to a point along a segment of a shape |
|
|
Snap to Point on Segment: Snaps to the nearest end point on a segment of a shape. |
|
|
Smart: A hybrid of the Snap to Segment and Snap to Point on Segment modes. |
Add Digitised Steps
Rather than enter single points, a more practicable way to work is to digitise multiple steps:
-
Right-click on a Group and click Add Digitised Steps:
-
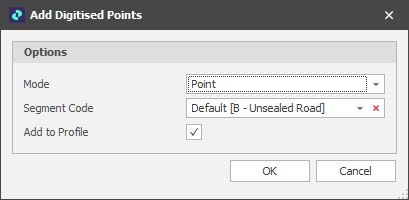
In the Add Digitised Points dialog, select Point as the Mode.
-
Accept the default Segment Code or use the drop-down control to select one.
-
Select the Add to Profile check box to add the digitised steps to the Haul Profile.
-
Click OK to begin digitising points in the Animation Preview pane.
-
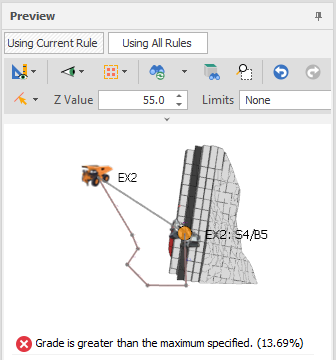
When you click the mouse to digitise a point, the elevation is shown automatically.
-
When you click on a second location the elevation and also the grade is shown (in blue).
If a grade is higher than the default grade a warning is shown in the Preview window:
Schedule and Sandbox tabs
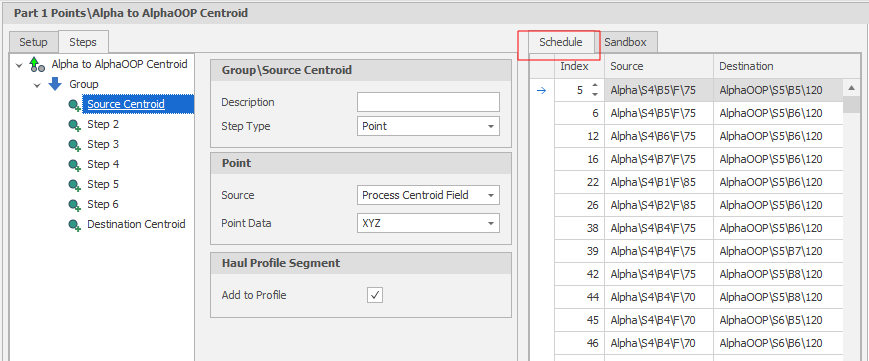
Once Filters are set, you should see Output Schedule Steps for the Current Rule under the Schedule tab to the right of the Group or the Step Properties pane.
The Sandbox tab will show you the Output Schedule Steps for the Rule that was actually chosen on the previous schedule run.
If you don't see any Steps on the Schedule tab, either Run your Scenario (or Generate Haul Profiles for the Current Rule) to populate the Output Schedule, or adjust the Filter.
If you are still not seeing anything there are two possible reasons:
-
First, you haven't selected Add to profile for the schedule steps that you are looking at.
-
Or your ranges have filtered everything out.
Connecting Source and Destination Points
After digitising a road, connect the vertices to the loading point and the destination point:
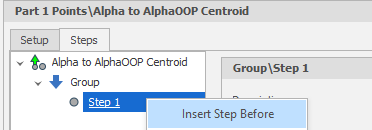
-
Right-click on Step 1 and select Insert Step Before:
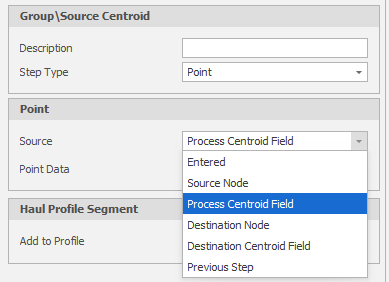
-
Choose Process Centroid Field as the Point Source:
-
Select the Add to Profile check box. This will automatically connect the loading point to the haulage road.
-
Click on Step 6 and select Insert Step After:

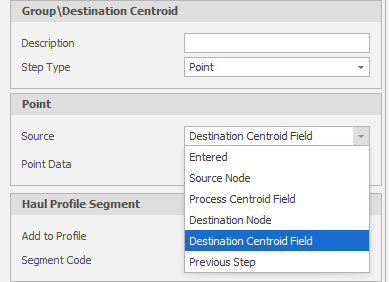
-
Choose Destination Centroid Field as the Point Source:
-
Select the Add to Profile check box. This will connect the destination point to the haulage road.
While this method is relevant for a first cut or first dump (since the haulage can be assumed using a direct line), in the case of a worked or final pit, the road must follow the batters of the pit, which means that the grade may be too high when a direct route is taken.
To determine which is the best road to use, as there is usually an established set of roads at any mine site, rather than individually creating points from the Source to the Destination, Haulage Networks allow you to separate out your workload into Network (Attach and Detach) Rules.