Levels & Positions
In Micromine Spry, Tables are tree-oriented data structures. The branches of this tree are the Levels, and in the application you would generally have anywhere from 2 to 7 Levels (although this number can be much higher if needed). For example, a mine might be described as having a Pit, Stage, Strip, Block, Seam, Bench structure, which would mean 6 Levels. The number of Levels is not pre-defined and should be based on individual mine requirements.
In addition, each Level contains at least one Position within it. In the example below, the Stage Level has 2 Positions (1 & 2). The following flowchart demonstrates the example with more detail.
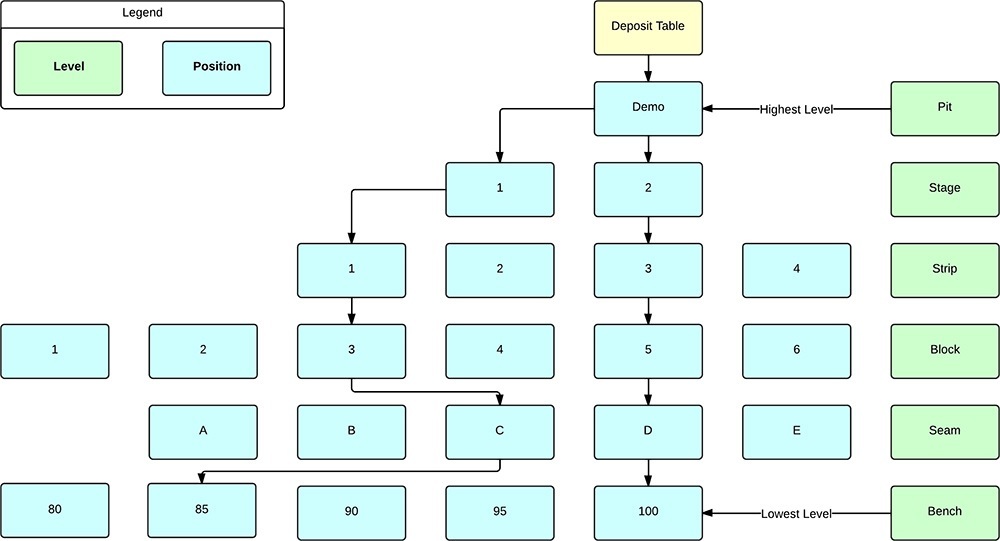
At the end of each branch (the Lowest Level in the image above) the data itself is contained in what is called a Leaf. The maximum number of Leaves in any Table is the multiple of the total number of Positions and this controls the amount of detail you can schedule your mine in. For example, if you took the example above, the maximum number of possible Leaves would be 1 * 2 * 4 * 6 * 5 * 5 = 1200. The number and different types of data each Leaf can contain is based on a structure defined in the Fields area in the application.
Another concept to be aware of is Nodes, which can be considered to be the progressive Position within a Table Structure. The screenshot below takes the previous example and shows what the Nodes look like.
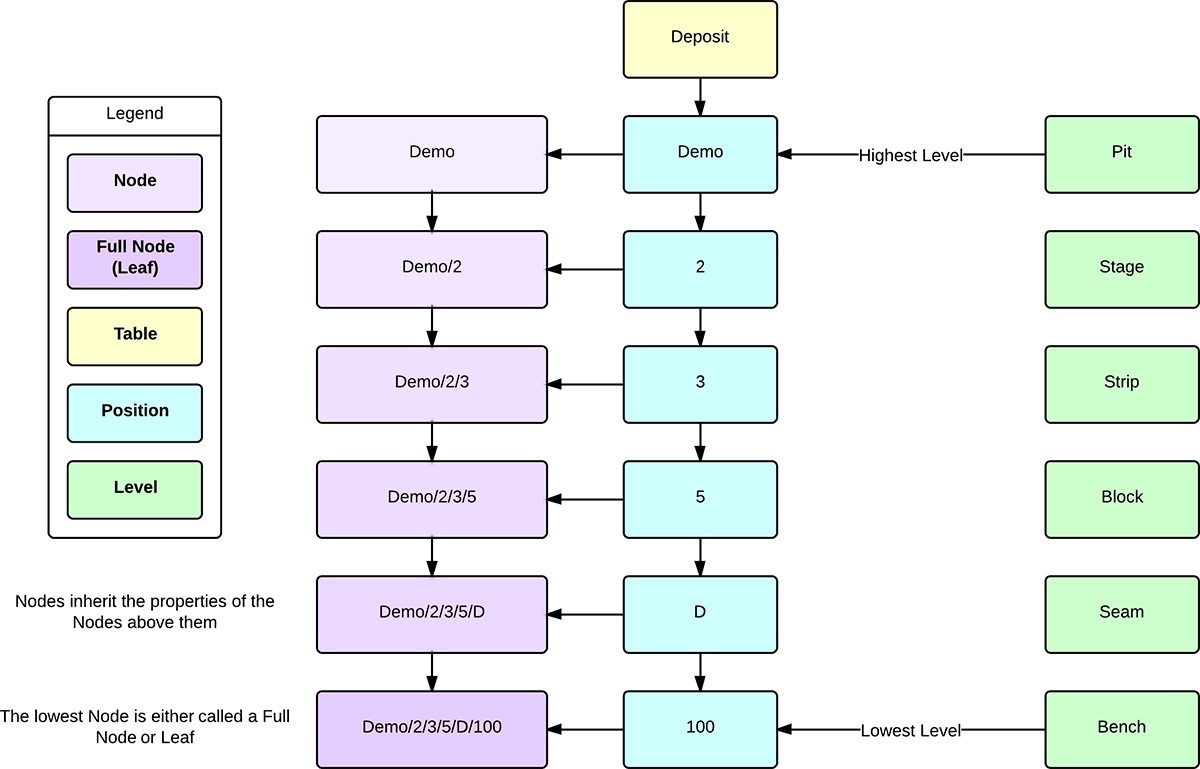
Nodes
A key concept to remember is that in a tree data structure, a Node can have many Nodes underneath it (Child Nodes) but only one Node above it (Parent Node).
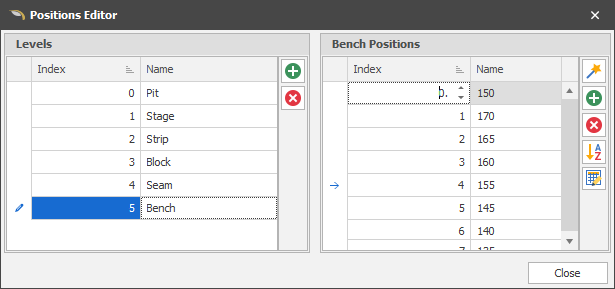
Tip: In the example above, all of the Levels and Positions are shown with their Name and are in a logical order, but each also has an Index which is the actual order that the application uses. The screenshot below shows an Index that is out of logical order. This can have ramifications that will be discussed later on in Ranges as well as Paths.

To create Levels, right-click your Table in the Project Explorer window and choose Setup Levels. Each level can be added with the Add Level button.

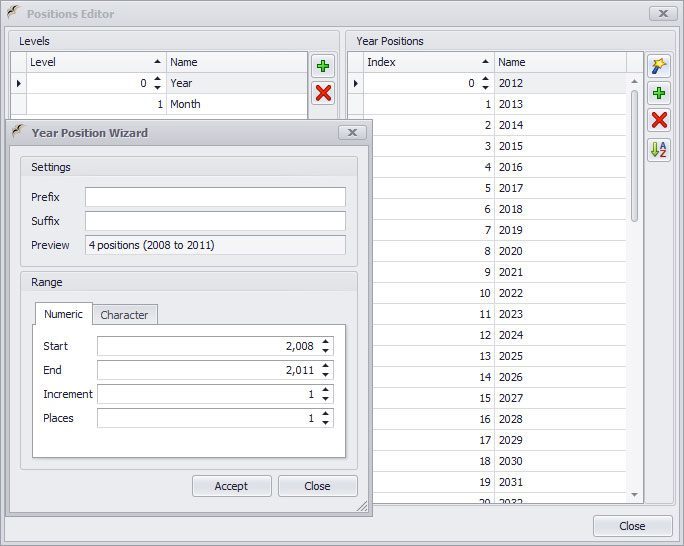
Positions can be added the same way, with an additional Position Wizard tool in the screenshot below.

This tool can be used to create Numeric, Character or Month type Positions automatically.
Tip: When you are importing data into a table and the Position required does not exist, the application (if you select the option to do so) will append the Position to the end of the list regardless of "logical" ordering. In the screenshot above, if the application automatically added the Year 2009 on import the Index would be 25. If the application is creating Postions for you, you should ensure that you re-order once completed.
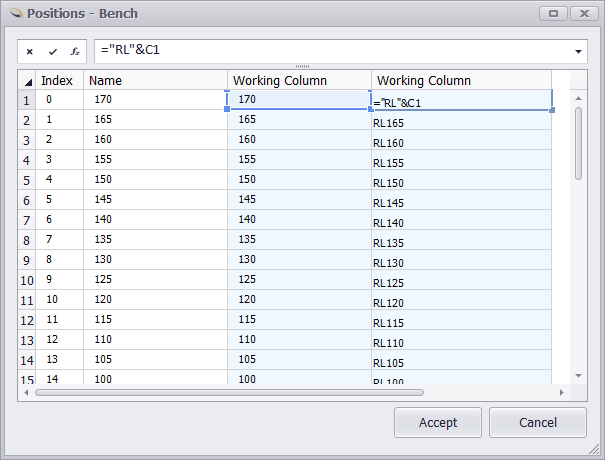
Use the Positions Bulk Editor to make more complicated edits.

Useful when you need to do more than just re-order! To access a "Working Column", like in the screenshot below, right click a column header (e.g Index or Name).