Creating a Sample Budget Target
This topic describes the procedure to create the sample target:
"Planned tonnes multiplied
by kilometres per hour (tonnage *km/h) by period and by crew".
Create a Target
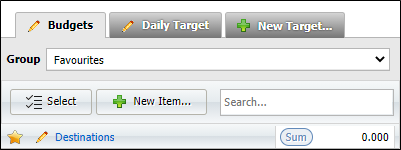
Use the New Target button to create a new target. Existing targets are tabbed on the Target panel:

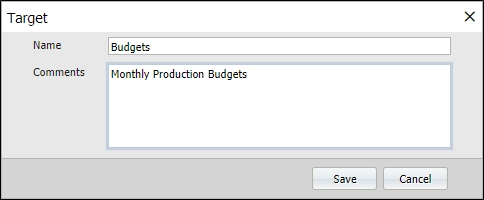
The New Target button opens the Target dialog.
Enter a unique Name for the Target.
Enter a Comment (Optional) that clarifies the purpose of the Target.
Click Save to save the new Target.
Select the Target you have just created:
Create a Target Item
To create a new item,
-
Click the New button in the Targets pane.

-
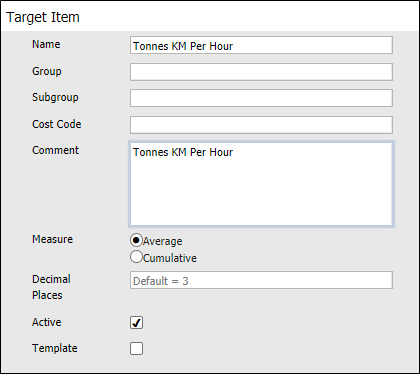
On the Target Item dialog, specify the general properties of the item. You must specify a Name for the item. Other attributes are optional.
-
Optional Group and Subgroup names are useful when you want to aggregate your data at different levels.
-
If a Cost Code is associated with the measure, you can enter it here.
-
The Comment field can be used to enter descriptive text on the target item.
-
Select an Average or Cumulative measure type for the target item.
-
In the Decimal Places field, you can enter the number of decimal places for the target item measure. The default, used if you do not enter a value, is 3 decimal places.
-
If the target item relates to a measure attribute that is actively being recorded on-site, select the Active check box. If the measure relates to future rather than current development or production activities, the item is inactive and you need not select this check box.
The Target pane allows you to filter the list of items based on the active or inactive status of the items.
-
Select the Template check box if the target item is to be used as a template. Templates can be used to automatically generate targets using the Auto Targets feature.
In this example, Target Item "Tonnes Km Per Hour" is created with an Average measure type:
Configure the Target Item
The Parameters grid is used to configure the attributes and other details for the target item.

To add a parameter to the item, click the New Item icon in the Parameters grid.

The Parameters options will be displayed.

Use the Object drop down to select the applicable object for the target item parameter. The options are as follows:

Select the Attribute for the specified Object using the drop down list. The available options are dependent on the Object selected.
Select either In or Not In from the Operation radio buttons. The default behaviour is to assign attribute values using an In operator. You can also negate values by selecting a Not In
If you want to expand the values that can be entered for the target item, select a secondary attribute from the Expand Attribute drop-down list. The available options are dependent on the selected Object and the selected Attribute.
In this example, you can create a target item for Tonnes KM Per Hour. To do this,
-
Select Measure from the Object drop down.
-
Select Measure from the Attribute drop down.
-
Select Tonnes KM and Hours from the Available Items table and click the right arrow to add them to the Selected Items table.

-
Click the Accept button to save the parameter.
-
Repeat this procedure to add an Hours parameter to the item.
-
Click Save to save the new item with the parameters configured.
Enter Target Values
To enter target values, with the required target tab selected:
- Select the period for which you ant to enter target datausing the Shift, Day, Week, Period or Month options.
- Enter target values for the periods specified:

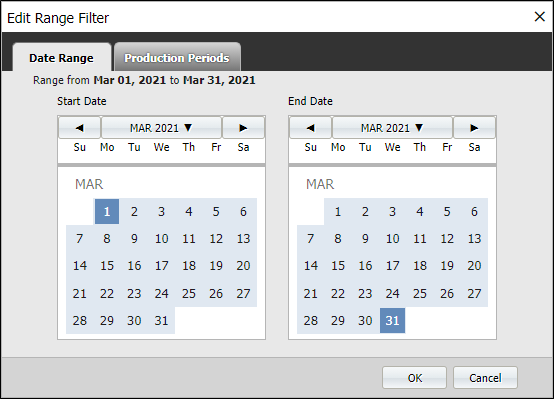
And specify a date range:

For more information about Period/Range selection, see: Target Period and Range
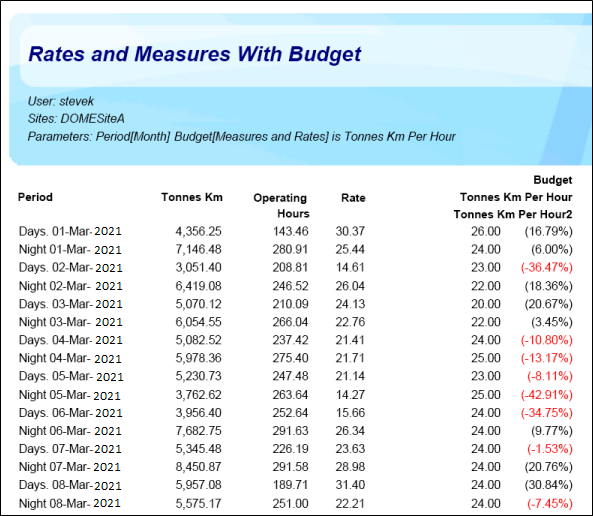
In this example, "Tonnes Km Per Hour" is selected as the Target Item we want to create a budget for; "March 2021" is chosen as the period we want to view/enter data for:

When you enter data, it is saved when you tab out or exit the cell you are editing. You can correct the value entered at any time.
To view those day and night shift cells that are off the screen use the horizontal slider bar below the data grid at the bottom of the screen:

Run a budget report and include the target you have created
- Click on Reporting at the top of the Pitram Portal window and select Rates and Measures With Budget from the Budgets panel at the left.
- Select a target from the list of Available Values.
- Select the reporting period from the Summary Levels section at the bottom of the screen.
- Click Run Job.
In this example, "Tonnes Km Per Hour" is selected as the target; "March 2021" is selected as the reporting period:

Here, actual values are reported alongside budgeted values. The percentage difference is shown in red: