Editing reference data
Before you can edit reference data, you need to check out the reference group you want to edit.
A reference group can have a status of Checked in, Checked out, or Published.
|
|
If a group is checked in, a padlock is shown on the group icon. |
|
|
If a group is checked out, no padlock is shown. |
|
|
If a group has been published, a (globe) published symbol is shown on the group icon. |
Checking out a group
There are two ways to check out a reference group:
- Click on a group in the navigation pane and select CheckOut All from the Other Actions drop-down menu.
- Click on the Checkout button above the data table with the group displayed.

Editing a group
When a reference group has been checked out, the name of the group and a Version control is displayed in a header above the workspace.
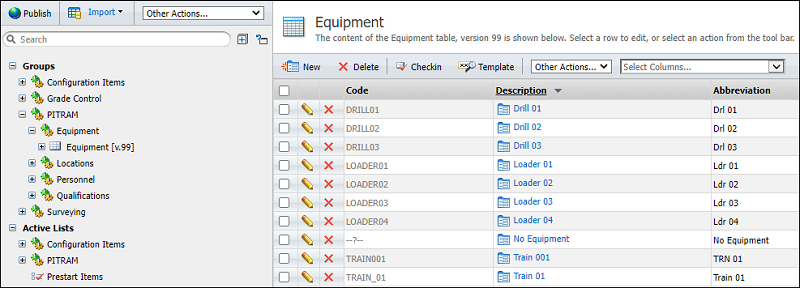
The data entities belonging to the group are displayed in the workspace and an Edit icon is displayed at the start of each row. A Delete icon is also displayed for each row.
Editing An Item
To edit an existing item, click on the Edit (pencil) icon alongside the item name.
Data Entities and Items
When you edit reference data, you edit a data entity and its items.
Reference Data is configured by defining data entities such as equipment, locations, and personnel. Each instance of an entity is a data item, for example Truck1, LocA, John Smith, etc.
A data entity can be an attribute of another entity in a hierarchical data structure. For example, an attribute of a unit of equipment is its model, and an attribute of an equipment model is its function.
Code, Descriptions and Abbreviations
Every data item has a Code, a Description and an Abbreviation. These are mandatory attributes. The Code must be unique within its reference group, i.e. it must uniquely define a location, or a unit of equipment, or a person, etc. Descriptions and abbreviations should also be unique.
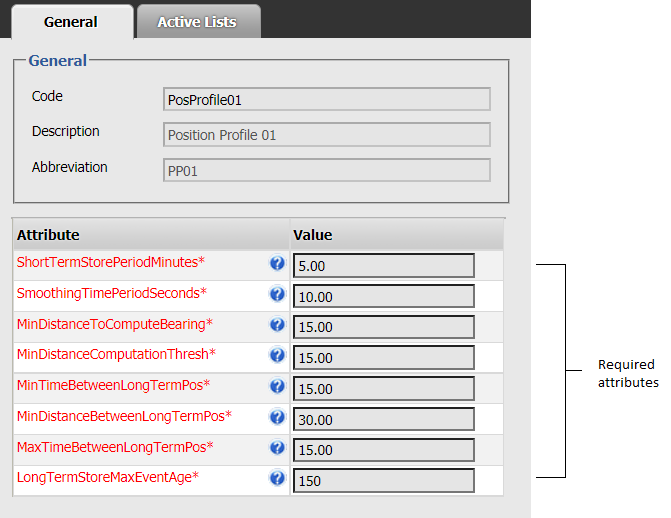
Additional Attributes
Data items may have any number of additional attributes. These attributes are common to all items in the same reference data group. All Locations, for example, will have the same set of attributes.
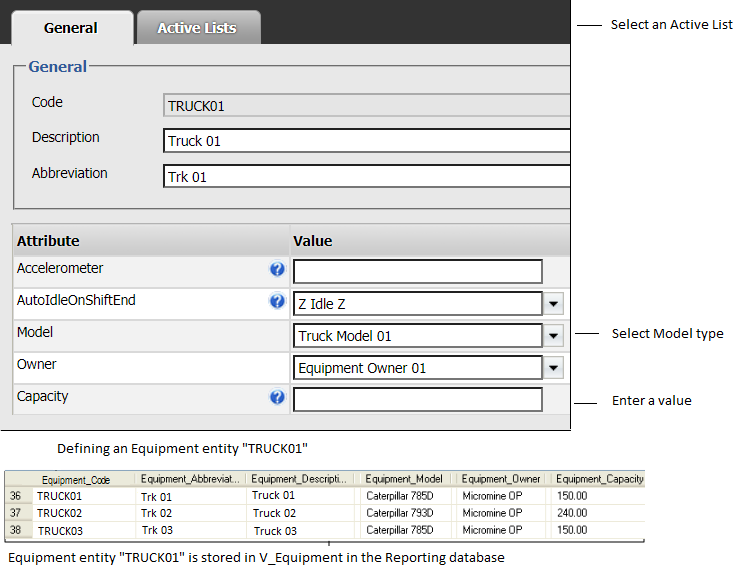
While some attributes are required (you must specify a value), other attributes are optional (null values are allowed).
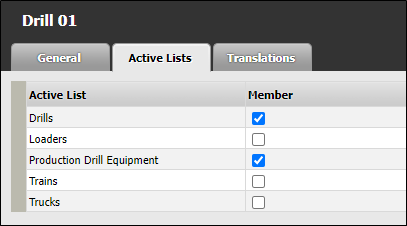
Attributes and Active Lists
Attributes and active lists are selectable, with the active lists listed below a separator bar as shown below:
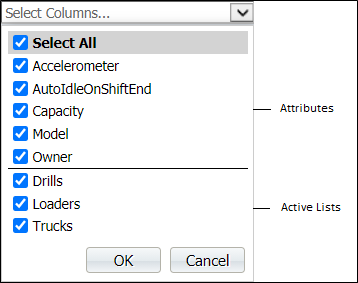
Select any combination of check boxes and click OK to display these columns in the grid:
The extra columns are added to the main grid, to the right of the default attributes (Code, Description and Abbreviation):

Search Filter
When filtering the Editor grid there are two options:
- All Displayed - search and filter by all columns currently selected for display in the grid
- Filter on one or more chosen attribute columns, and display those attributes as columns to the right of the default (Code, Description Abbreviation) attributes.

You can also filter the display by number of records, using the Show drop down.

Deleting Items
To delete an item that is currently checked out:
- Select the check box alongside the item name and then click the Delete icon at the end of the row on the right.
To delete multiple items:
- Select the check box alongside each item name then click the Delete icon on the taskbar.
Adding Items
- Click the New icon on the taskbar.
Associating active lists with groups
When you edit the attributes of a reference item, you can choose to make it a member of one or more Creating and Updating an Active List .
Undoing changes
To undo or roll back your changes: Select the Undo Checkout option from the Other Actions... drop-down list above the table. When you select the option, the group reverts to its previous version and any changes you have made for the current version will be lost.
The membership of one or more active lists may be affected when reference groups are rolled back to a previous version.
Publishing changes
To make the changes you have made available to other Pitram services or applications, you will need check in the groups you have changed before you Publishing changes to Reference Data those changes.
Printing
You can generate a printout of a table by selecting the Print option from the Other Actions drop-down menu.