Widgets
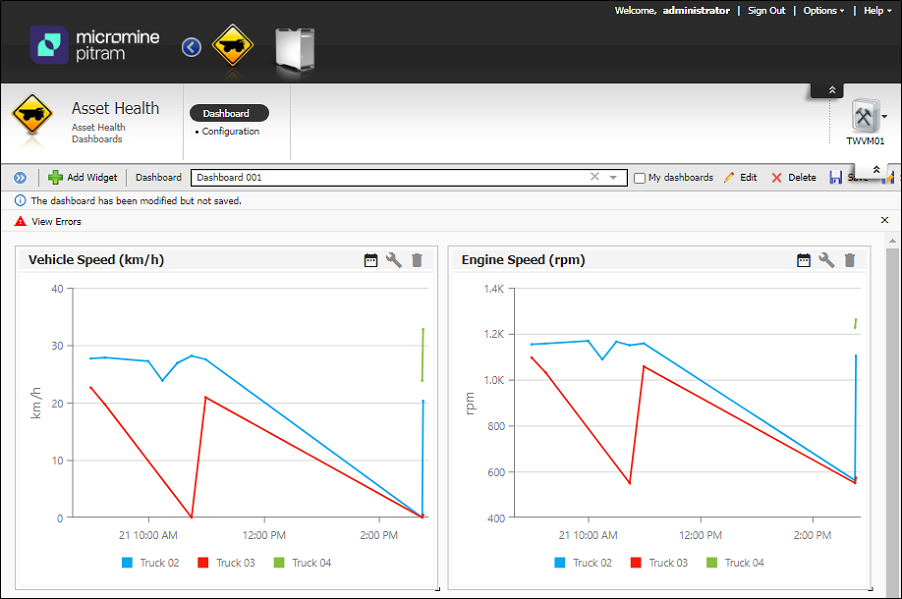
On the Services ribbon, click Asset Health to display the dashboards showing the performance against the reading definitions you have configured for your assets.
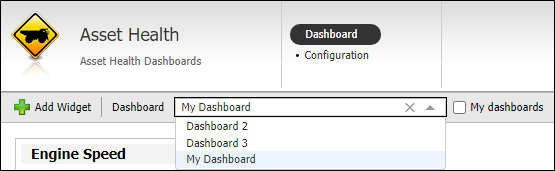
You can select a dashboard for display in the Dashboards page using the drop down.
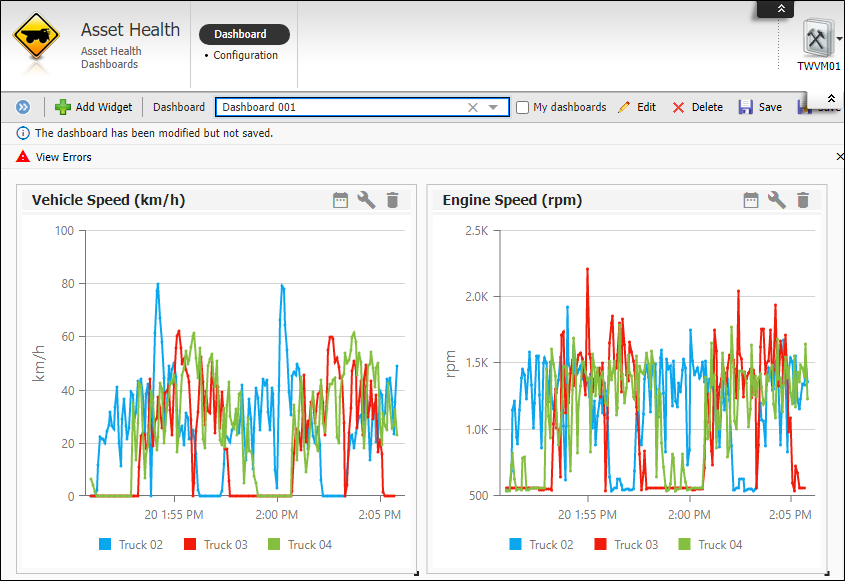
Widgets added to the Asset Health dashboards you create display information on various states and values for configured equipment.
A number of widget types can be added to the dashboard. See Asset Health Widget Types for details on each widget type available.
To add a widget to the dashboard,
-
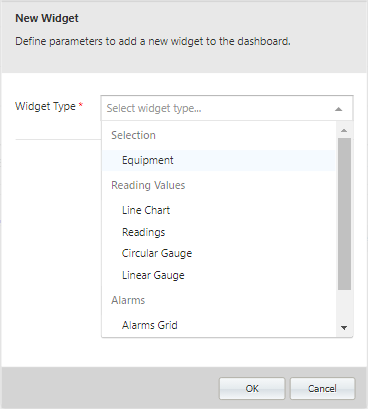
Click the Add Widget button to open the New Widget form.
-
Select the Widget Type to be added from groups of available widgets in the drop down.
If you add a Selection widget, no further configuration is required. For everything else:
-
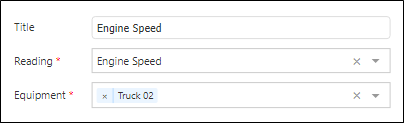
Enter a name for the widget in the Title field.
-
Enter the required details for the widget, such as the Reading, Equipment, Threshold etc values.
-
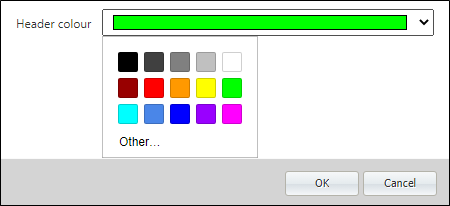
Use the Header Colour drop down to select a custom colour for the widget header. This is useful to enable the identification of individual widgets at a glance.
-
Click OK to save the new widget and add it to the selected dashboard.
Dashboard Widget Layout
There are a number of ways you can interact with the dashboards you create and modify the layout of your widgets and the information they contain.
-
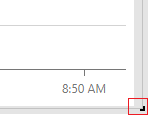
You can resize the widgets on your dashboard using the resize point in the bottom right corner.
If the widget is resized beyond the display of all information, vertical and horizontal scroll bars will be added automatically.
-
You can drag and drop the widgets on your dashboard to reorganise the order in which they are displayed. When you drag a widget, an indicator of the space it will occupy is presented as a shadow by the application.
-
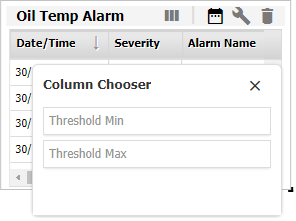
You can use the Column Chooser to determine the columns that are displayed in the widget.
-
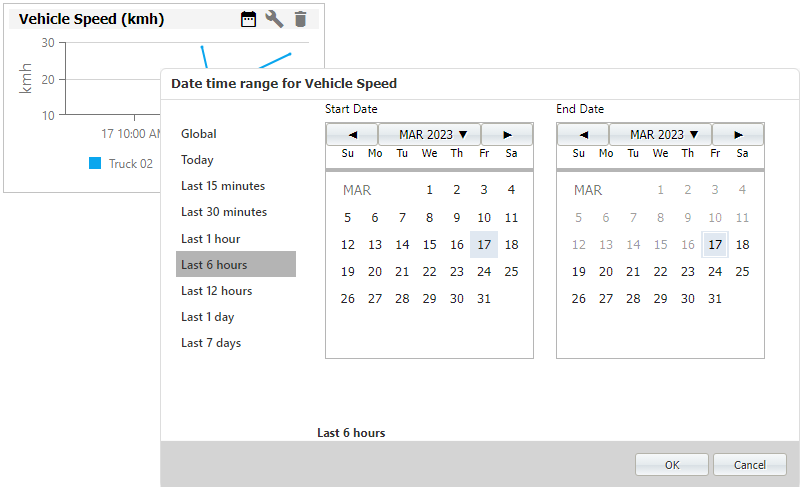
You can select a date and time range for the information to be displayed using the Calendar button in the widget title bar.
-
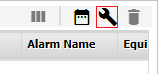
You can modify the details of the widget. The Edit widget configuration button will relaunch the widget form and you can make changes to the current configuration for the widget.
-
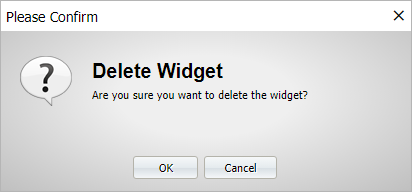
You can remove a widget from the dashboard using the Remove Widget button at the top right.
You will be prompted to confirm the removal.
-
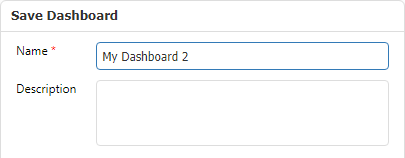
You can save a dashboard with a new name, retaining all the existing widgets to make a new dashboard using the Save As button. You can then add or remove widgets from the new dashboard using the process outlined.
-
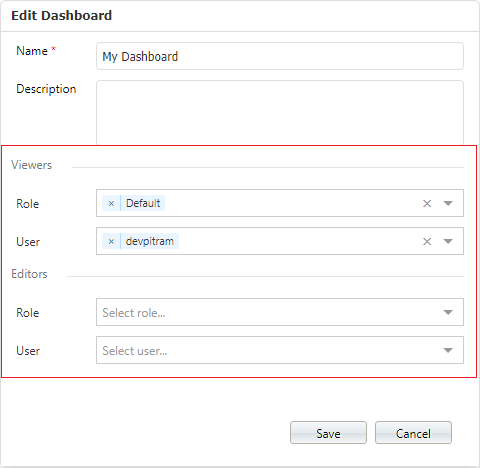
You can configure the access that users have to your dashboard, whether write (Editors) or read-only (Viewers), at the dashboard level using the Edit button.
Calendar
You can adjust the global time range for all of the widgets by clicking the Calendar button in the toolbar.

This will open the Global Date Time Range calendar.
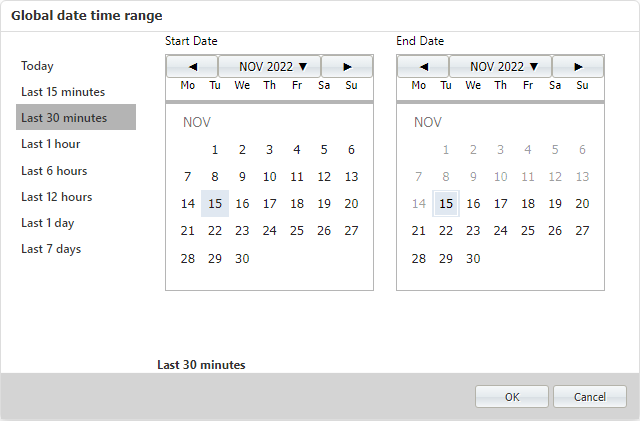
You can use the calendar to select a Start and End range for the widgets on your dashboard, or select from the preset ranges at the left - e.g. Last 1 Hour. When you click OK, the selected range will be applied.
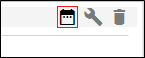
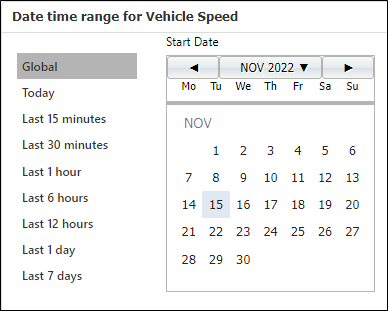
The time range can be also configured per individual widget by clicking the calendar button in the widget:
Once you have set the calendar for a specific widget, it will be displayed in a darker colour, to indicate a setting.
If you want to apply the Global date time range to the widget, click the calendar button for the widget again and select Global.
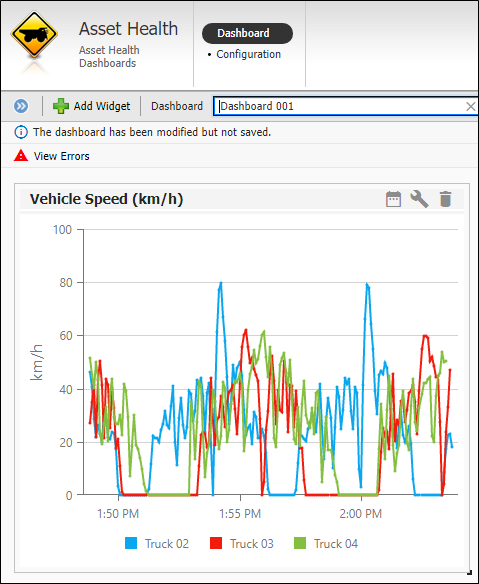
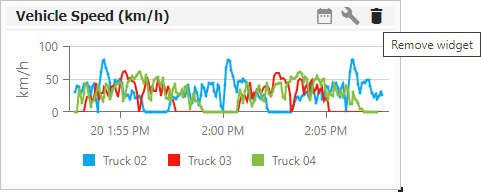
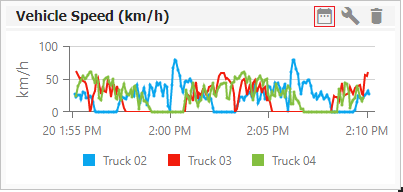
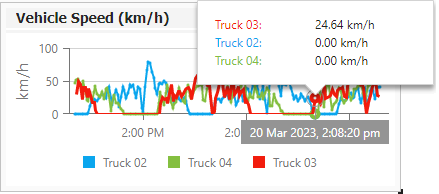
Some widget types feature additional information which can be accessed by clicking or hovering on the data they contain. For example, the Vehicle Speed widget features hover information at the points on the graph:
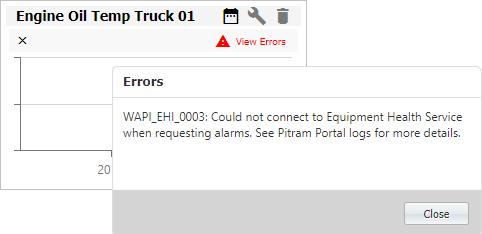
If errors occur for a widget, the View Errors option will be displayed. You can click the option to view the error.
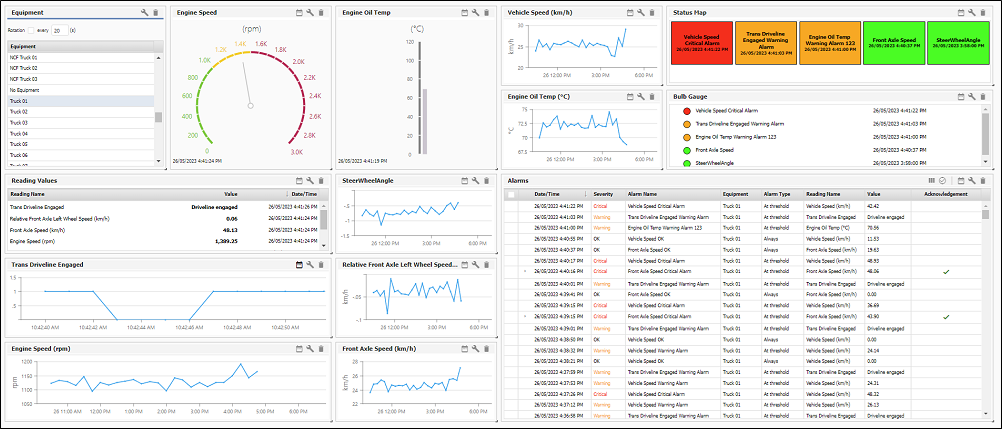
Asset Health Widget Types
This section describes the different types of widgets which may be added to an Asset Health dashboard.
-
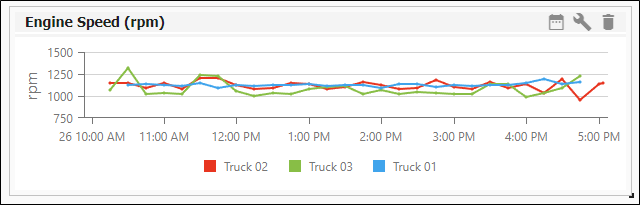
Line Chart
Displays a chart of reading values over time for one or more equipment.
-
Readings
Displays one-or-more readings for a single equipment in a grid.

-
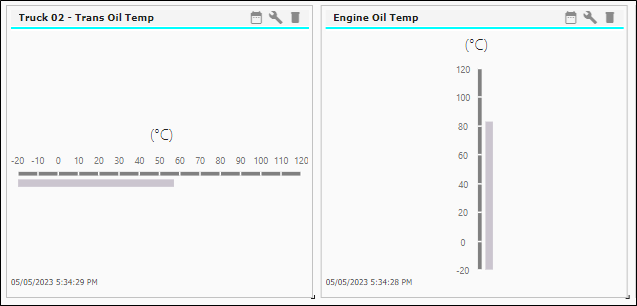
Linear Gauge
Displays the latest value of a selected reading and a single equipment. It can be configured to be displayed horizontally or vertically.
-
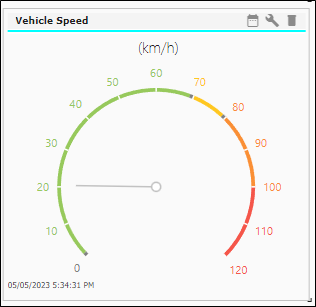
Circular Gauge
Displays the latest value of a selected reading and a single equipment.
-
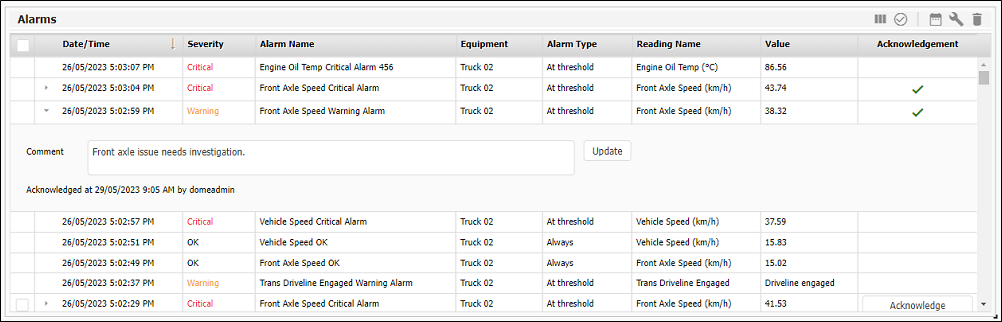
Alarms Grid
Displays the reading alarm details as a grid which provides the ability to sort and filter the data on various columns. Alarms which require acknowledgement can be acknowledged, and have optional comments entered.
-
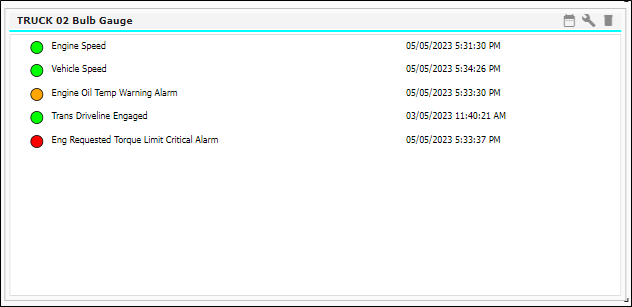
Bulb Gauge
Displays the alarm status for one or more readings as a list of traffic light bulbs.
-
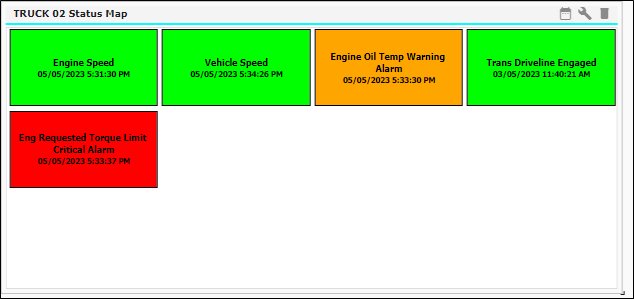
Status Map
Displays the alarm status for one or more readings in a grid format.
-
Equipment Selection
This widget provides the ability to automatically apply a selected equipment to all other widgets on the current dashboard. This creates an equipment centric dashboard where data can be explored via various widgets for a single equipment. The widget may be configured to display a subset of equipment, equipment by equipment model or equipment by Active List.