Configure a Dispatch Region
In order to configure a Dispatch Region, do the following:
- Deploy and Define the Mine Areas within the Dispatch Region (for example, LocAll and StocksAll below).
- Associate locations with each mine area (for example, LocA and LocB,StockA and StockB below).
- Define an active list that is a list of the Mine Areas within the Dispatch Region.
- Define the Dispatch Region (for example, OreX below). One attribute of the Dispatch Region wil be the Active List you have defined in the previous step.

Deploy MineArea Reference Data
- In Reference Edit, select Other Actions | Deploy Reference Data on the navigation pane header.
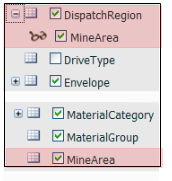
- In the Deployment dialog, select Configuration Items | Locations | DispatchRegion and MineArea. MineArea is also listed further down. Select this also.
- Select OK to save your settings and close the dialog.
Define Mine Areas
- Go to Groups | Locations | MineArea.
- Select Checkout on the workspace toolbar.
- Click New MineArea. The dialog will open.
- Select the following to define LocAll:
Option Select Code LOCALL Description LocAll Abbreviation LocAll - Click OK to save the setting.
- Click New MineArea again. Select the following to define StocksAll:
Option Select Code STOCKSALL Description StocksAll Abbreviation StocksAll - Click Checkin on the header.
Associate locations with each mine area
- Go to | Locations | Location.
- Click Checkout on the workspace toolbar.
- Double-click on LocA to view its properties.
- On the General tab set:
Attribute Select MineArea LocAll
- Click OK to save the setting.
- Make the following changes to the other locations in the Dispatch Region:
Location Attribute Select LocB MineArea LocAll StocksA MineArea StocksAll StocksB MineArea StocksAll
- When you have finished editing the locations, select Checkin.
Create the Dispatch Region Active List
- Go to Active Lists | Dispatch Region | Locations. Active lists do not need to be checked in and out.
- Click the New Active List option on the header.
- In the New Active List dialog, select the following:
Option Select Name OreX Dispatch Region Category Locations MineArea MineArea Selected Elements LocAll (LOCALL)
StocksAll (STOCKSALL)
- Click OK to create the active list.
Create the dispatch region
- To define the new dispatch region, go to Groups | Configuration Items | Locations | DispatchRegion in the navigation pane.
- Check out the tokens in the group.
- Go to New DispatchRegion to create OreX.
- Select the following:
Option Select Code OreX Dispatch Region Description Locations Abbreviation MineArea Attribute MineArea OreX Dispatch Region - ClickOK to save your settings.
- Click Checkin on the header. You have created the following dispatch region.

- Click Publish on the navigator header.
Units of equipment allocated to a location within a dispatch region will be restricted to locations within that region.