Users
-
-
Select Users to view and manage users and groups.
Invite Users
As an administrator, you can grant access to Nexus by inviting users to become members of your tenancy:
-
Click Invite above the list of Users:

-
Set user invitation parameters in the Invite Users dialog.
User name
User name is a property you can edit for each user. By default, the email address used to create the user account is set as the User name. See: Manage Users
Last active
(For on-premises clients) The date and time of the most recent activity of each user is shown to the right of the user name. This makes it possible to monitor sign-in activity and see which users have not yet activated their accounts.
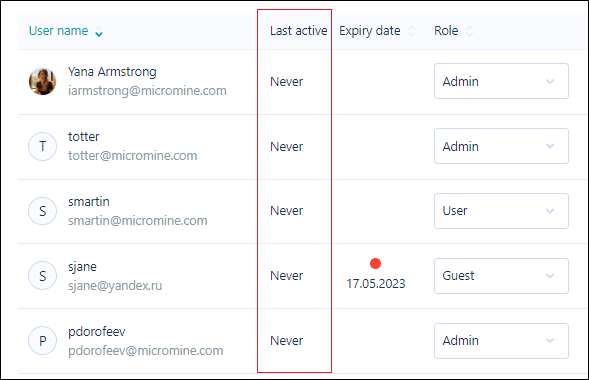
Users who have not yet activated their accounts are shown as "never".
Role
One of the following roles may be assigned to each user:
| Role | Description |
|---|---|
|
User |
Manage the tasks, files, and attributes that you own and work with the tasks and files that are assigned to you. |
|
Admin |
Setup user accounts and groups, apply permissions, define tasks, object types, attributes, and tasks. |
|
Guest |
The Guest role provides Read-Only permission to view Nexus for a limited time via invitation from an Administrator. |
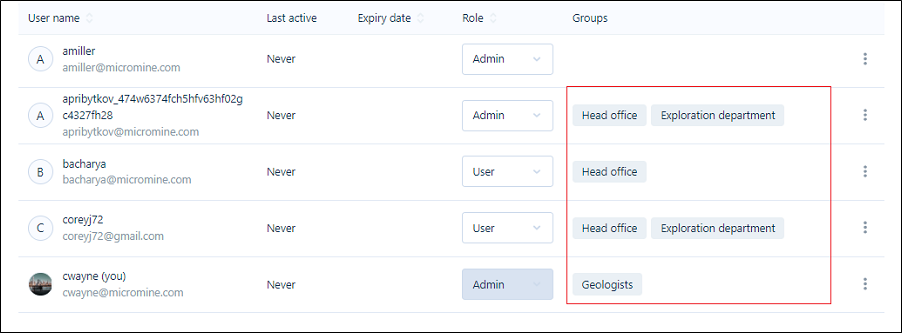
Groups
The Group membership of each user is shown to the right of their role:
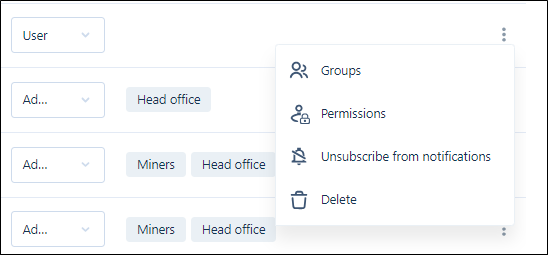
To add a user to a group:
-
Click the Groups option from the More menu at the far right of the User row:
-
A Groups selection dialog is displayed:
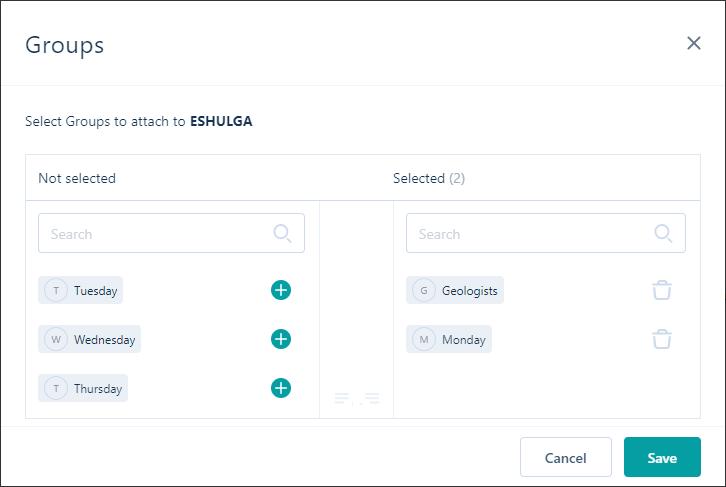
Not Selected
The user groups that have been configured on the Groups tab of the Admin Settings window, are available for selection in the Not selected pane. Click on the Add icons to move them to the Selected pane.
Selected
The groups you have attached the current user to, are listed in the Selected pane. Click on the Trash can icons to remove them. This moves them back to the Not selected pane.
Save
To save your changes and exit, click Save.
You can also add multiple users to a group using the Admin Settings | Group tab - see Manage Groups.
Permissions
To view and manage permissions for a user:
-
Click the Permissions option in the More menu at the far right of the User row.
The Permissions for the selected user will be displayed in a separate window.
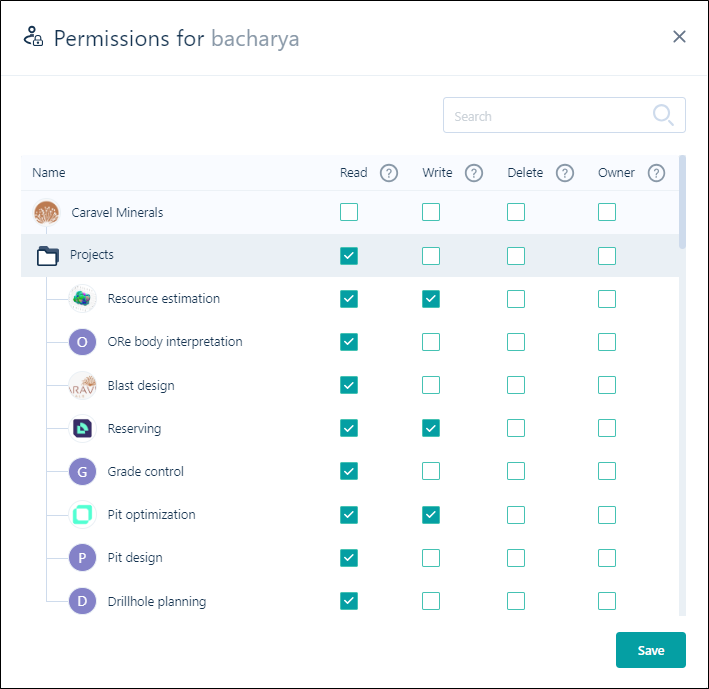
-
The permissions for the user can be modified using the Read, Write, Delete and Owner check boxes for each Workspace and Project. You can set permissions for the Workspace and/or the Projects it contains.
-
If you select a permission check box at the project level, all projects in the Workspace will be set with that permission - as shown with the Read permission in the example above.
Deselect the project level permission and use the check boxes for each Project if you want to set project permissions individually - as with the Write permission in the example.
Unless you set a permission for the Workspace, the user permission will only be for the selected Projects at the permission level set for each.
-
If any changes are made, click Save to retain the new settings .
-
Click the cross at the top right to close the window and return to Administration | Users.
For information on how permissions work within Nexus, see the Permissions section in Tips and Tricks.
Unsubscribe
To unsubscribe a user from all email notifications,
-
Click the Unsubscribe from notifications option in the More menu at the far right of the User row.
You will be asked to confirm the unsubscribe request.
Note: Deleted users are automatically unsubscribed from all notifications.
Administrators can only Unsubscribe Users, Guests and their own account. Administrators cannot Unsubscribe other Administrator accounts, and the option is not available from the More menu:

Administrators who need to Unsubscribe from notifications should go to their account details on the Users tab of Admin Settings and Unsubscribe themselves.
Delete
To delete a user:
-
Click the Delete option from the More menu at the far right of the User row.
You will be prompted to confirm the deletion.
Note: Deleting a user will automatically unsubscribe them from all notifications.