Calendars (Operational Schedule Only)
Note that calendars can be defined for Operational schedules only. When a Strategic schedule is loaded, the Calendars group will not appear on the Schedule tab.
Calendars specify lists of dates and time intervals. They can be assigned to:
-
tasks – to specify the dates and times during which work can be completed, and
-
resources – to specify the dates and times during which they are available to work on tasks.
Calendars can also be nested to define a new calendar that contains only those dates which are common to all constituent calendars. This is useful when you need to define calendars for special purposes. For example, you could define a master calendar to specify the normal working days and times for the mine. Within this, you could nest another calendar that excludes all of the public holidays for your region. The net result would be a calendar that contains the normal working days and times exclusive of public holidays.
![]()
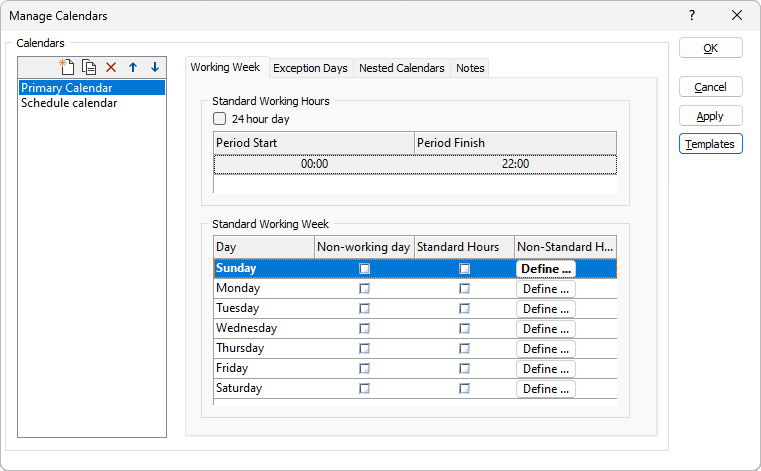
Calendars
The Calendars group on the left-hand side of the form lists the names of the calendars that have been defined for the schedule.
| To … | Do this … |
|---|---|
| Add new calendar | Click the icon button and enter the name of the new calendar. |
| Select calendar | Click the left mouse button on the name. Hereinafter, that calendar is referred to as the “current” calendar. |
| Copy calendar | Click the icon button. |
| Rename calendar | Double-click the left mouse button on the current name and enter the new name for the calendar. |
| Delete calendar | Click the icon button. |
| Move calendar | Use the Up and Down icons to reposition the selected calendar in the list. |
The form contains four (4) tabs:
| Tab | Content (for Current Calendar) |
|---|---|
| Working Week | Standard working hours in working day, and working days in standard working week. |
| Exception Days | Specific dates with ranges of times excluded from calendar. |
| Nested Calendars | Calendars nested within calendar. |
| Notes | Notes or useful descriptive comments. |
Working Week
Select the Working Week tab to specify the standard working hours in a working day and the working days in a standard working week for the current calendar.
Standard Working Hours
Specify the standard working hours for a working day.
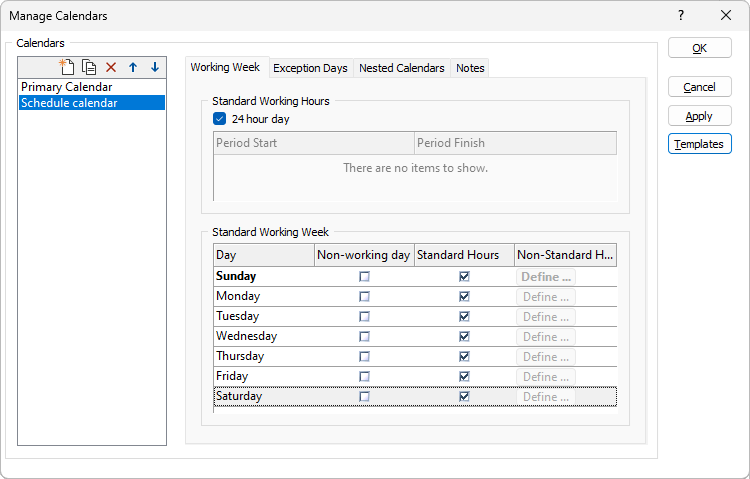
24 hour day
Select this option to specify that a standard working day spans the entire 24 hours.
When selected, the Intervals grid list is disabled.
Managing Intervals
(24 hour day not selected.) This grid list lists the start (Period Start) and end (Period Finish) times of the intervals (ranges of times) that are included in a standard working day.
Click the right mouse button on the grid list to display the context menu and select the appropriate option:
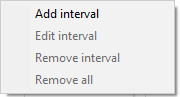
Add New Interval
Select Add interval from the context menu. The new interval will be added to the grid list as shown below:

Edit Interval
Select the interval to be changed and select Edit interval from the context menu. The form shown below will be displayed:

Using the 24-hour clock format, enter Start time and End time for the selected interval and click OK to apply the changes and update the grid list.
Delete Interval
Select the interval to be deleted and select Remove interval from the context menu. The selected interval will be removed from the grid list.
Delete All Intervals
Select Remove all from the context menu. All of the defined intervals will be removed from the grid list.
Standard Working Week
Specify the working days for a standard working week.
The grid list contains the following columns:
Day
Day of the week
The first day of the working week is displayed in bold text. Click the right mouse button on the appropriate day to change this using the context menu that is shown below:

Non-working day
Select this option to indicate that the day is a non-working day and should be excluded from the calendar.
Standard Hours
Select this option to indicate that the Standard Working Hours, as specified in the grid list above, are worked on the day.
Non-Standard Hours
(Standard Hours not selected.) Click the Define button to specify the start (Period Start) and end (Period Finish) times of the intervals (ranges of times) that are included in the working day as shown below:
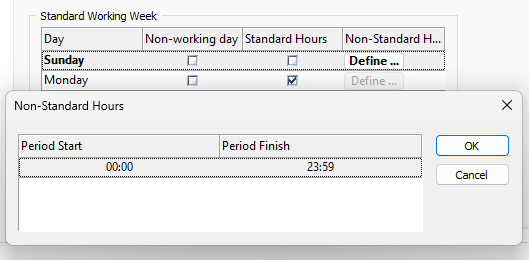
The first interval will be inserted automatically. You can edit this to suit your requirements.
Click the right mouse button on the grid list to display the context menu and select the appropriate option:
Add New Interval
Select Add interval from the context menu. The new interval will be added to the grid list as shown below:
Edit interval
Select the interval to be changed and select Edit interval from the context menu. The form shown below will be displayed:
Using the 24-hour clock format, enter Start time and End time for the selected interval and click OK to apply the changes and update the grid list.
Delete Interval
Select the interval to be deleted and select Remove Interval from the context menu. The selected interval will be removed from the grid list.
Delete All Intervals
Select Remove all from the context menu. All of the defined intervals will be removed from the grid list.
Templates
Calendar Templates allow calendars to be shared between different operational schedules without having to re-configure them each time. Select the calendar you want to save as a template and click the Templates button. For more information, see: Calendar Templates