Excel
![]()
To import Excel data via ODBC, select Import | Excel (via ODBC)
The following options are available in the Import Microsoft Excel File form:
Source
Double-click (or click on the Select icon) to select the Excel File you want to import and click OK. A variety of Microsoft Office/Excel (*.xls, *.xlsx, *.xlsm, *.xlsb) versions and formats are supported. Right-click (F4) in the File box to preview the contents of the file and sheet you have selected.
Click the Ellipsis button to select the Sheet you want to import and click OK.

Table Origin
The Table Origin marks a start position on a Header row that contains the field names for each column in a table. To import a subset of the rows and columns in a table, you can specify a start Row and a start Column.
If you leave these boxes blank, the Header row containing field names is assumed to start at row 0, column 0 of the worksheet.
Table Size
The Table Size is the number of Rows and Columns you want to import.
If you leave these boxes blank, the import will start at the first row and column in the worksheet (or the Table Origin if defined) and import all subsequent rows and columns.
The Table Size (in rows) only includes data rows.
Rows to ignore
The number of rows to ignore immediately after the Header row (where the field names are defined). Often there are several blank rows or the first row after the Header defines the units.
Import empty records
Select this check box option to import files which contain empty (yet valid) records. Empty records in a file will be ignored when this option is not selected.
Use Template File to Define Output File Structure
If this option is selected, the data in the source file will be written to a new file which is based on the template file you have specified.
The width and decimal precision of each field is based upon the values encountered when the rows are scanned. Values in the Source file are mapped sequentially to the fields in the Output file and data types are converted where necessary.
If you know that the Type, Width or Decimal Precision properties of a field are incorrect, you can change them in the Fields to Import grid.
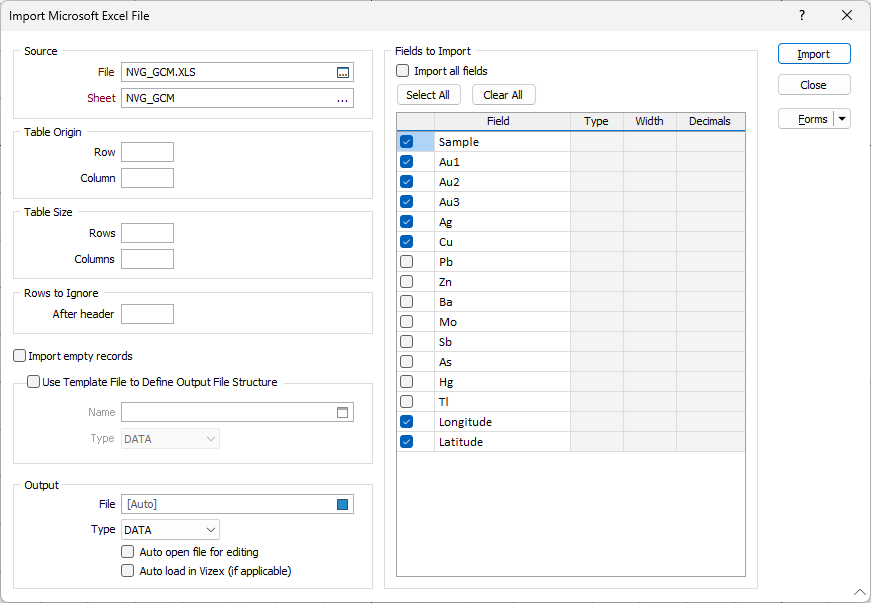
Output
File
Double-click (or click on the Select icon) to select the name of the Target file. The imported data will be saved in this file. If the file exists, you will be asked if you want to overwrite or append to it.
The process will only append to the selected fields if the data being is imported is compatible with those fields.
If you don't enter a value, the name and location of the output file will be auto-filled. If the path created for Autofill has the same extension as the input file path, _MM is appended to the output file name.
Auto open file for editing
Select this option to open the file for editing in the File Editor once it has been .
Auto load in Vizex (if applicable)
To display the data in Vizex once the file(s) have been imported, select the Auto load option.
Fields to import
Click the Import all fields check box to import all fields.
Otherwise click the Select all button or the Clear All button prior to individually selecting the fields you want to import.
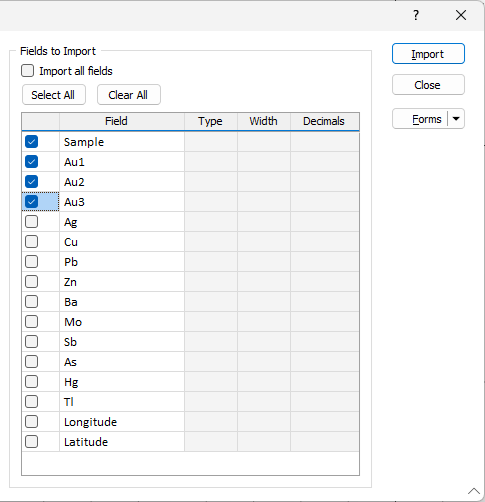
If you have set a Table Origin or a Table Size, this may affect what is shown in the Fields to Import list. If the number of columns in Table Size is greater than the number of fields in the Source file, each extra field name will be given a default name Fn where n is the sequence number of that field in the file.
Date fields are imported in ISO date format.
Forms
Click the Forms button to select and open a saved form set, or if a form set has been loaded, save the current form set
Import
Click Import to complete the process. A message will appear when the import is complete. You can right-click in the Target file box to view the imported data.