Positioning Controls
This topic describes how to construct professional looking reports by precisely aligning their elements to each other. For this, two Snapping functions are introduced: Snap to grid and Snap lines.
Snap to Grid
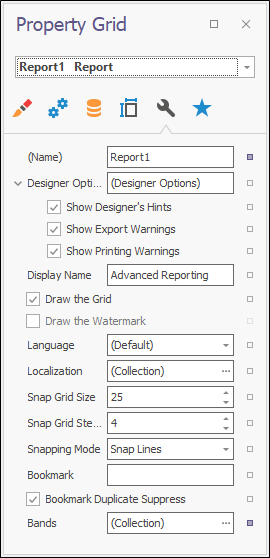
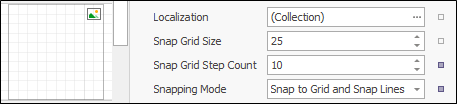
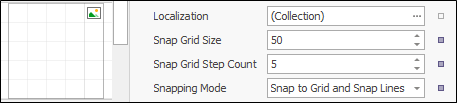
The report snap grid can be switched on or off in the Report Properties under the Miscellaneous tab with the Draw the Grid property. This is where you can also set the Snap Grid Size, Snap Grid Step Count and Snapping Mode.
This shows the report with Draw the Grid switched off.
The Paper Kind, Margins and Printer settings can be configured on the Page Settings tab.

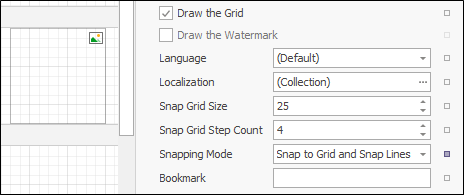
With Draw the Grid switched back on and Snapping Mode set to Snap to Grid or Snap Lines and Snap to Grid, you can precisely alignment elements. The grid size can also be changed by adjusting the Snap Grid Size.
The Picture Box is 25mm by 25mm. This grid is size 25 with 4 squares by 4 squares making a large square.
The Picture Box is still 25mm by 25mm. This grid is size 25 with 10 squares by 10 squares making a large square.
The Picture Box is still 25mm by 25mm. This grid is size 50 with 5 squares by 5 squares making a large square.
Snap Lines
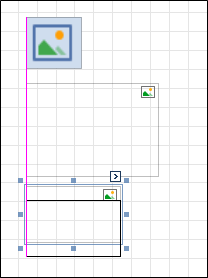
When the Snapping Mode is set to a Snap Lines option, report elements are aligned using snap lines. In the image below, the lowest element is being lowered but kept aligned to the other elements, as seen by the pink line. The pink line will disappear when the element is moved too far off the virtual line.