Step 2 - Create then Review/Edit Metadata
Step 2 in the process of setting up a logging profile is to create and then review or edit the required metadata.
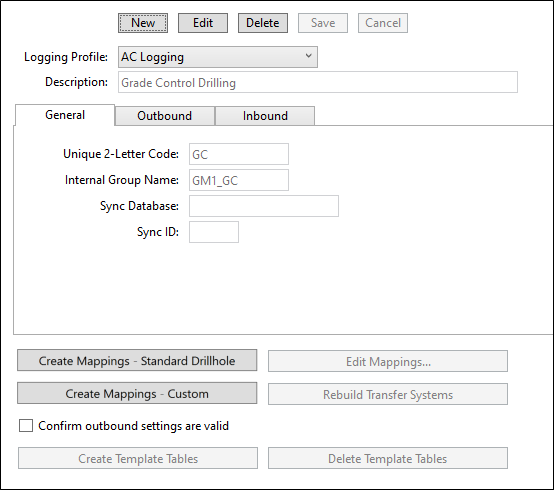
To create a new logging profile, a metadata definition with mappings and other required information must be made. To do this, from the Logging Integrator Admin App:
-
Fill in all the settings on the three tabs: General, Outbound (Data pushed out of Geobank into Geobank For Field Teams) and Inbound (completed logging in Geobank For Field Teams pulled back into the Geobank Buffer tables).
-
Note:
-
Each profile must have a unique two-letter code, such as DD, RC etc. to distinguish it from other profile in the database
-
The Sync Database and Sync ID (the number in front of the GM sync database view names for the logging profile) may or may not be known before creating the Geobank For Field Teams Profile. Add these when they are known.
-
All other general and Outbound information should be set up-front, as limited changes can be made after creating the GM profile.
-

When the settings are correct,
-
Select one of the Create Mappings actions:
-
The Standard Drillhole logging option will use the tables identified in the Logging Names list to create a definition for a profile which uses all these tables and their fields.
-
The Custom option will create a definition template to which you can add the Geobank tables you want to be in the profile.
-
-
Edit Mappings will now be enabled. Click this button to open the mappings dataview.

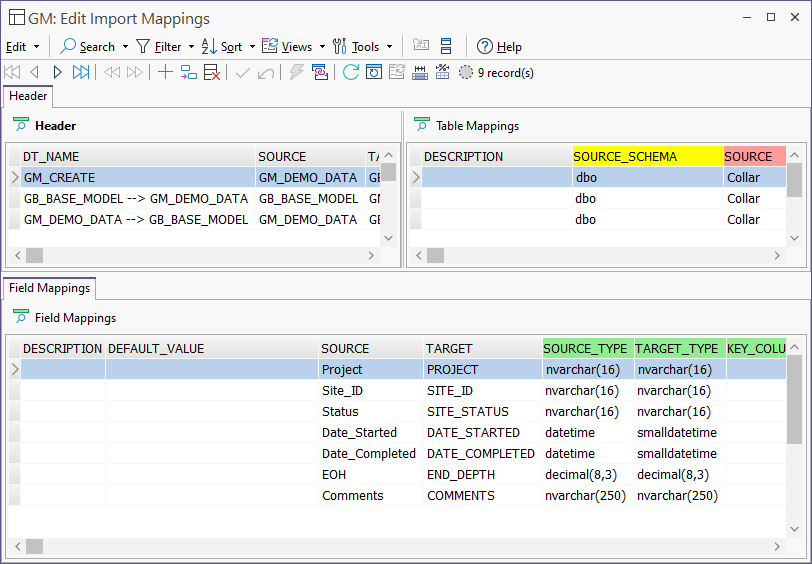
The key actions to be performed in the Edit Import Mappings Data View are:
-
Only data within the ...Logging_Create header should be edited at this stage (Outbound and Inbound are regenerated based on the Create definition)
-
Deactivate any tables you do not want in the logging profile.
For example, logging Grade control drillholes will likely need less information compared to exploration drillholes.
-
Use the same Table TARGET name for interval or other tables which you want the logger to see in a single table.
-
Within each active table, deactivate any fields which do not need to be logged (or which have a known fixed value);
-
Default values can be set for deactivated columns using the syntax: (N'string') or ((1)) for numbers. These are used when inbound data is pulled back.
-
-
The TARGET Logging names for both Tables and columns can be edited, but this must be done before the Geobank For Field Teams logging profile is created.
-
Add additional tables, or add required tables for Custom logging profiles.
Note: the KEY_COLUMNS list of the first GB table mapped to the same target is used to uniquely define each row of the combined table. This means that SORT_ORDER is important and the KEY_COLUMNS list may need adjusting to ensure it is compliant with the tables being combined.
Step 3 - Create the Geobank For Field Teams logging profile