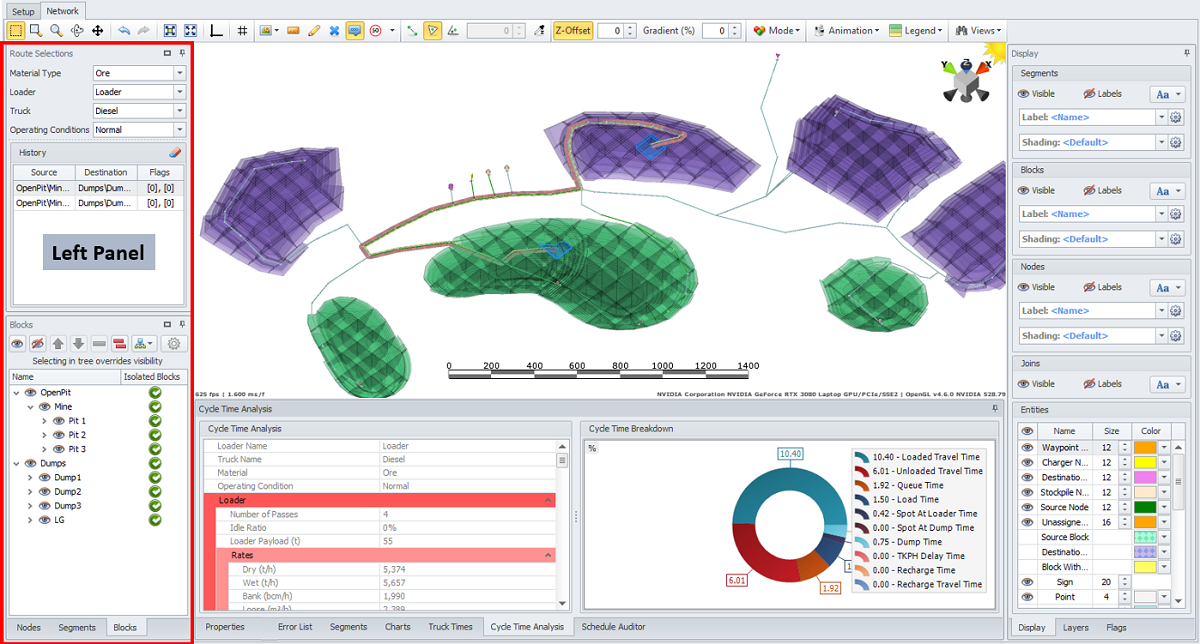
Left Panel
On the left-hand side of the Network tab there is a panel which comprises upper and lower panes: Route Selections and a History pane at the top; Nodes, Segments and Blocks panes at the bottom.
Note that you can change the position and size of the panels by left-clicking on the header and dragging to the desired position.
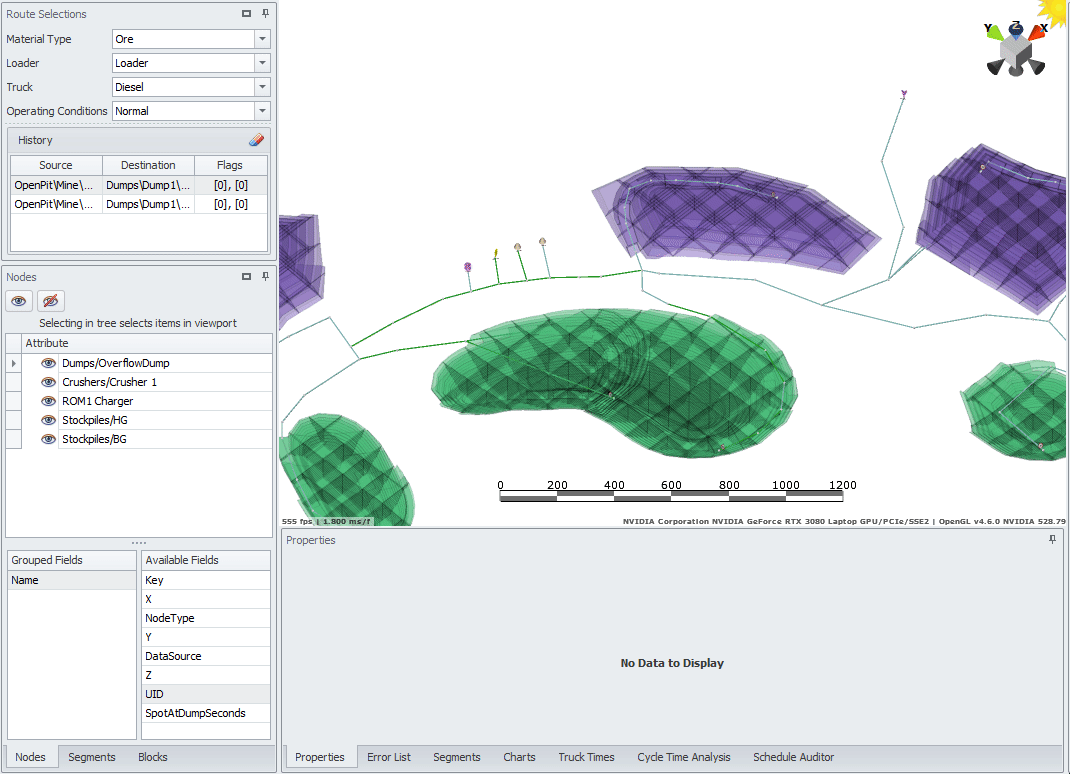
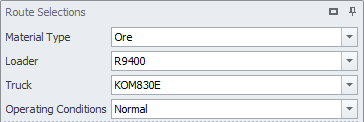 Route Selections panel
The Route Selections panel is used to select the parameters required for calculating cycle times.
-
Select a material type in the Material Type field, the available materials are defined in the Materials step.
-
Select a loader from the Loader dropdown, the available loader types are defined in the Loaders step.
-
Select a truck from the Truck dropdown, the available dump truck types are defined in the Truck Models step.
-
Specify the applicable operating conditions in the Operating Conditions field, defined in the Operating Conditions step.
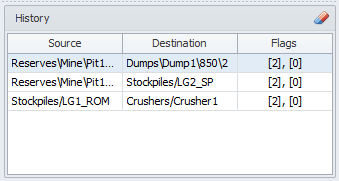 History panel
The History panel displays previous haul routes, including Source and Destination.
Flags column - [number of flags with On state], [number of flags with Off state].
-
Select the haul route from the list to activate it in the viewport.
-
Double click on the haul from the list to zoom in to it in the Viewport.
-
Click theClear History (eraser) icon to delete all previously selected routes.
Nodes tab
Open the Nodes tab (bottom left corner) to select and group the nodes displayed in the viewport by their attributes.
-
Drag fields from the Available Fields list to the Grouped Fields list. The added fields will be shown in the Attribute panel.
-
In the Attribute panel, toggle the nodes and their properties you want to display in the network viewport.
-
Click on the Attribute header to sort the nodes A-Z or Z-A.
-
Selecting in the tree structure, selects items in the Viewport.
-
To zoom in to the node, double click on it.
-
To delete nodes, select one or multiple in the Nodes panel and then right-click in the Viewport > Delete.
-
For an example of the Nodes panel and its use with custom nodes, see: Node Exercises.
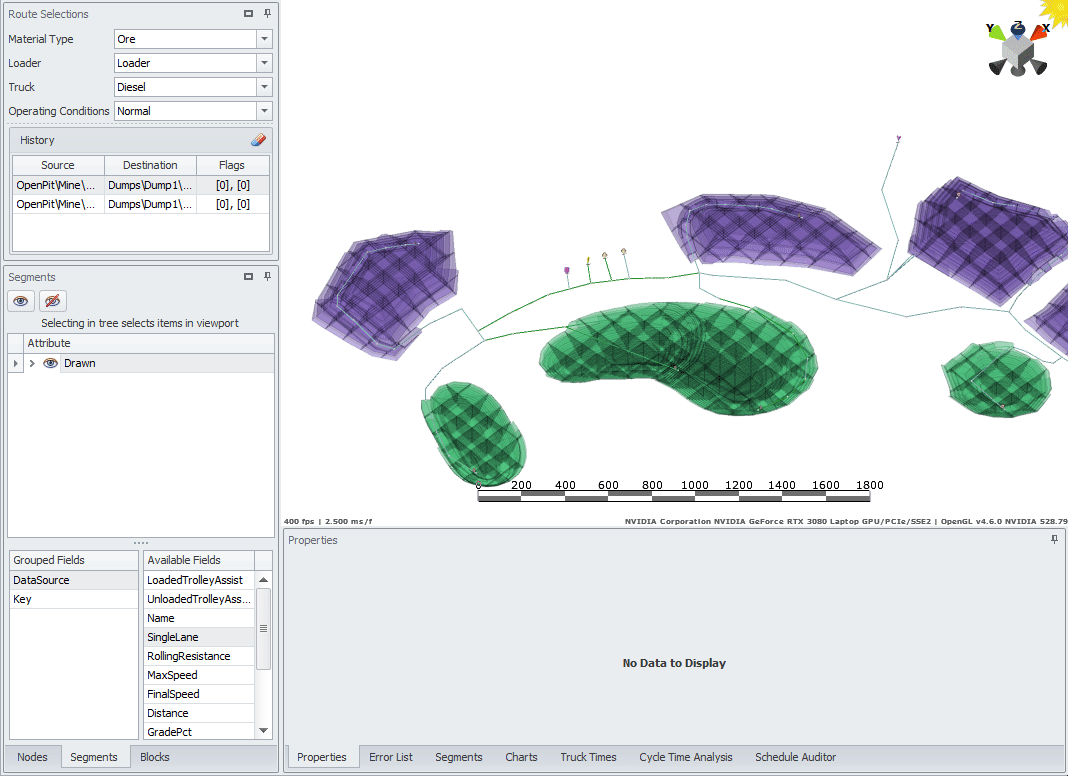
Segments tab
Open the Segments tab to select and group the segments displayed in the viewport by their attributes.
-
Drag fields from the Available Fields list to the Grouped Fields list. The added fields will be shown in the Attribute panel.
-
In the Attribute panel, toggle the segments and their properties you want to display in the network viewport.
-
Click on the Attribute header to sort the nodes A-Z or Z-A.
-
Selecting in the tree structure, selects items in the Viewport.
-
To zoom in to the segment, double click on it (may be useful for finding flagged segments).
-
To delete segments, select one or multiple in the Segments panel and then right-click in the Viewport > Delete.
-
Use the right-click dropdown to work with the selected segments.
For best practices of managing segments of the road network, see: Segments Exercises
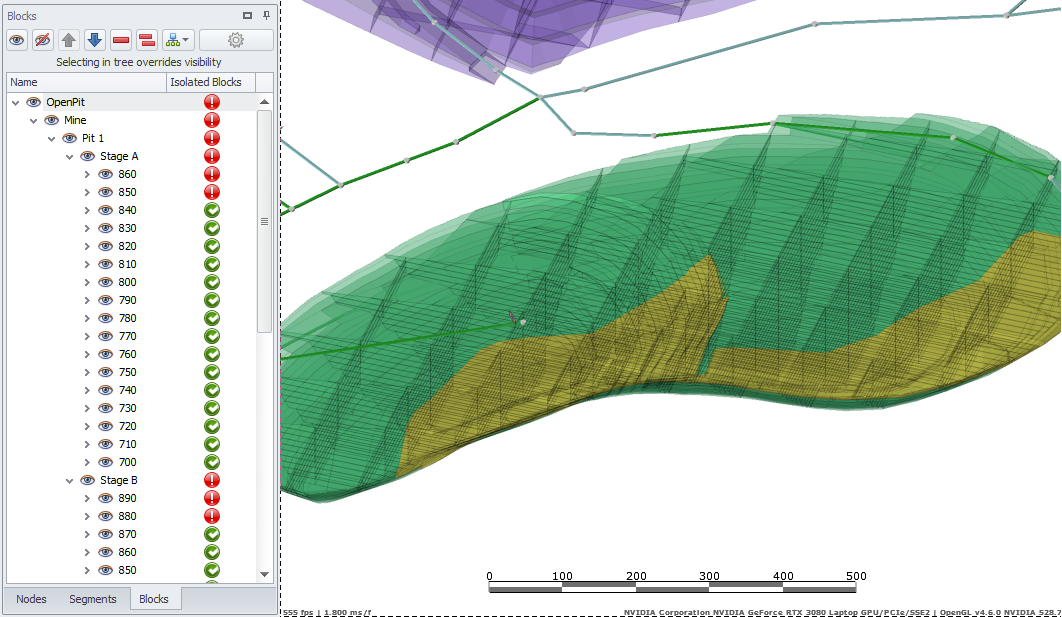
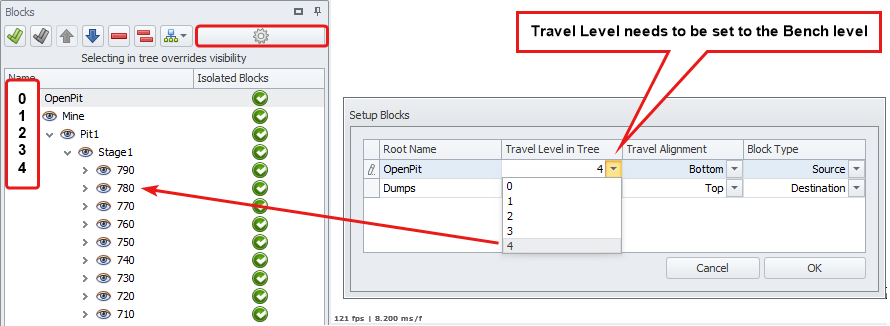
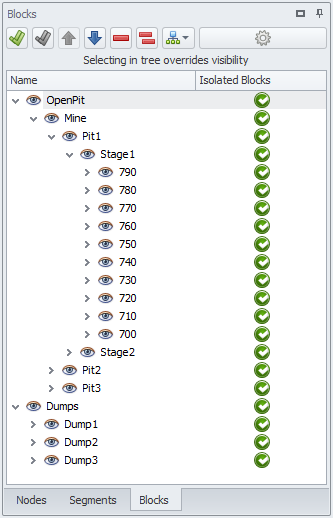 Blocks tab
Open the Blocks tab to select, show/hide, move up and down in the list, delete blocks, as well as to import and export joins and set travel level and travel alignment.
-
Expand the blocks tree to the desired level:
-
When you click on a row in the tree, that row should be temporarily visible in the viewport.
-
When you tick a row in the tree, that row should be permanently visible in the viewport.
-
When you double click a row, it should center those blocks in the viewport.
-
Use the eye ball toggles to show/hide all records or individual mine levels.


-
Change the tree order with the blue arrows.
-
Remove a row with the single red minus icon (this cannot be undone).
-
Remove all blocks with the double red minus icon (this cannot be undone).
-
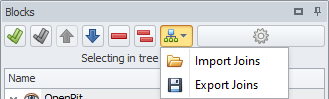
Import or export joins to the ".blockJoins" file using the import/export options. Exporting joins can be a useful function for saving and backing up the connection made. For more details, see Import and Export of Joins.
-
Click thegear icon to open the Setup Blocks menu, where you can select Travel Level in Tree (in relation to the path RL), Travel Alignment (bottom, middle or top) and Block Type (Source or Destination).
When you import blocks into Haul Infinity, you will be asked to set a Travel Level in Tree for each root record.
-
The travel level needs to be set to the Bench level.
-
Haul Infinity will create a network of centroids of the blocks to pathfind to the nearest ramp exit/entry point.
-
Blocks automatically connect to the network at the same elevation within the auto join distance of the bench.
-
Check if blocks are all connected to the haul network. A red exclamation mark in the Isolated Blocks column will show beside isolated blocks.
-
Connected blocks - green, isolated blocks - red.
-
By default, Blocks Without Joins will be displayed in yellow. You can select another color in the Display tab > Entities panel > Blocks Without Joins.
In order to proceed with the setup, all blocks must be connected to the road network.
For recommendations on how to connect isolated blocks to the network, see: Blocks Exercises and Assign Joins Based on Segment Names