Data
The application handles data import through Excel style spreadsheets as either an .xls, .xlsx or .csv file type. Each row in the spreadsheet requires a unique Leaf Name which maps the position of the data in the tree structure, as illustrated below.
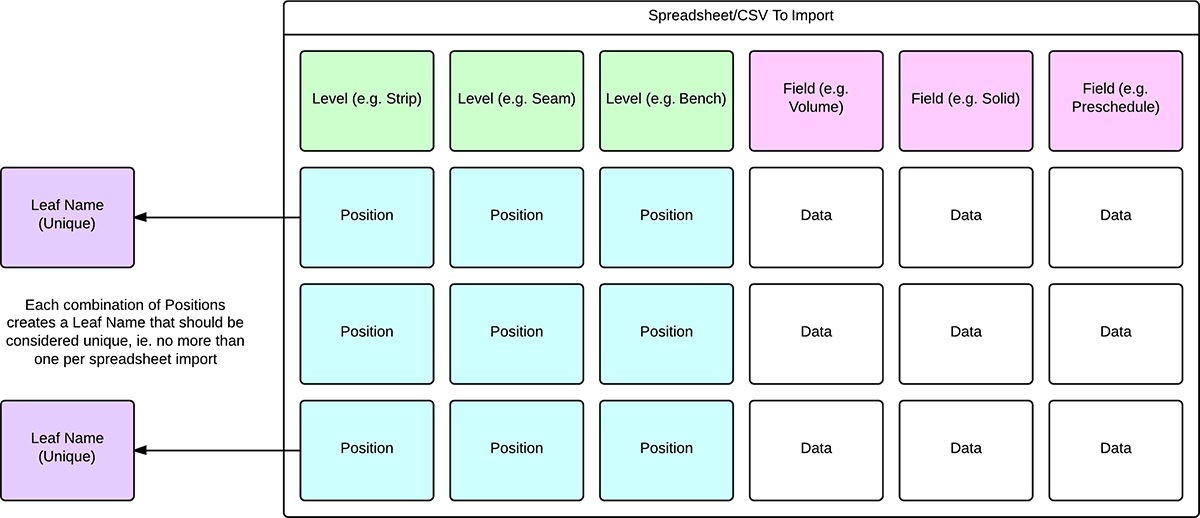
When importing data, it is also essential that every Level defined in your Table is part of the Leaf Name. For example in the image above, if you did not include the Bench Level and it was present in your Table, you would not be able to import your data. However you are not required to associate every field in your data to your Fields in the application. Any field that is not associated in the import process will not be modified.
Once you have successfully imported your data you are technically ready to start your Scheduling and Haulage, but in the next section we'll look at the Table View as well as Ranges and exporting your data back out of the application.
Data Import
Before importing data into your Table, first ensure that you have every Field and Level defined.
To import data, right-click the Table, select Import > Data and choose your data (.xls, .xlsx or .csv).
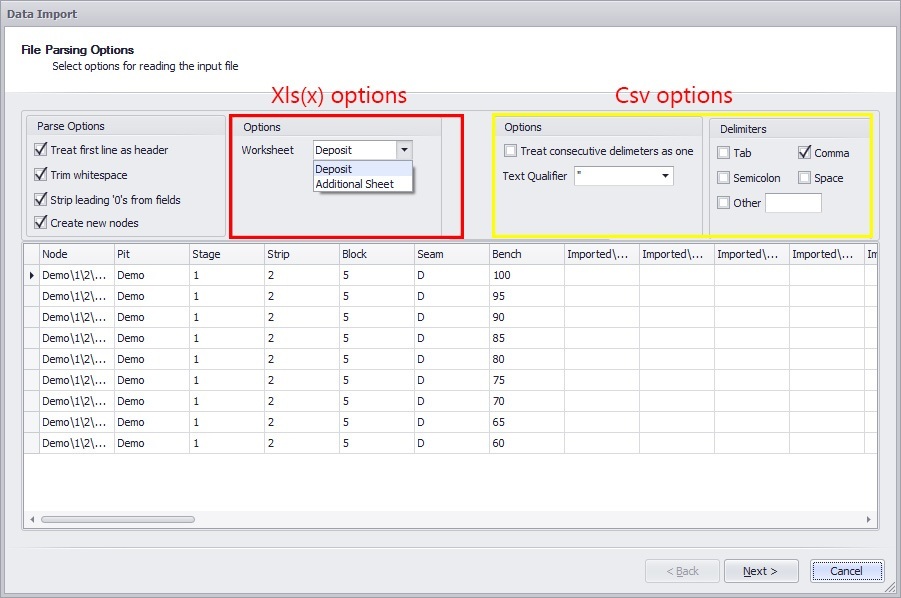
The next screen provides a preview of your data and the options determine how the application will read the data. These options depend on the file type, see the screenshot below.
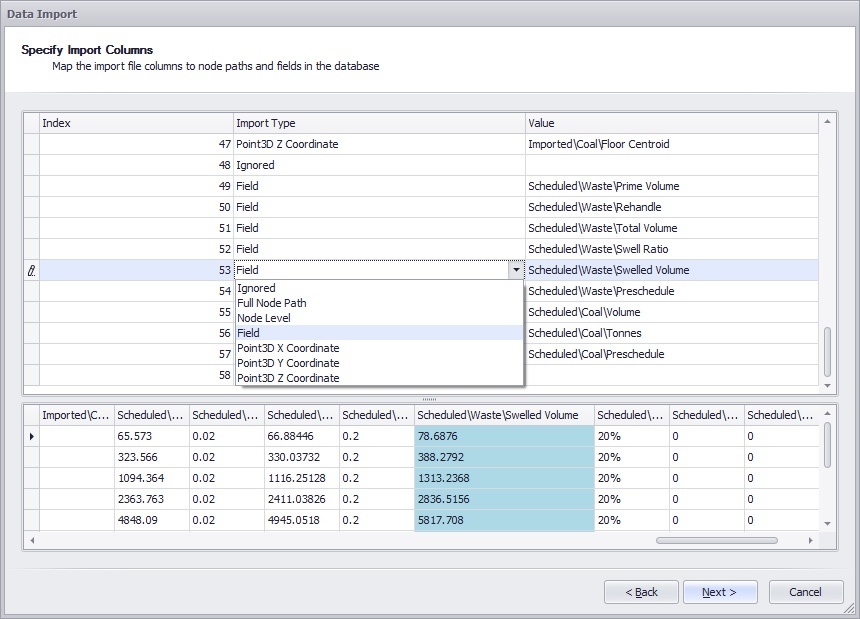
Once you can see your data as you'd expect it to appear, left-click next and check/assign the associations of your Levels and Fields. The header of your data file is read by the application and any exact matches (Folder and Name) to your Level and Field names will be associated automatically.
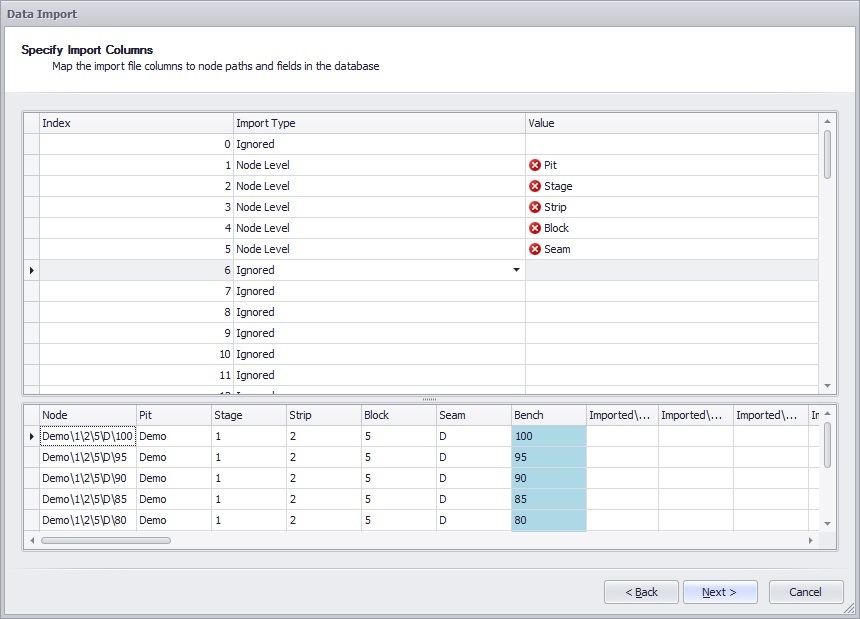
In this screen, it is important that every Level is associated/mapped. If this isn't done you will see an error similar to the screenshot below.
Whilst it is required to associated every Level, any Field that is not associated will just not be modified. This is useful when you wish only to update a certain number of fields without modifying other results.
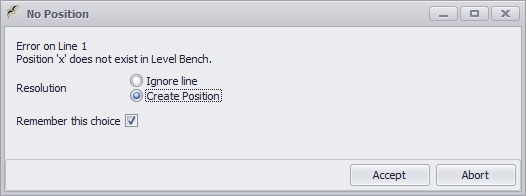
After left-clicking Next, below are some examples of prompts relating to abnormal data or errors. The first shows the prompt when a Position is not present inside a Level. Note: If you choose to create a Position it will be appended to the list (added to the end) and may no longer be in logical order.
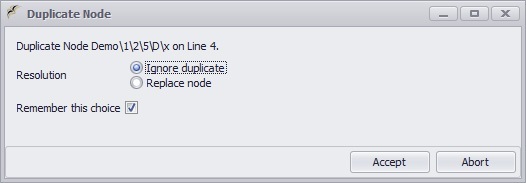
If you have allowed for a duplicate Leaf, you will receive the following error message. It is recommended that these are not ignored OR replaced but that you left-click Abort, look at your data and correct it. Duplicate Leaves almost never result in an accurate data import.
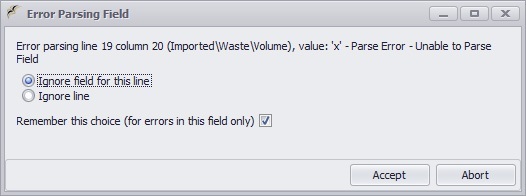
Field types are defined in order to contain a certain kind of data. If your data doesn't match what the application expects from the field, you will receive an error like the one below (in this example a String "x" is where a Double Precision Float should be).
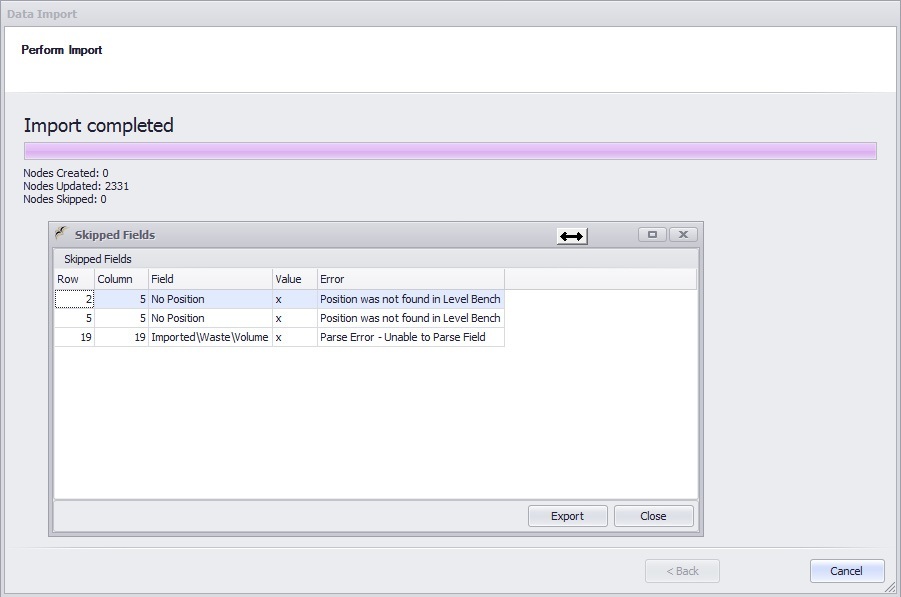
Once your data has finished importing, you are presented with the number of Nodes (Leaves) created, updated and skipped, as well as any skipped Fields.
To check your data has been successfully imported, the Table View discussed in the next section will allow you to view your tree structure and all of the data within it.