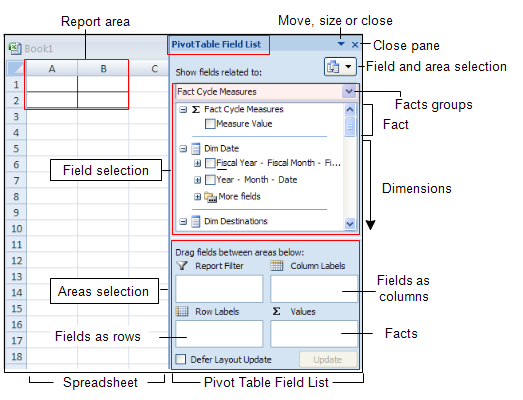
Configuring OLAP cube on site is undertaken in two stages:
Stage 1: Create the structures of the Data Warehouse and of the OLAP cube. This includes database, tables, username and passwords.
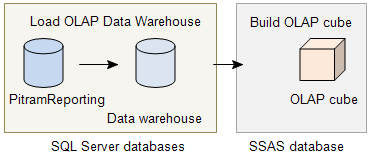
Stage 2: Load data from PitramReporting into the Data Warehouse, and finally into the OLAP cube. When this stage is complete, you are ready to generate reports using OLAP cube.

Stage 1: Create structures
Do the following:
-
Create the Data Warehouse. As a SQL Server user with sufficient privileges to create databases/users, run the script DOMEOLAPDWCreateDatabase.sql to create the Data Warehouse. This script can be found in the \extras\Deployment Scripts\OLAP directory of the release folder.
The script will:
- Create the Data Warehouse called DOMEOlapDW (Data Warehouse). You can define your own name by modifying the script.
- Create a new user with a password = warehouse, if it does not yet exist.
- Link the Data Warehouse to the user.
-
Add a System DSN (not a User DSN) for the Data Warehouse. To achieve this, use the ODBC Data Source Administrator in Windows.
For the DSN:
- Use the SQL Server driver to connect to the database server.
- Use SQL Server authentication.
- Connect using the database system user name (typically \warehouse).
- Change the default database to the Data Warehouse.
For example. the steps are:
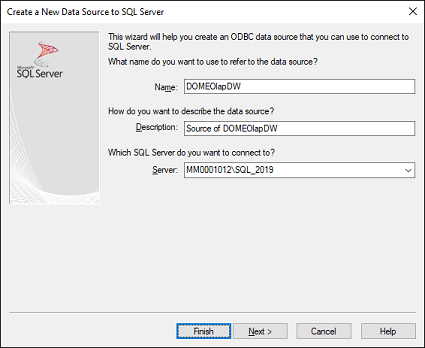
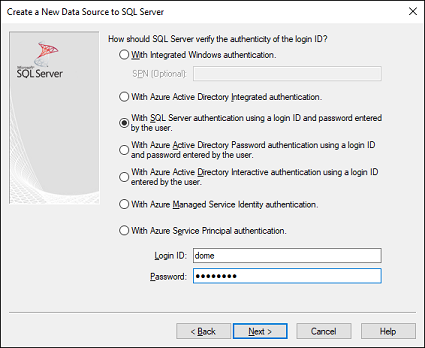
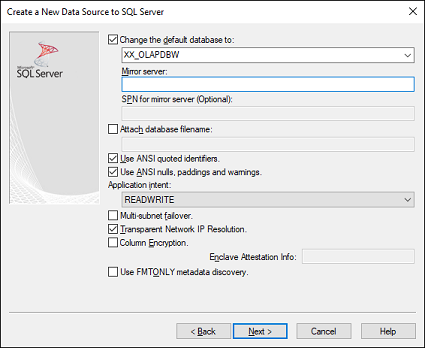
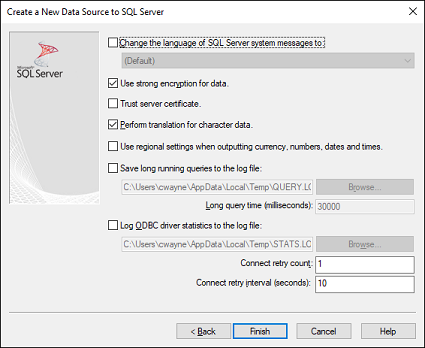
- Click Finish.
- Select Test Data Source. You should receive a message to say TESTS COMPLETED SUCCESSFULLY!
-
If the account that you use to access the OLAP cube is not an Administrator of SSAS, it is necessary to deploy the OLAP database manually. This manual deployment needs to be performed initially by an Administrator of SSAS, but this is a once-only action. After the first deployment you can maintain the OLAP cube without requiring SSAS Administrator privileges.
To achieve this:
-
Open SQL Server Management Studio and connect to the SQL Server using Server Type:
Analysis Services.
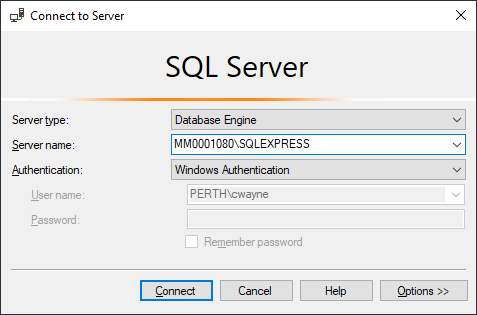
-
On the Server, locate the following script:
DomeAnalysisServices.xmla
This is located in the IIS Public directory, usually at:
C:\InetPub\wwwroot\Dome\Configuration\Services\Deployment
If necessary, copy the file to the machine running SQL Server Management Studio.
- Double-click the script so that it opens in SQL Server Management Studio.
-
Execute the script. A default database structure will be created within SSAS.
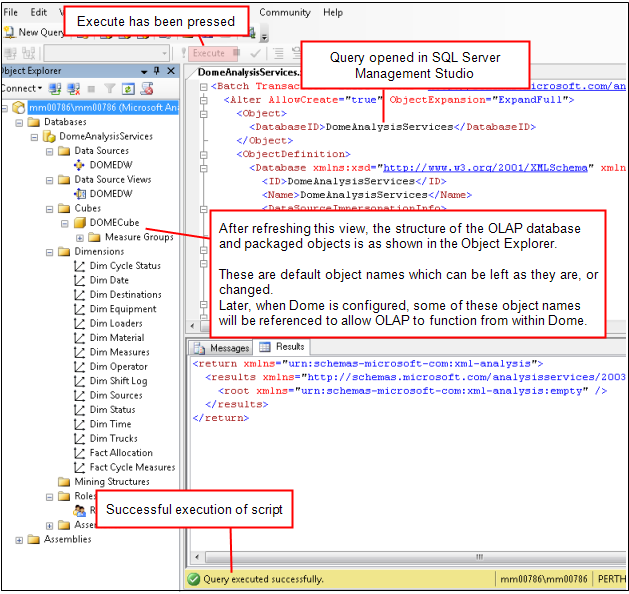
-
If desired, change the database name, cube name and role name from the defaults.
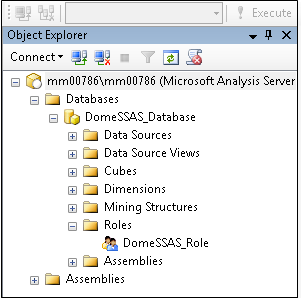
-
Assign the account that you will use to access the cube to the SSAS role within the database. Make sure the role has full control.
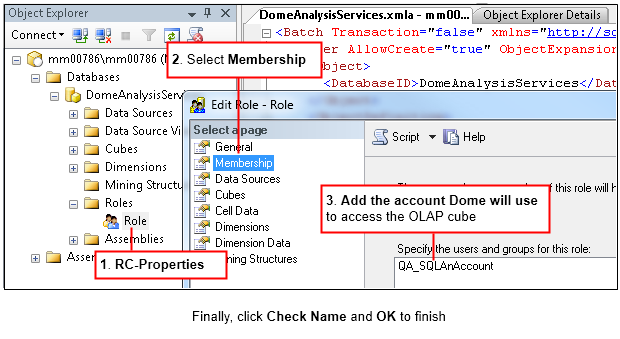
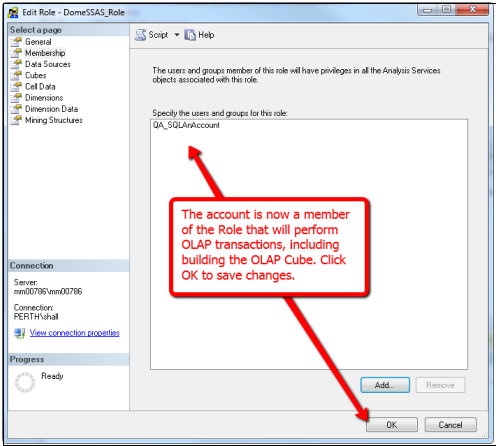
- Log out of SSAS. The above procedure will not need to be performed again if OLAP is configured correctly, Pitram Portal will now be able to build/rebuild the OLAP cube independently.
-
-
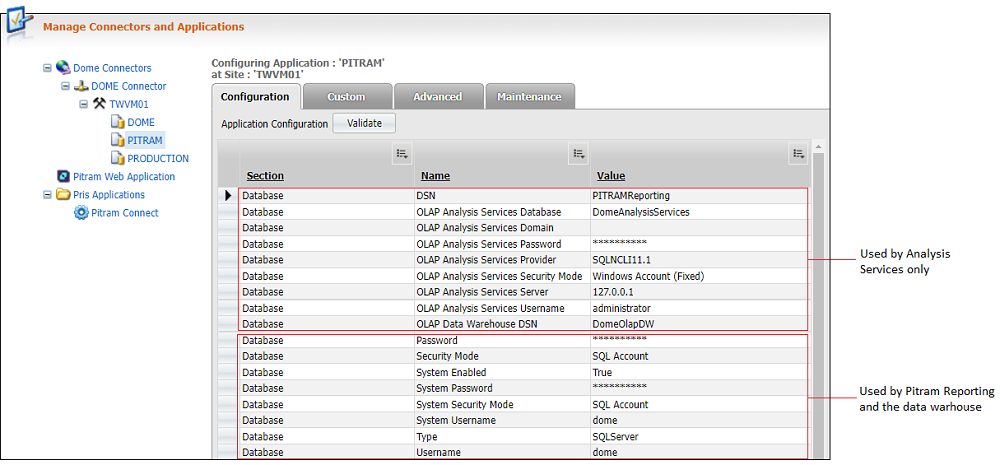
Set up the Analysis Services in the connector configuration. The Analysis Services are site related and their configuration is included as part of the Pitram application.
Configure the following parameters:
Section Name Example Description Database OLAP Data Warehouse DSN DOMEOlapDW
or user-defined
The name of the system DSN used to connect to the Data Warehouse. Database OLAP Analysis Services Provider SQLNCLI101 The SQL Server version of SQL Server Analysis Services.
For:
- SQL2005 enter SQLNCLI.1
or
- SQL2008 enter SQLNCLI10.1
Database OLAP Analysis Services Server JK00344 Defines the SQL Server where the Analysis Services are running.
It is the target server for OLAP.
Database OLAP Analysis Services Database XX_OLAPDW The name of the OLAP database that will be created and maintained by . Database OLAP Analysis Services Security Mode A windows account used to define two types of Windows authentication:
- Windows Account mode will use integrated Windows Authentication and is best when Active Directory users are configured in a single Domain that contains the and SQL Server servers.
- Windows Account (fixed) mode uses Windows Authentication to impersonate a defined user. It is therefore best when Active Directory users have not been defined, or if servers are in different domains that do not share a trust scheme.
Database OLAP Analysis Services Domain Valid domain These parameters are only used when:
Security Mode = Windows Account (fixed)
Database OLAP Analysis Services Username Valid domain Database OLAP Analysis Services Password Valid domain Module: OLAP Is Enabled Selected
a
This enables the OLAP functionality in . Select System | Manage Connectors to view the settings that have been configured.
- At this point, you should log out of and restart all Services, including IIS.
-
To install the data structure for both the Data Warehouse and OLAP cube, select System | Manage Services. You will find that Reporting | Install is highlighted.

-
Click Install. The structures for the Data Warehouse and the OLAP cube will be created.
The Installation process has now completed the following:
- Dimension and fact tables have been created in OLAP cube.
- Scripts have been created in the Data Warehouse to maintain the dimension and fact tables, and to perform tasks related to data loading, updating and other functions.
- The table, OlapActions has been created in the Production database. This table is used to store the supported actions with their current states and the times of any status changes.
- An XMLA script, which creates the OLAP cube and generates the entire cube structure, is deployed.
The following dimension and stored procedures were created in Data Warehouse.
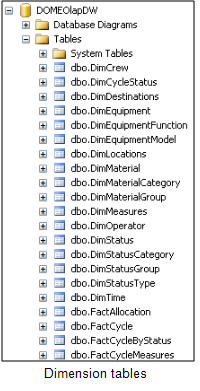
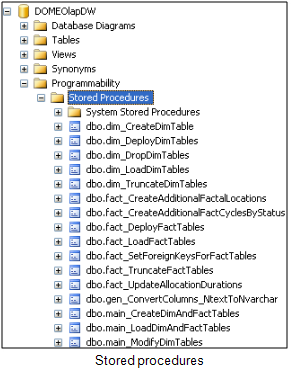
The following objects were created in the OLAP cube.
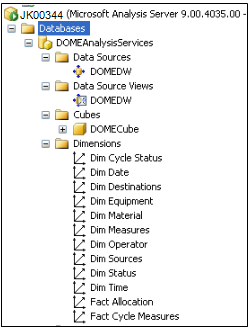
The configuration and the structures of both the Data Warehouse and the OLAP cube have been created.
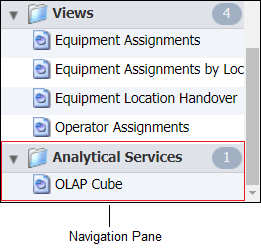
If the system detects that some of the data structures are missing, the Install button will remain active. Before proceeding, make sure that OLAP cube is listed in the navigation pane of Reporting.
Stage 2: Load the data
To load the data:
-
Go to the Reporting service
 . By default, OLAP Cube will be listed at the bottom of the Reporting navigation pane on the left.
-
Click OLAP Cube in the navigation pane. The OLAP Cube window will open in the pane on the right.

When the window is opened for the first time, the Status Change Time is not defined, and the Status = N/A.
-
Click Run to Load OLAP Data Warehouse. The Run button will change to Running, and the Status Change Time will be updated as the load progresses.
The second Run button will be inactive until the load has been completed.
When the load is complete, the Status will change to Success. The Status Change Time will reflect the time the load was competed.
Load and Build can take between 10 to 30 minutes to complete - depending on the amount of data to be transferred.
- Click Run to Build OLAP Cube. When both the Load and Build actions are complete the Status of both will display Success. The Excel Open icon
 is displayed and active.
 - Click Open to launch Excel and connect Excel to the OLAP cube. You are now ready to start designing reports
