Validating Reference Data
After configuring the attributes of a reference item, you may need to specify validation rules.
Create a Template
- To create a template, ensure that the item’s reference group table is displayed in the main window, then select Template from the item menu:
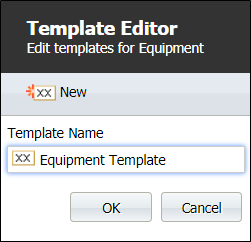
- In the Template Editor, click New and enter a name for the new template, then click OK.

The attributes of the reference item are listed. When you select an attribute, a Rules Preview pane is shown in the right-hand pane.
The Rules Preview pane
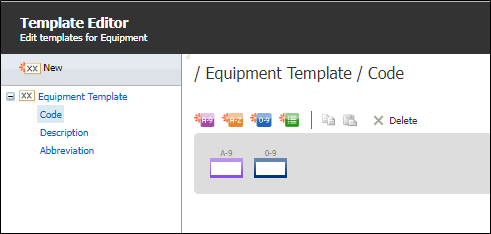
Toolbar options allow you to validate the format and the content of your attributes. Copy and paste options make it easy to apply the same rules to multiple attributes:
| Tool | Description |
|---|---|
|
|
Create an Alphanumeric Text rule. |
|
|
Create an Alpha Text rule. |
|
|
Create a Numeric rule. |
|
|
Create an Attribute rule. |
|
|
Copy the validation rule you have created for an attribute to the clipboard. |
|
|
Paste a validation rule that was copied to the clipboard and apply to the current attribute. |
|
|
Delete the selected rule. You will be prompted to confirm the deletion. Once a rule is deleted it is removed from the Preview pane. |
The rules that you create for each attribute are ordered in the Rules Preview pane. An example is described below.
- An Attribute Rule is created for the Code attribute.
- An Alphanumeric Text Rule is created for the Code attribute.
- A Numeric Rule is created for the Code attribute.
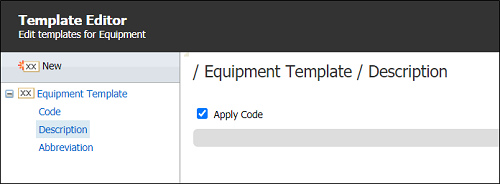
- Once validation and formatting has been applied to the Code attribute, an option to apply the same settings to the Description and Abbreviation attributes is provided as a useful shortcut.
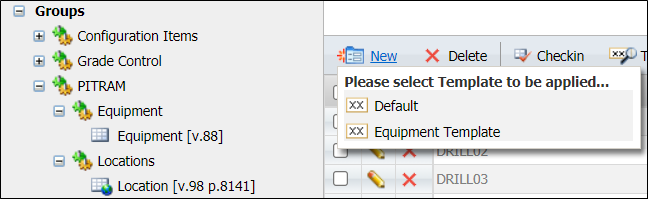
- Once validation and formatting rules have been setup as a template, you can apply the template whenever you create a new reference data item:
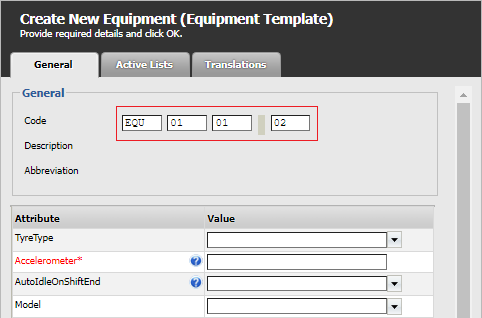
- The reference data you enter is valid and consistent as a result:
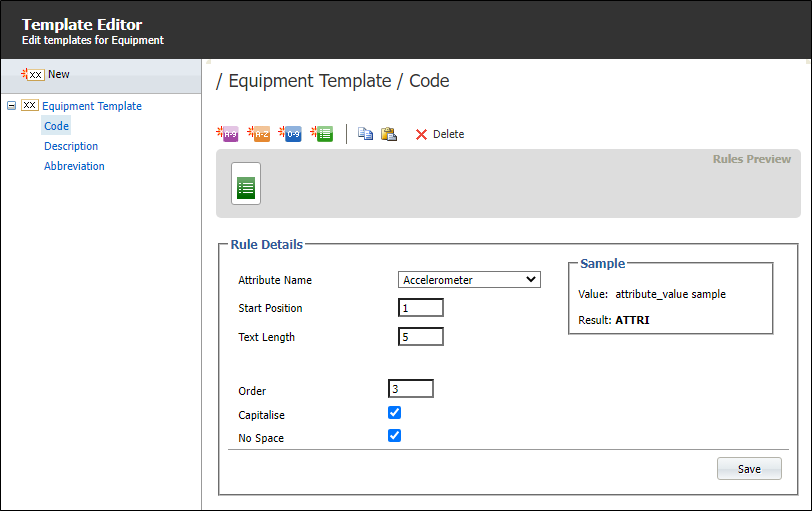
An Attribute Name is selected from a list of attributes for the reference data item. In this example, the first two characters of the Code attribute must be the first two characters of a selected attribute value, as specified by Start Position, Text Length, and in the Order in which the rule is applied.
The option to enforce capitalisation of the attribute values and disallow spaces is provided.
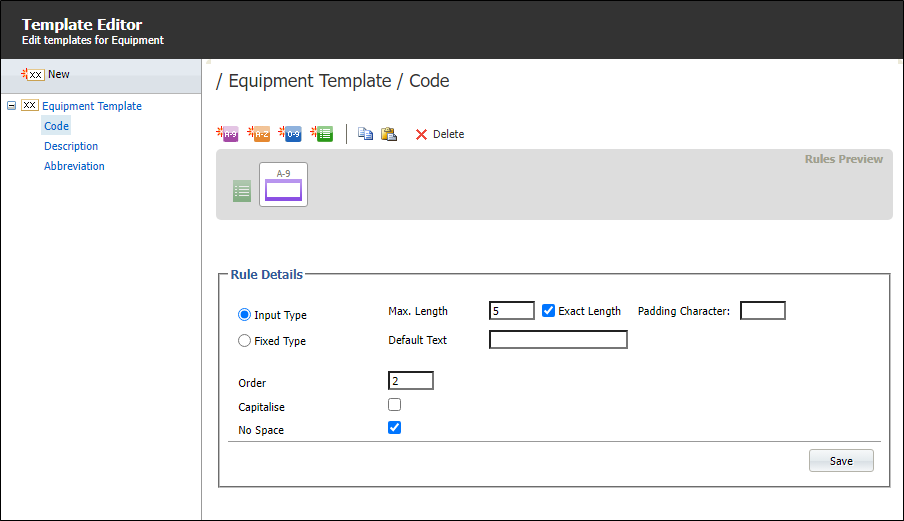
In this example an Input Type alphanumeric string is defined. This means any Code attribute must contain an alphanumeric string with a Max Length of 3 characters, and in the Order in which the rule is applied. The Exact Length check box is selected to ensure that the input string is always exactly 3 characters in length. To allow strings of a varying length, deselect this check box.
As an alternative, you can select Fixed Type and enter Default Text. Any Code attribute must contain the alphanumeric string you have entered, in the Order in which the rule is applied.
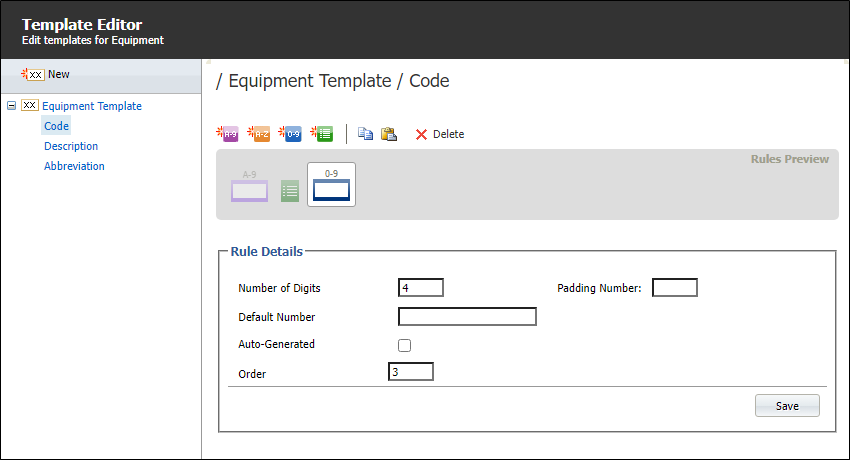
A number’s length is defined by its Number of digits and, optionally, a Default Number may be specified. This means any Code attribute must contain a number of the specified length, possibly with a default value that can be changed by the user, and in the Order in which the rule is applied.
As an alternative, you can select an Auto-Generated check box to let the application generate a number of the specified length automatically. This will override the Default Number (if specified).
The Order in which a rule is applied can be changed if required. When you click Save the order of the Rule icons in the Preview pane will change accordingly.
If the Apply Code option is not selected, you can setup rules for those attributes individually.
During the creation or editing process, the validation and formatting rules you have established are applied:
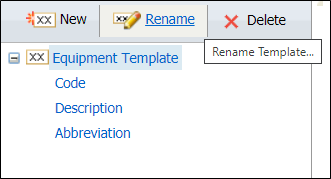
Rename a Template
-
Click on the current Template name.
-
Click the Rename button to edit the Template name.
-
Click OK to save the name change.
Delete a Template
- Click on the Template name.
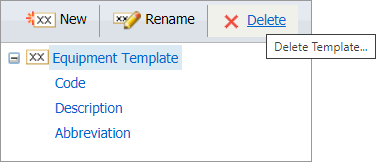
- Click the Delete button to delete the template.
- When prompted, click Yes to confirm the deletion.