The Reconciliation window
To open the Reconciliation window, select the Reconciliation option on the Materials Management menu.

Before you can work with Reconciliation you will need to create or open a Reconciliation Period.
Using the available options in the Reconciliation screen, you can create, list, open, save, publish or delete reconciliations in Pitram.
When the options are not displayed in the startup screen, you can access these functions using the Task Manager menu in the bottom left corner of the program window.

- New Select this option to create a new reconciliation period. Each period is given a Name, Start date and End date.
- Reconciliations Opens a list of all running and completed reconciliations on the system.
- Open Select an existing reconciliation period.
- Save When a reconciliation period is current, select this option to save your changes to the database. This ensures that the reconciled quantities and grades are available for publication.
- Publish Select this option to publish the reconciled quantities and grades and make them available to the Reporting service. When a reconciliation period is published, the claimed quantity and grades are not overwritten; only the actuals are written to the database.
- Delete Select this option to delete the current reconciliation period.
Note: When editing quantities and grades in a reconciliation, those edited values are saved within the reconciliation tables. These can then be shared by other reconciliations that might be created for the same period. If you select the Delete Reconciliation Changes option when deleting a reconciliation, the edited quantities are removed from the reconciliation tables, with no effect on Grades or Movements.

Once a reconciliation period is created or opened, the Reconciliation window is displayed.
By default, the envelope with the highest order number is active. Typically, this will be Mill Cone or an equivalent envelope.

The Reconciliation header comprises the following panes:
Envelopes
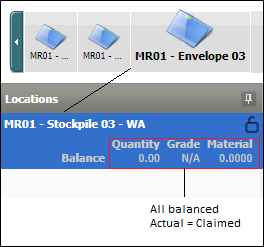
Each envelope is shown in its own tile and is shown in a horizontal chain or sequence of tiles as defined by their Order attributes, with the envelope with the lowest order number at the far left of the chain, and the envelope with the highest order number at the far right of the chain.
Left and Right arrows can be used to navigate through the sequence.
The active (selected) envelope is shown with a larger icon:
Opening value + inputs - outputs - closing quantity= 0 where closing is the surveyed value for the envelope and where the opening value is the previous end-of-period envelope survey.
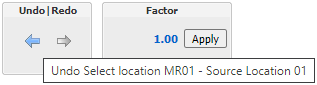
Undo | Redo
The Undo | Redo options are used to undo or redo the previous action. If you hover on an arrow, the action to be undone or redone is displayed in a tooltip.
The Undo option will revert any changes made to the values currently displayed in the main reconciliation window for the Reconciliation. Any change made to the filter or selection will clear the Undo history.
Note: For best practice purposes, the Ctrl + Z Undo short cut is NOT enabled. Only the Undo button can be used to revert changes to the current reconciliation.
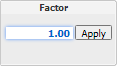
Factor
Using the Factor field provided, you can set and apply a factor to the transactions tonnes or grades for a reconciliation, according to the element selected in the 'Reconciling Filter'. For example, applying a factor of 0.97 would reduce all values for that transaction in the reconciliation period by 0.97 or 97% of their original amount.
The Factor field is masked to 2 decimal places. You can enter a factor with more, but not less, than 2 decimal places. Factor validation is applied up to 10 digits, less than 1000. Internal transactions for the envelope are ignored. Blocked locations cannot have a Factor applied.
Reconciling Element
The Measure type and the Element associated with the movements Into or out of the current envelope are shown in the Reconciling Element pane.
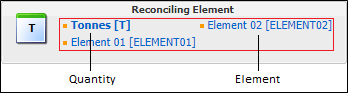
Select either the Measure unit or the Element name to edit the units of measure or the elements associated with the current envelope.
Filters
Select a Filter option to filter the input totals by Total, Day or Transaction. This changes the display of the Movements In and Movements Out.

- Total movements into and out of the envelope.
-
Daily movements into and out of the envelope.
-
Transactions for each location in the active envelope.
The images below show the Total filter.


Before any changes are made to the quantity or grade, Actual is equal to Claimed. Values are balanced when Opening + Input - Output - Closing = 0
Location Summary
Total Envelope Movements
This part of the Reconciliation window shows the total inputs and total outputs (i.e. quantity, grade and material) for the whole envelope for the reconciliation period. Actual values may be edited, claimed values are saved events in the Pitram database and cannot be edited here.
The Material value is the contained metal value calculated using the quantity, grade and Unit of Measure for the element.
The contained metal value is calculated using the quantity, grade and the unit of measure (ppm or %) of the element to give a realistic value of the material mined.
Total Selected Location Movements
Below the total envelope movements is a summary of the inputs, current stock and outputs for the selected location for the reconciliation period. The display changes according to the filter that has been selected. The change in stock is calculated as the material in, minus the material out for the active location.
Material movements between the locations within an envelope are not included in totals

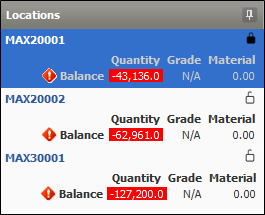
Values displayed in the workspace that do not balance are displayed with a red background. The aim of reconciliation is to balance these values. Often, if the magnitude of a negative balance value is within reasonable bounds it may be acceptable. For example, -200 t in a 60,000 t period report may be of no importance.
Any changes made to the actual Total Output quantity or grade are distributed to the individual locations in the envelope, based upon the proportion of their output in the total output for the envelope.

Only actual values can be edited: To edit the grade you must change either the actual Grade or the actual Material.
Start a New Reconciliation
To begin a new reconciliation in the Reconciliation window,
-
Select the New option from the Task Manager menu.
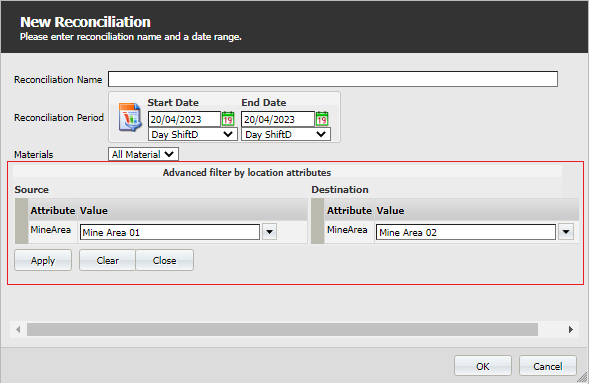
The New Reconciliation dialog opens.

-
Enter a name for the reconciliation in the Reconciliation Name field.
-
Use the calendar controls provided to set the Start Date and End Date of the reconciliation.
-
Select the relevant shifts for the Start and End Date using the drop downs.
-
If required, use the Materials drop down to select the active list of materials for which the reconciliation is to be applied.
The created reconciliation will include only movements with the material from the active list.
-
If you click the Advanced Filter button, the Advanced filter by location attributes details are displayed.
-
If required, you can use the Source and Destination Attribute Value drop downs to select the locations by which to filter the reconciliation and click Apply.
-
Click OK to save the reconciliation.
While running, the new reconciliation appears in the In Progress grid.

When complete, the reconciliation appears in the Completed grid and can be viewed from the Reconciliation window and edited as described.