Multiple Loaders and Trucks Configuration
To edit the definition of a Multiple Loaders and Trucks Panel:
-
Click the Edit icon at the top right of the panel.
-
Rename the panel if required and click Next.
-
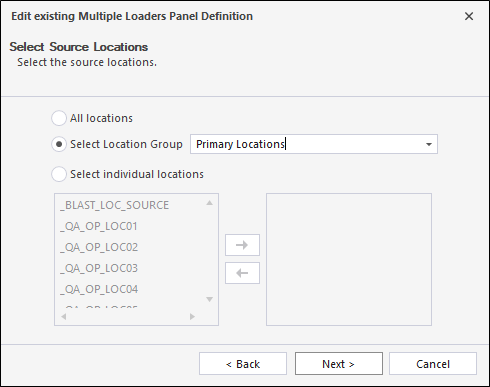
Use the Select Source Locations page to configure the source locations to be shown in the panel.
-
Click Next.
-
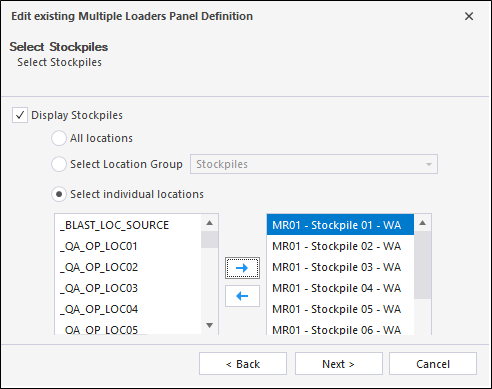
Use the Select Stockpiles Configuration page to either:
- Select the Stockpile Location Group which determines the Stockpiles that will be shown on the panel, or
-
Select individual locations, or
- Hide stockpiles by deselecting the Display Stockpiles check box.
If the Display Stockpiles check box is not selected, the Stockpiles Area will not be shown on the Multiple Loaders and Trucks panel, and all available space will be shared between the Cycle Status Area and the Loaders Area.
-
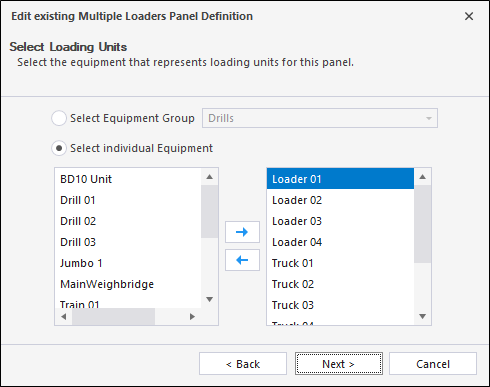
Click Next and use the Select Loading Units page to configure the Loading Units for the panel.
-
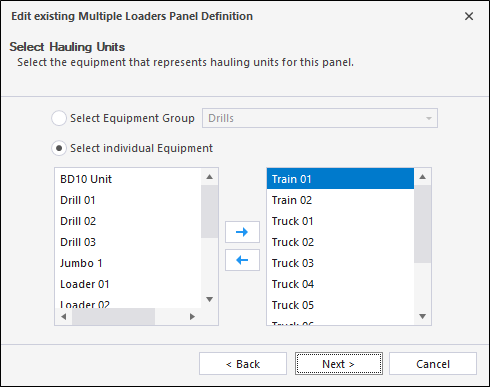
Click Next and use the Select Hauling Units page to configure the Hauling Units for the panel.
-
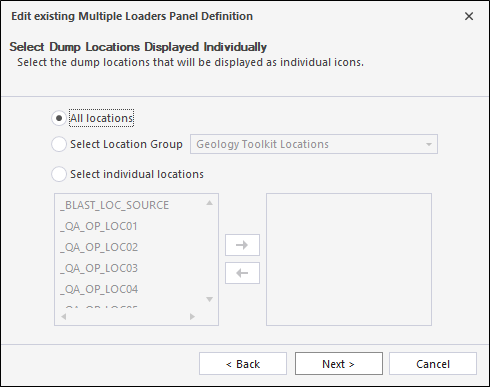
Click Next and use the Select Dump Locations page to configure the Dump Locations for the panel.
-
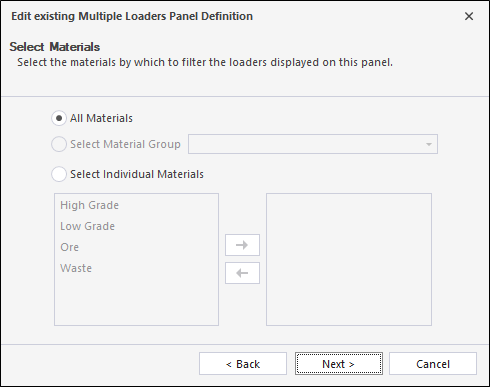
Click Next and use the Select Materials page to configure the Materials for the panel.
-
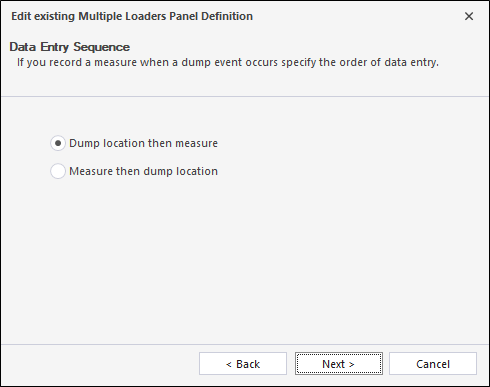
Click Next and use the Data Entry Sequence page to configure the sequence in which data entry occurs when recording a measure on a dump event.
-
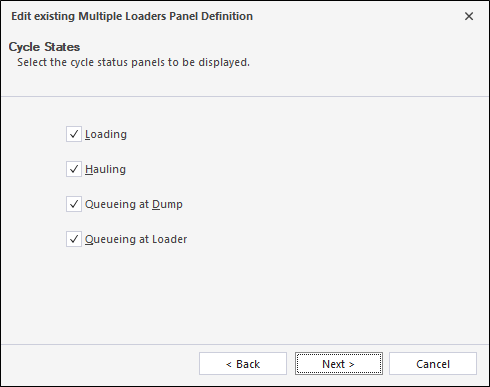
Click Next and use the Cycle States page to select the cycle status panels to be displayed.
-
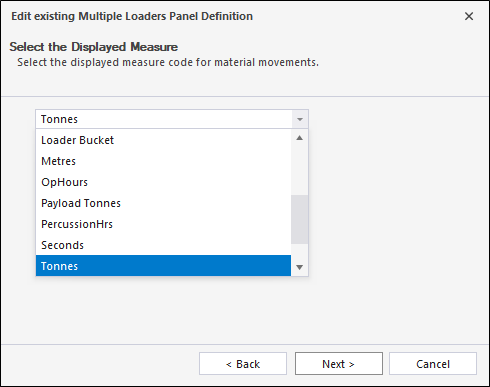
Click Next and use the Displayed Measures page to select the measure code displayed for material movements.
-
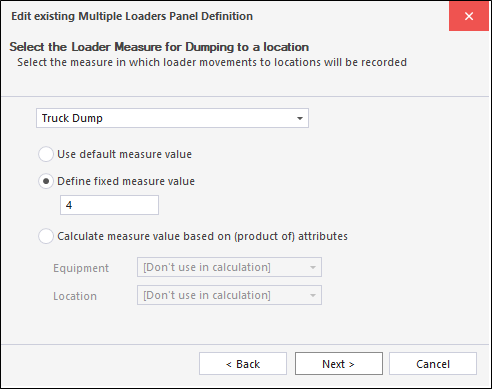
Click Next and use the Loader Measure... page to configure the Primary Measure that loaders will dump to a truck:
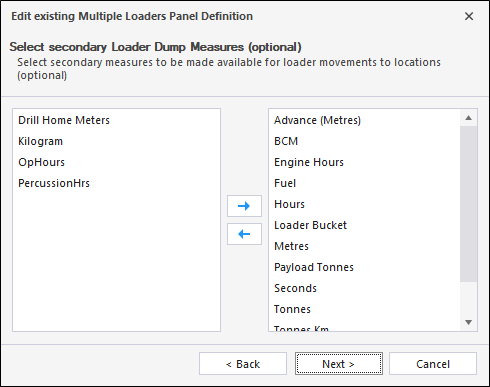
- Click Next and use the Loader Dump Measure... page to select the secondary measure/s to be made available for loader movements.
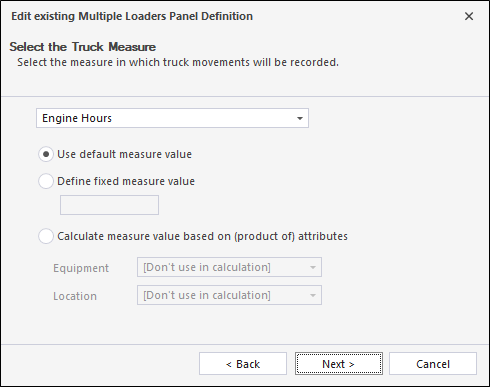
- Click Next and use the Truck Measure page to configure the measure in which truck movements will be recorded.
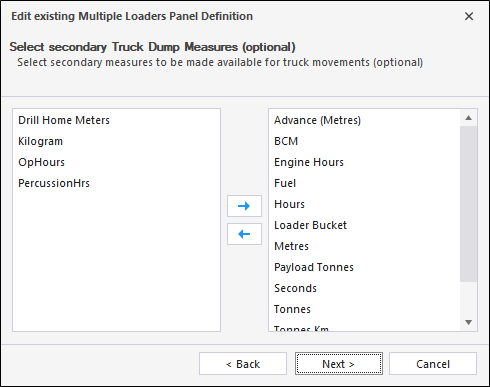
- Click Next and use the Secondary Truck Dump Measures page to optionally configure the secondary measures to be made available for truck movements.
- Click Next and use the Loader Measure... page to configure the measure used to record loader dumps to trucks.
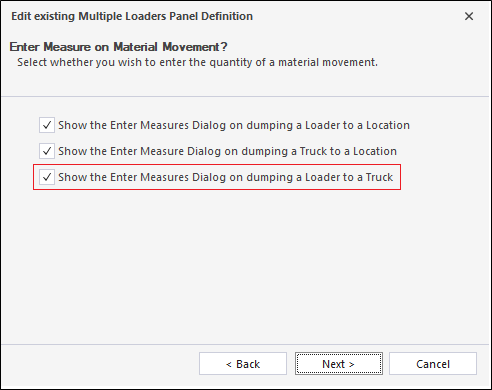
- Click Next and use the Enter Measure on Material Movement page to set options which determine whether or not to display the Enter Measure Dialog when dumping a loader to a truck:
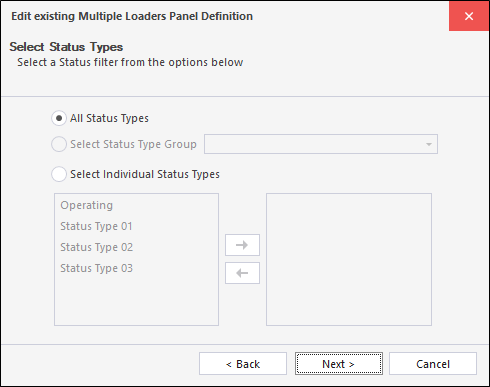
- Click Next and use the Select Status Types page to configure the status types for the panel.
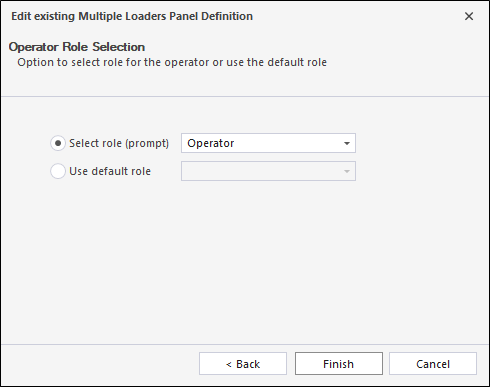
- Click Next and use the Operator Role Selection page to set the role for the operator for loaders and trucks.
- Click Finish to apply the configuration.

Note that the configuration wizard does not include an option to "Select the travel destination for Truck Trips". This is only applicable for the Single Loader and Trucks panel.
When configuration is complete, the Multiple Loaders and Trucks panel will refresh itself.
Scenarios
Workflows are implemented through drag and drop operations (into and within the Multiple Loaders and Trucks (MLP) panel) and these are shown in the following table:
| # | Dragged Element | Drop Target | Events generated on drop completion | Can drop be completed on another MLP? | Post Effects |
|---|---|---|---|---|---|
| 1 | Source location | Truck | Allocated equipment to the location | Yes | |
| 2 | Source location | Loader | Yes | ||
| 3 | Stockpile | Truck | Yes | ||
| 4 | Stockpile | Loader | Yes | ||
| 5 | Loader | Stockpile |
|
Yes | Loader changes its state to Travelling Empty state. |
| 6 | Loader | Dump location | |||
| 7 | Truck | Dump location | Truck changes its state to Travelling Empty state and its position in Cycle Area according to the new state. | ||
| 8 | Loader | Truck |
|
Yes |
Truck changes its state to Loading state and its position in Cycle Area according to the new state. Loader changes its state to Travelling Empty state. |
| 9 | Truck | Some status zone in Cycle Status Area | Record cycle status against equipment | Yes, if the Truck is defined in recipient MLP configuration | Truck changes its state and its position in Cycle Area according to the new state. |
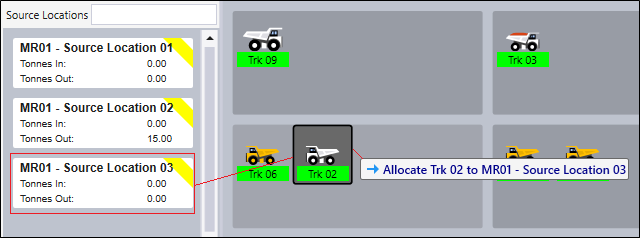
Drag and drop operations are annotated to show the object being dragged and the target of the drag and drop operation. In the following example, a location is dragged onto a truck - the annotation reveals that the truck is allocated to that location:
Saving and restoring panels
The following Multiple Loaders and Trucks panel properties can be saved and restored on startup or closure of Data Acquisition:
- Zoom values and Filter values for each area of locations (source locations, stockpiles, dump locations);
- Zoom value for the Loaders area;
- The Height and Width of each area on the panel;
- The Height and Width of the Multiple Loaders and Trucks panel;
- The position on the canvas of the Multiple Loaders and Trucks panel.
Canvas layouts are stored in:
%Pitram\Configuration\Machine% folder in CanvasDefinitions_DataAcquisition.xml