Project Browser
When you open a Nexus project, the contents of that project are shown in a Browser window.

To select multiple files or a folder, use the selection check boxes to the left of each file name:
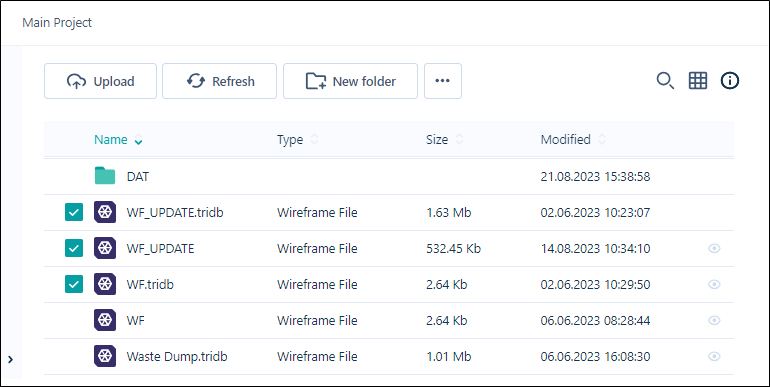
Use the options on the ribbon to manage your project folders and files:
|
|
Click to Upload files or folders to your |
|
|
Click to Refresh the page. The data and metadata on the page is refreshed by querying |
|
|
Click to create a New Folder in your |
|
Click to Show unavailable files in your |

|
You can toggle off the display of unavailable files with the Hide Unavailable button. |
|
|
Click to Download the selected file(s) or folder in your |
|
|
Click Copy to to copy the selected file(s) or folder to another location in your |
|
|
Click Move to to move the selected file(s) or folder to another location in your |
|
|
Click Rename to rename a selected file or folder in your |
|
|
Click Attach to task to attach the selected file(s) or folder to a task in your |
|
|
Click Remove from here from the Remove sub menu to delete the selected file(s) or folder from the current location. The files or folder (and its contents) will be deleted from the location, but not from any other locations in the |
|
|
Click Remove from everywhere from the Remove sub menu to delete the selected file(s) or folder from all locations. The files or folder (and its contents) will be deleted from |

|
|

|
Click Object Page in the Info panel to open a page which displays various details for files and objects (Files, Drillholes, Wireframes Points, Strings etc). |

|
If you require access to an unavailable file, you click the Permissions button in the Info panel at the right. |

|
Click Subscribein the panel at the right to subscribe to a selected file or files in your |

|
Click Check Outin the Info panel at the right to reserve the file/object for editing. While a file or object is 'checked out', no other user will be able to make changes to it across your workspaces and projects. |

|
Click Check Inin the Info panel at the right to return the 'checked out' file/object for editing. When a file/object is 'checked in', others across your workspaces and projects with access to the file will be able to make changes. |

|
Click the Download Link button in the Info panel to create a link to download a selected file that can be shared with other users. A URL is created which can be provided to external people without access to Micromine Nexus, in order to share data and allow the download of the file or folder. You will be prompted to select a lifetime for the link to be valid - 1 day, 1 week or 1 month. After the lifetime has expired, the file/folder will not be accessible through the generated link. Users attempting to access an expired file/folder will be redirected to an expired link notification page. |

|
Click Navigate Linkin the Info panel at the right to copy a link to the selected file in your |
|
|
Toggle between Show Search and Hide Search to display the text search field for the |
|
|
Toggle between Grid View and Table View to change the display of the |
|
|
Click the Viewer icon in the grid to view the selected Nexus wireframe object models in the Viewer. Note: This feature is only available for models from Micromine Origin & Beyond 23.5. |
|
|
Click the Preview icon in the grid to toggle display of the Info panel for the selected file/s. |


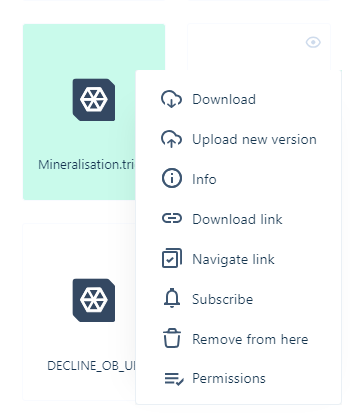
The context menu for the File browser can be opened by right-clicking on a file:
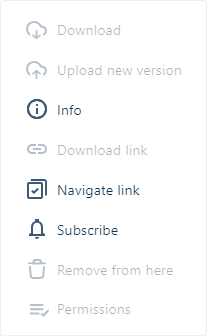
If a file is not selected or you right-click anywhere else in the library, the context menu will be displayed, but no actions will be available:
Navigate Link
The Navigate Link option in the context menu, Viewer, and browsers allows you to create a direct link to a selected file, object or folder that can be opened by another, authenticated user. Selecting any file / object from the browser and picking Navigate Link from the context menu will add the link to your clipboard to be shared. When the recipient clicks the link, they will be taken to Nexus and asked to login before being taken directly to the file, object or folder in the browser. The element you created the link for will be opened in the Info panel and can be viewed, downloaded and worked with as normal from there:
If you share a Navigate Link directly from the Viewer or Document Viewer, the recipient will be able to open it directly in the Viewer or in Document Preview mode respectively. If you create a link to a Folder in the browser, the root of the folder will be opened for the recipient of the link.
Project Information
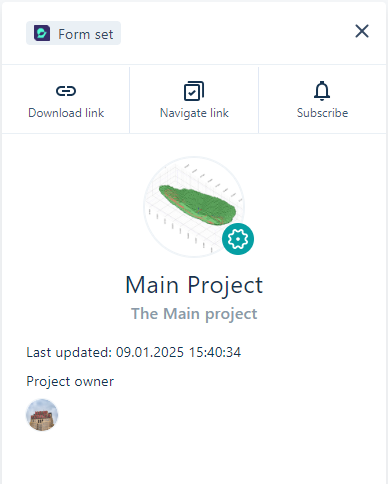
When no file is selected in the Project browser, the properties of the Project are shown in an Info pane:
-
An icon indicating that the Project contains Form Sets from Micromine Origin & Beyond.
-
The Download link button to create a link to share the project. Anyone with the link can download the project folder.
-
The Navigate link button to create a direct link to the project in Nexus for users with the required permission.
-
The Subscribe button to receive notifications on any updates made to the project, including new files or changes to existing files.
-
The Profile picture for the Project.
-
The Name and Description for the selected Project.
-
The date on which the Project was Last Updated.
-
The name of the Project Owner.
File Information
When a file is selected, the properties of the file can be shown in an Info pane:
-
The icon associated with the object type of the file.
-
The name and an optional description of the file.
-
Versioning information including the author who uploaded the file and contributors (if any) who updated the file.
To view version, attribute and permissions information about the file selected in your Nexus project:
-
Select the file/s for which you want to view information.

-
Click the Info icon in the toolbar.
-
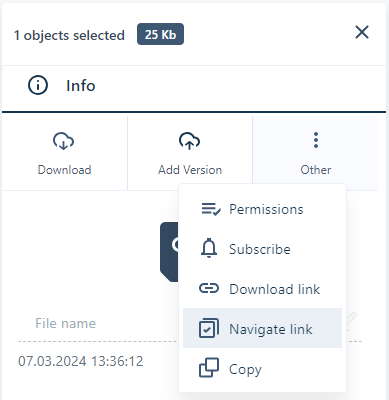
An Info pane is displayed on the right-hand side of the screen:
- The number of files selected, along with the combined size of the files is displayed at the top of the Info panel.
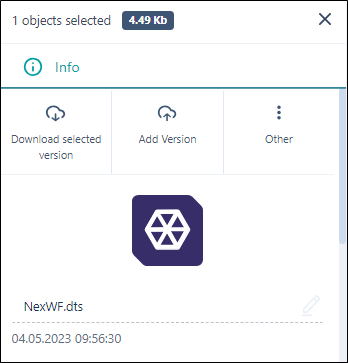
You can click the cross at the top right of the Info panel to close it.
Note: The Info panel is also available from the right-click context menu in the file browser for a selected file.
The tabs in the File Info panel allow you to set the metadata and attributes of the file, view the locations in which the file appears, and view or enter comments for the current and/or previous versions of the file:
Note that Nexus project storage is completely independent of workspace library and task storage.