Getting Started
If you are working in Nexus for the first time, a default workspace and project will have been created for you and a Welcome (Workspace Home) page is displayed after you sign-in.
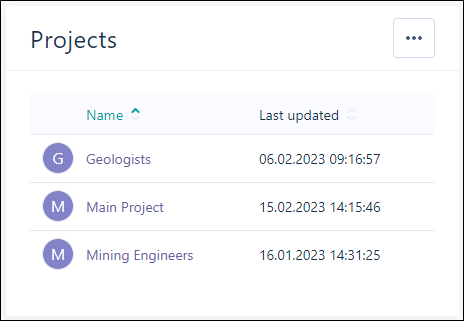
Projects in the current workspace are listed in a Projects pane:
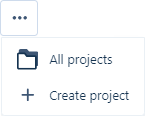
The Ellipse button in the top right-hand corner allows you to navigate to the All Projects page.
Your user name is listed in a Members pane (along with the user names of other Users as well as the Groups who have access to the workspace):

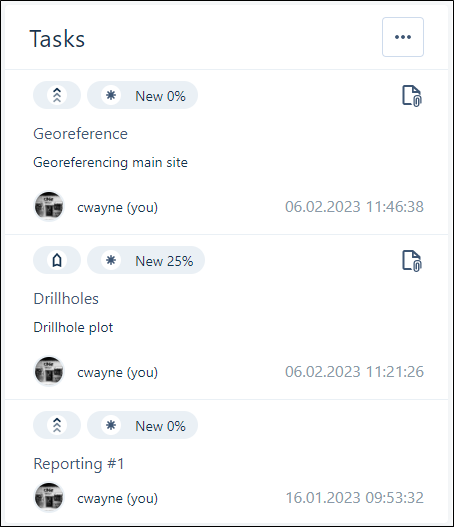
Any Tasks to which you have been assigned are displayed in a Tasks pane.
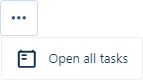
The Ellipse button in the top right-hand corner of the Tasks pane allows you to Open all tasks in the Gantt Chart.
Workspace
Depending on your subscription plan, you will have access to one or more workspaces.
To get started with workspaces in Nexus, from the Navigation menu:
-
Click on <the name of the current workspace>.
-
Select an option from the Workspace menu:
-
Select from a list of Recent Workspaces
-
View All Workspaces
If you need to quickly return to the Workspace start page from Settings or any other place in Projects, Library or Tasks; click the Micromine Nexus logo in the top left corner of the interface.
![]()
Projects
A Nexus project is typically a container for files which serve to achieve a single outcome, for example, a finalised block model or a periodic mining plan. You can link to a project when you integrate other Micromine applications with Nexus.
Version control is applied at the file level.
Note that Nexus project storage is completely independent of workspace library and task storage.
To get started with Nexus projects, from the Navigation menu:
-
Click on <the name of the current project> or, if no project has yet been selected, click on No Project Selected.
-
Select an option from the Project menu:
-
Select from a list of Recent Projects
-
View All Projects
-
Set Project Settings
-
Create a Project
Tasks
To get started with tasks in Nexus: