Downsample
Downsampling may be used to simplify a dense point cloud so that processing is more efficient and interpretation clearer.
![]()
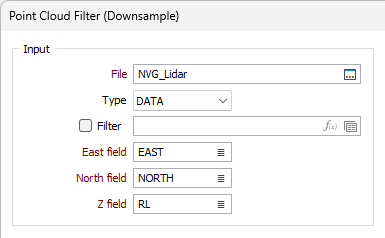
Input
Double-click, or click on the Select icon, to navigate to the location of the file that contains imported point cloud data. This will typically be a data file with a .DAT or .SVY file extension, but other files such as LAS, LAZ and E57 are supported. Select the file Type from the drop down.
East, North, and Z fields
Specify the names of the point coordinate fields in the Input file. These fields will be disabled for some input file types.
Downsample Filter
Choose from one of the following downsample options:
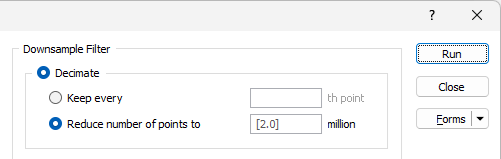
Decimate
Downsampling by an integer factor is referred to as decimation.
-
Keep every: Select this option to downsample the point cloud by keeping every <n>th point, where <n> is the number you enter.
-
Reduce the number of points to: Point cloud data often comprises millions to billions of 3D points. Select this check box to reduce the number of points by expressing a filter value of <n> million points.
This will speed up processing for very large datasets, but at the expense of memory.
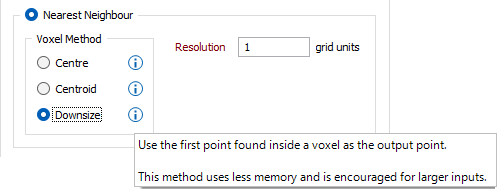
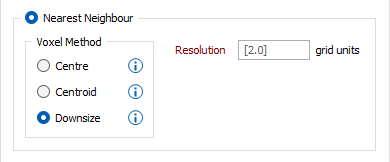
Nearest Neighbour
Select this option to use a Nearest Neighbour interpolation algorithm.
Voxel Method
-
Centre: select the points nearest to either the Voxel Centre.
The process will use the centre of a voxel as the output point, only if a point is found inside the voxel.
-
Centroid: select the points nearest to the Voxel Centroid.
The process will load all points and calculate an output centroid for each group of points that fall in a voxel.
-
Downsize: selects the first point encountered inside the voxel as the origin for the voxel grid.
The process will use the first point found inside a voxel as the output point. All other points in the voxel are discarded (filtered out). This method uses less memory and is recommended for large inputs.
If you hover on the Information icon at the right of each Voxel Method option, a pop up defining the method is displayed:
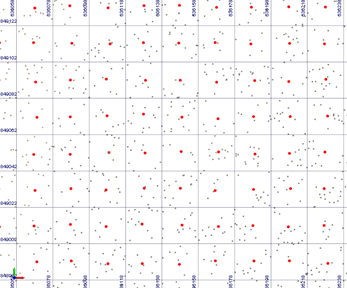
Resolution
Enter a value which will be the size of the grid voxels used.
A 2D section of what the result may look like is shown in the following screenshot:
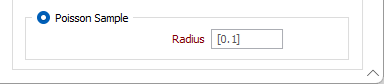
Poisson Sample
Poisson Sample is a classic sampling method which allows a dense point cloud to be simplified by reducing noise and outliers in the data using disk sampling.
Radius
Enter the radius of the sample disks.
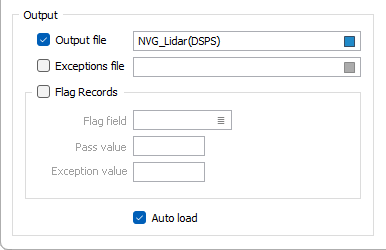
Output
Select the check boxes to nominate the files to which the results of the process and exceptions will be written.
Output file
Enter, or double-click to select, the name of file to which results of the process will be written. By default, this will be a data file with a .DAT file extension.
Exception file
Enter, or double-click to select, the name of file to which any exceptions will be written for diagnostic and validation purposes. By default, this will be a data file with a .DAT file extension. This field will be disabled for some input file types.
Flag records
Select the Flag records option to write default or user defined Pass and Exception values to the Output file. This option and the related filed will be disabled for some input file types.
Auto load
Select this check box to auto load the filtered data in Vizex.
Forms
Click the Forms button to select and open a saved form set, or if a form set has been loaded, save the current form set.
By design, the Forms button is not available for loaded Vizex layers (i.e. when opening the form set properties of a layer in the Vizex Layer Display pane). In Vizex, the Forms button is only available for new forms opened via the Home tab or the Vizex tab, in the Layer group (or by double-clicking on a form type node in the Vizex Layer Types pane).
Save and Save As
Click the Save button to save the changes you have made to the form set. Click Save As to save your changes as a new form set. Save As will default to the first available form set number.
Reset
Click Reset to clear the form of all values and reset the form to its default state.
Reset Tab
For tabbed forms, select Reset Tab to clear the active tab of all values and reset the tab to its default state - without making any changes to other tabs in the dialog.
Undo and Redo
Click Undo (CTRL + Z) to undo recent changes in the form. After an Undo, click Redo (CTRL + Y) to restore the last change that was undone.
Collapse
Collapse (roll-up) the form to preview a chart, or preview the results of an operation in Vizex, or obtain input values from Vizex, the Property Window, the File Editor, or the Plot Editor.