Create
Before you create a new Pit Design layer, load any display objects that define the area of interest, for example, an ore body block model and an optimal pit wireframe that can be used as a guide during design.
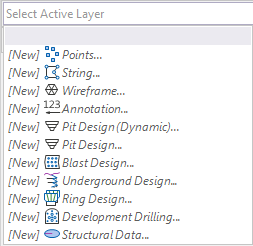
To create a new Pit Design layer in Vizex:
- On the Vizex tab, in the Windows group, click New Vizex Instance.
- In the Vizex Display Pane, select [New] Pit Design … as the active layer.

In the Input Data form, set the parameters that will applied during the pit design process and specify an input data file.
Once you have set the parameters of your pit design, you can use the tools provided by the Visual Explorer (Vizex), to generate a stockpile or an open pit complete with haul roads. A pit (or stockpile) can be generated from the base upwards (or from the crest downwards).
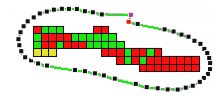
You begin by digitising a base string in the display. To help you locate this correctly you can display contour strings, a block model, topographic contours, and output from pit optimisation, in the background.
Pit or stockpile walls are generated according to the parameters you have defined. There are comprehensive editing and road design facilities. You can create complex pits with multiple bases, bases at variable elevations, intersecting topography, switchbacks and more.
In addition to the pit constraints you define, you can import a constraints model that can be used to project varying slope angles and berm widths in different parts, and at different elevations, of the pit.
Pit Design is an iterative process. You can optimise your pit outline by using the tools provided on the Vizex toolbars.
When you create a new Pit Design layer as the active layer and press N to begin digitising, the default string type is set to TOE. Similarly, when you use the string editing tools (New String, New Polygon, New Ellipse etc.) and the active layer is a Pit Design layer, the default String type is TOE.
|
New String |
There are different modes for creating strings. You can use the Right-click New > Pit String menu to select a (Toe, Crest, Road, or Contour) string mode. |
|
Smooth String |
|
|
Simplify String |
|
|
Add Road |
If you want to digitise a road manually, rather than generate a road using the Add Road tool on the Pit Design toolbar, select the New Pit String > Road option. This invokes the New String function. In this case, the type of the string is set to Road. You can also select the Road > Manual Road Edge function to build a haul road that ascends or descends from a selected (crest or toe) start string. |
|
Project to Berm |
|
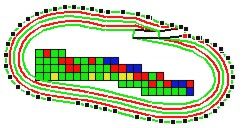
You can preview your pit outline, generate a wireframe, and load it into Vizex.
At any stage you can use the Undo button to undo the last edit or revert back to a previous level in the design process. You can intervene at any stage or allow automatic features to perform part of the design using default values. However, the entire process can not be totally automated. Features such as initial road directions, switchbacks, passing bays, road intersections and changing road slopes, all require manual intervention.
Before beginning your pit design, you should:
-
be familiar with the Edit String functions and the tools provided on the Strings menu.
-
have some knowledge of the Wireframing functions.
-
have an understanding of the existing surface topography, the nature and extent of the orebody, and the economic limits of the mine.
Typically, an orebody model and/or a pit optimisation string will be displayed as a background layer, showing what you want to mine at the current level. If not, you will need to make sure that the display limits are set so that the current level is that of the base of the pit (or stockpile)