Edit Block Model Extents
Click the Edit Extents button to collapse the form and visually adjust the extents of a block model, automatically aligning the extents to a restriction wireframe (where present), or to the extents of a nominated wireframe or DATA file.
Interactively adjusting the extents rectangle in Vizex, or in the Vizex Property Window, will update the values in the form.
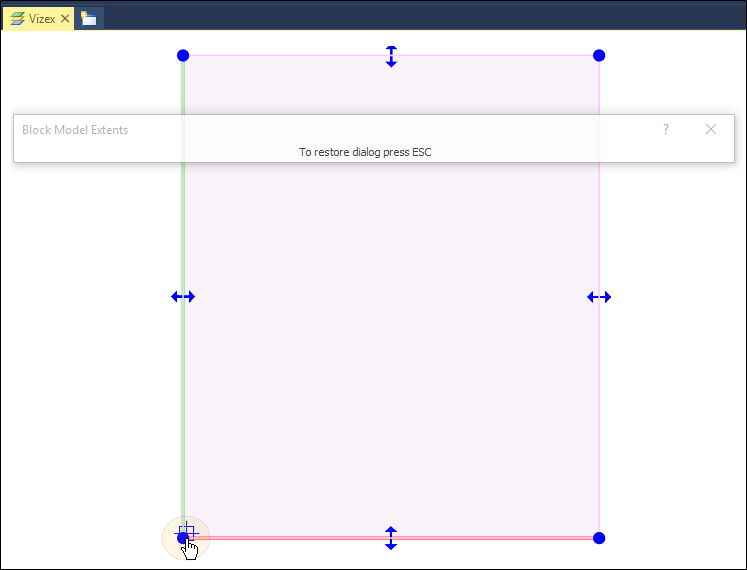
If you collapse the form and the extents grid is blank, a default extents box is created in the centre of the screen.
Clearing the form will use a default block size of 10x10x10. If you know the block size that you want to use, type these values into the form before clicking the Edit Extents button.
- Click and hold down the mouse button to define the lower bound of the extents rectangle
- Drag the mouse to define the extents rectangle
- Release the mouse button to set the upper-bound of the extents rectangle
Interactively edit the extents
Handles at the corners of the extents rectangle can be dragged to change the size and position of the rectangle, while preserving the orthogonal shape of the extents.
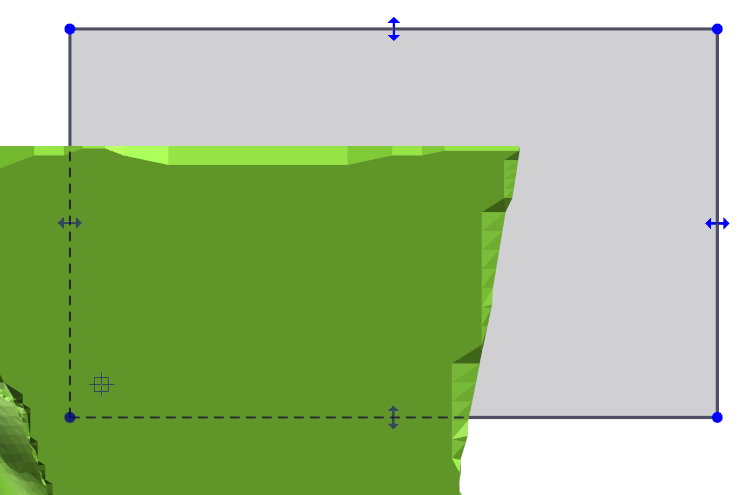
A point, which represents the centroid of the lower-bound block, is shown in one corner, which can also be dragged:
The whole of the interactive extents rectangle is always visible. Those parts of the extents rectangle that are clipped by other Vizex objects are darkened to indicate that they are "hidden". Hidden edges are also given a dashed line style:
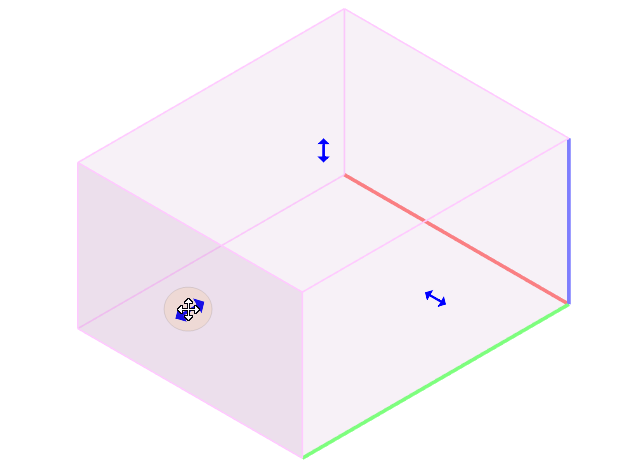
At the centre of each face of the rectangle, a handle can be dragged to pull or push the face in that camera direction:
Double clicking a face will orient the camera view to face in that direction.
The whole extents rectangle can be dragged by selecting it when a handle is not active. Note that moving the corners or the faces of the rectangle will snap to multiples of the block size, whereas moving the whole extents will not.
Holding down X, Y or Z will restrict movement to that axis. Using the X, Y and Z keys while snapping, can be quite useful, especially for aligning the faces to objects.
Holding down the Shift key as you use the X, Y and Z keys will disable resizing along that axis. Pressing Shift + X, for example, will restrict resizing to the Y-Z plane, and disallow any change in the length of the X axis.
Collapsing the form by double-clicking the title bar, or via the Collapse option on the Forms drop-down menu, has the same effect as clicking the Edit Extents button.
When you collapse the form, the extents shape is snapped to the current block model grid, as defined by the Min centre and the Block size. When the form is restored, the Max Centre is adjusted to make the extents size a multiple of the block size.
Snapping is supported in 2D. Snapping to points when dragging a corner, with no axis restrictions, will position the corner on those points without changing its distance from the camera. When dragging the whole shape, the closest corner to the cursor will be snapped to the snap points.
The extents rectangle uses the currently set Overlay colour and Selection colour settings (on the Selection tab of the Project Options | Vizex form).
Interactive block model extents will lock to the grid of the template block model if a grid has been defined.