File Structure
When you create a new macro file using the default structure, it will contain all the fields mentioned below. They are used differently depending on the instruction that you enter, and not all are required for each instruction. The Process field is compulsory. All other fields are optional depending on the instruction you want to execute.
Because the system determines the purpose of each field by its position, not by its name, you may give the fields any name you want. However, the fields that are present must be specified in the correct order; that is, if you need to include the BMP field, it must be the fourth field in the Macro file.
In earlier versions, some macro commands used the FORM field in a non-standard way. For backward compatibility, if the PAR field is empty, the FORM field will be checked for ABORT and BEEP special command parameters.
The fields in a Macro file
| Process | This is the name of the instruction you want to perform, either a form or a command. |
| Form | This is the number of a saved form set. |
| PLT file | The name or number of a plot file. The default file location is the current project folder. If the instruction outputs a plot file, type the file name (and optional filepath) here. When you enter a number between 0 and 999, the name is created from the first five characters of the process code and the number is appended. |
|
A number not between 0 to 999 will be treated as text and will be used as the file name. |
|
| BMP file | The name or number of a bitmap file to which you can dump the screen. This is similar to the Display | Dump option that is available on the menu for some forms. When you enter a number, the filename is formed in the same way as for PLT files (see above). |
| Append ROP | Specify whether you want to append a Report, a Plot, or Other output file. To append a report type R; to append a plot file type P. To append any other output file type O. You can use these in any combination, for example RO, POR, etc. |
| Par | This field is used by some macro instructions to pass additional values that are not included in a form. For example, when using the ABORT command the Par field should contain either YES or NO to indicate whether the macro should abort or not when errors occur. |
| %1 to %99 | Up to 99 replaceable parameters can be specified. These must correspond to the parameters you have entered in a form. |
Note: The columns in a macro file have a fixed format. While consecutively numbered pass parameter ("%n") columns may be appended to a file, deleting or renaming existing columns is not recommended and can result in unexpected behaviour.
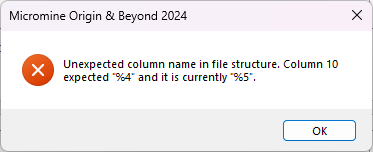
When a macro is run, an error is displayed if unexpected columns are encountered in the file:
Special commands
The following special commands can be applied to the Par field.
FUNCTION: Abort processing of the macro
Enter YES or NO in the Par field to indicate if the macro should abort when an error occurs.
| Process | Form |
|---|---|
| ABORT | YES/NO |
FUNCTION: Sound the computer audio tone.
In the Par field enter the number of times <n> that you want to sound the computer’s audio tone.
| Process |
Form |
|---|---|
| BEEP | <n> |
FUNCTION: Draw contours.
When you run the Display Contours function manually (that is, not via a macro), you will be asked if you want to reload (min/max, grid spacing) values.
When you run the macro, placing a “yes” in the Par field will force these values to be reloaded when you have substituted the grid file name with a replaceable parameter.
| Process |
Par |
|---|---|
| CONTDISP | YES |
FUNCTION: Plot a file
In the Plot File field enter the output file name. The default file location is the current project folder. Alternatively, a filepath can be specified.
In the Append field optionally enter the letter P to indicate that a DXF file is to be displayed in paper units.
In the Par field enter the media type to use (default is SINGLE).
| Process | Form | Plot file | Append | Par |
|---|---|---|---|---|
| PLOT | YES/NO | <filename> | P | SINGLE/ROLL/ONE |
FUNCTION: Traverse adjustment.
In the Par field enter the initial reference bearing and the closing reference bearing, separated by commas or spaces.
| Process | Par |
|---|---|
| TRAVERSE | <first-bearing>, <closing-bearing> |
FUNCTION: Polygonal Section models
In the Par field, enter the name of the model (A – Z) you want to load.
| Process | Par |
|---|---|
| DHMNSEC | <model name> |
| DHMPSEC | <model name> |
| DHMTSEC | <model name> |
| GMOD | <model name> |
For a list of macro processes as they appear on the main menu, refer to the Macro Processes topic.