Convert File Encoding
![]()
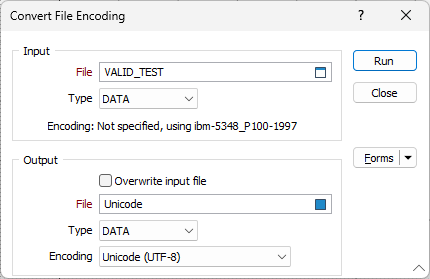
- Select an input file type and then double-click (F3) in the File box to select the file you want to convert.
- Enter (or double-click (F3) to select) the name of the output file. Alternatively, select the Overwrite input file option.
- Use the Encoding drop down to select the format for the encoding.
- Click Run to perform the encoding and create the specified output file.
The current encoding of the input file is shown. If the file has already been converted to Unicode, the Run button is disabled.
Note: If the conversion is applied with Overwrite input file enabled, it cannot be undone.

The available Encoding options are as follows:
| Encoding | Description |
|---|---|
| Non-Unicode System Default | This option will store the file in system local encoding. This can be more "compact" but does not support rich Unicode content. |
| Unicode (UTF-8) | This file encoding supports rich Unicode content. |
| Compressed Unicode (BOCU-1) | Supports rich Unicode content like UTF-8 but takes less space. This is the current (Auto) default. |
The encoding function checks if the conversion is possible; i.e. whether all characters in the input file can be represented in the output file and if the data fits into each field. If not, an error is reported and the process will not run (where the Overwrite input file option is selected) or the error will be reported as a warning.
To set the default file encoding for new data files in your project, see: File Encoding