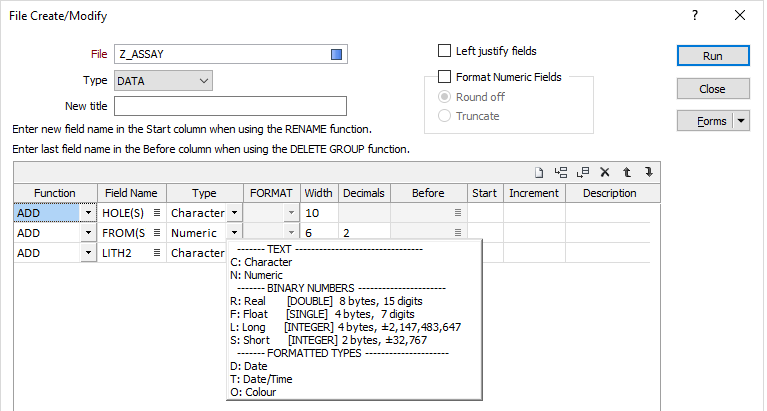
New/Modify File

A DESCRIPTION column, at the right-hand side of the grid, allows the purpose and the content of any field in the file to be described using a maximum of 255 characters. See: Field Descriptions
You can add or insert new fields and delete or rename existing fields.
| Function | Description |
|---|---|
| ADD | Add a field to the file and specify its type, width and decimal precision (if any). You can also specify a Start value and an Increment value. |
| INSERT | Insert a field in the file, after the field specified in the Before column, and specify its type, width and decimal precision (if any). You can also specify a Start value and an Increment value. |
| MODIFY | Modify the name, type, width and decimal precision (if any) of an existing field. You may also modify the Start value and Increment value (if any). |
| DELETE | Delete the field specified in the Field Name column. |
| DELETE GROUP | Delete multiple consecutive fields in the file, beginning with the field specified in the Field Name column, and ending with the field specified in the Before column. |
| RENAME | Rename the field specified in the Field Name column by entering a new name in the Start column. |
Text (Character, Numeric), Binary (Real, Float, Long, Short) and Formatted (Colour, Date, and Date Time) field types can be selected in the Modify File Structure dialog:
You can use the Modify function to left-justify text files that were imported in column delimited format, and format numeric fields even if you don't want to modify the file. For example, if an imported file includes more decimal places than you require, you can use this function to rewrite decimal places and left-justify all fields.
Format
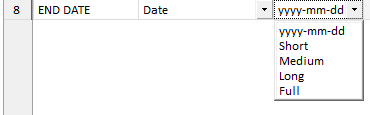
Date fields
Select the ISO (yyyy-mm-dd) date format, or select a (Short, Medium, Long or Full) date format.
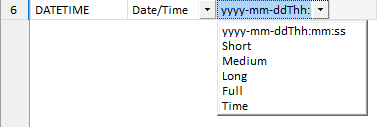
Date/Time fields
Select the ISO (yyyy-mm-ddThh:mm:ss) date/time format, or select a (Short, Medium, Long, Full or Time) date format.
When you select a Short, Medium, Long, Full, or Time format, the field is formatted using the International Components for Unicode (ICU), based on the locale of your computer. For more information, see: http://demo.icu-project.org/icu-bin/locexp
The English (Australia) locale is switched to use the English (United Kingdom) locale, since the short date formats of the latter are preferred.
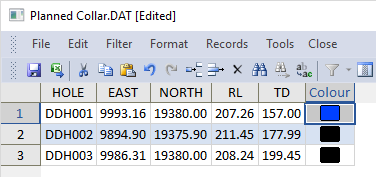
Colour fields
In the File Editor, the content of a formatted Colour field is displayed as a (selectable) colour patch.
This field can be used to colour code data displayed in Vizex. However, if you are mapping Colour values to a Colour Set, the "Colour" field you select must be a field that contains valid RGB, HTML Hex, Hex, or Integer colour definitions.
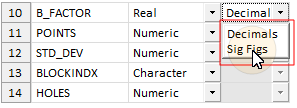
Real fields
When choosing how Real numbers are formatted, you can specify the number of decimal places or the number of significant figures:
When modifying the structure of a file and adding a Real field, the field is populated with a Decimals format and blank decimals. Unless the decimal precision is explicitly set, a default precision, based on the data in that field, will be used.
For Real fields, the valid range of precision is -9 to 9 decimals (includes 0 decimals) then the default decimal precision. Negative decimals on a Real field are rounded to powers of 10.
For Float (single-precision) fields, the valid range of precision is 1 to 9 then the default decimal precision. FLOAT fields are now deprecated in File Create/Modify and are no longer recommended. FLOATS are converted to REALs (double precision), improving precision and avoiding numerical inconsistencies.
To create or modify a file via a macro
- Select File | Create or Modify File or Macros | File Create/Modify from the main menu.
- Select the file you want to modify, or enter the name of a new file to be created.
- Select the appropriate file type.
- Optionally, enter a descriptive title of up to 40 characters. A DESCRIPTION column, at the right-hand side of the grid, allows the purpose and the content of any field in the file to be described using a maximum of 255 characters.
- If you want to left-justify fields or format numeric fields, select these options.
- In the table defining the file structure, select or enter the required values.
- If using the RENAME function, remember to enter the new field name in the Start column.
- If using the DELETE GROUP function, remember to enter the last field name in the Before column.
- Click on the Forms menu button if you want to save the file structure as a form set.
- Click on the Run button to run the macro.
Modifying the structure of a file in a previous version will remove any descriptions you have added in the current version.
When you add new fields using the Modify function, no data is lost from the file. If, however, you delete a field that contains data, that data will be lost.