Site List Editor
In Micromine Geobank we rely on site lists (typically lists of drillhole numbers) to make it easier to abstract selection criteria in queries for data views, exports and reports, etc.
The Drillhole Utilities | Special Tools | Site List Editor provides an effective way of creating and maintaining the site lists for one or more projects.
To open the Site List Editor, double-click on the Site List Editor icon, or right-click and select Execute from the right-click menu.
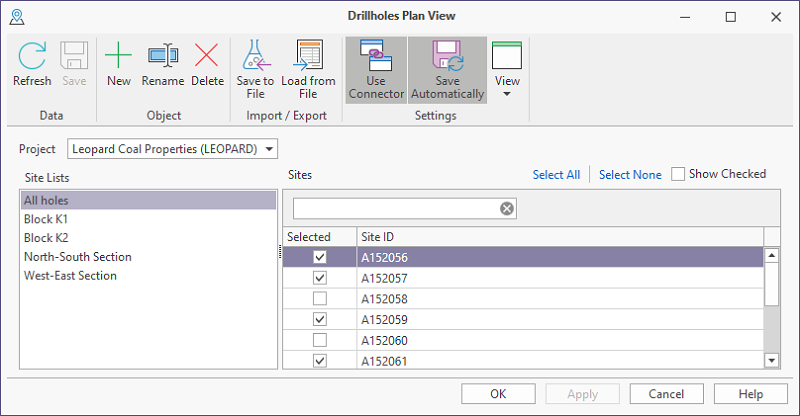
The Site List Editor can be synced with the Plan View, which can be used to spatially select the holes that will be included or excluded from a site list. Conversely, you can use the Site List Editor to change the hole selection in the Plan View. To synchronise the two tools, activate the Connector in the Ribbon of both.

Note: For performance and safety reasons, as a precaution it is recommended to turn off the Save Automatically function if you have a long site list and are selecting or deselecting points in the Plan View, as this will make individual calls to the database and there is no Undo function.
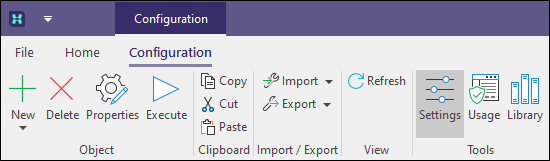
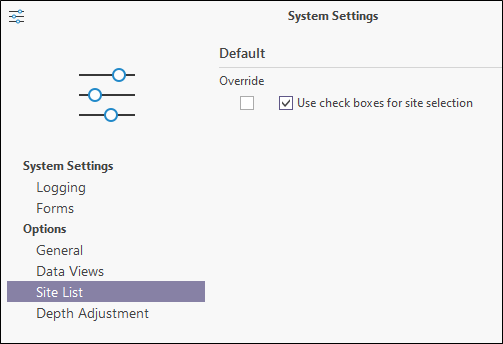
The appearance of the editor will be different depending on the state of a setting on the Options - Site List tab of the Configuration | Settings dialog.
Use check boxes for site selection
Select the Use check boxes for site selection option to manage the sites in one or more site lists by applying check box selections. Select All and Select None options can be used to fill or clear the list, prior to selecting or deselecting check boxes individually:
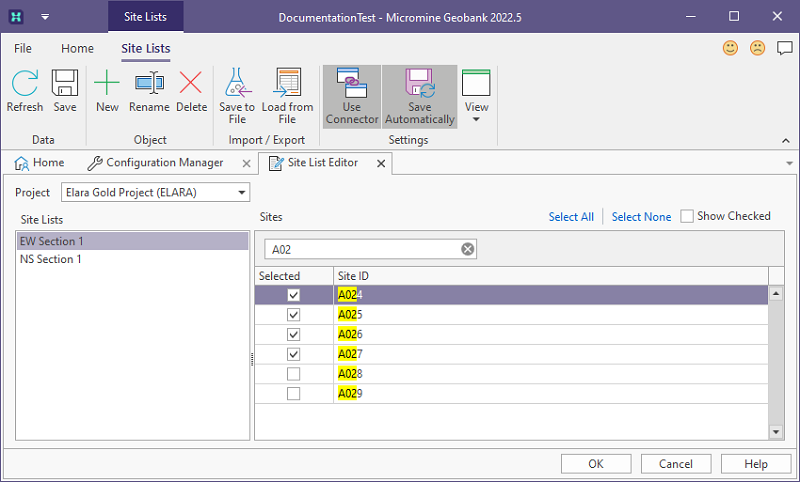
Select All
Select all sites for inclusion in the current list.
Select None
Clear any selections for the current list.
Show Checked
Select this option to show the sites (check boxes) that are selected for the current list. When this option is not selected, all sites are shown.
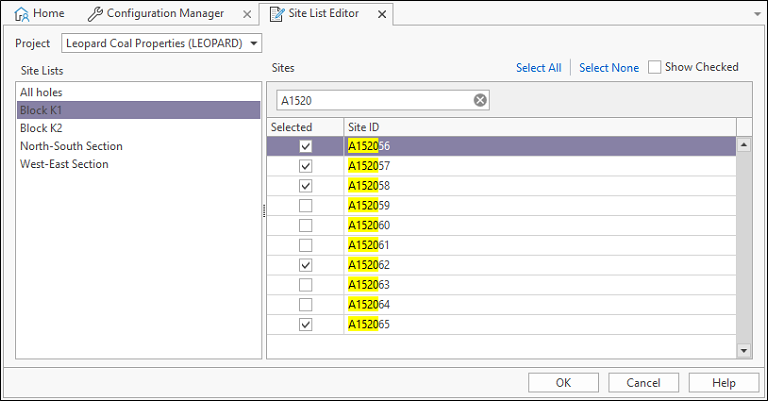
Use window panes for site selection
When the Use check boxes for site selection option is not selected, site selections are made by moving site identifiers between panes, as described in the remainder of this topic.
Select a Project
When you select a project, the site lists for that project are shown in the left-hand pane. The first site list in the list is selected by default.
Sites included in the current list are shown in the Sites pane. Those sites not included in the current list are shown in the (All Sites) pane:.
You can use the filter boxes at the top of each pane to make a selection based on the filter you have entered:
Modify a Site List
To modify the current site list:
- Select a site list in the Site Lists pane.
- Select the sites to remove from the site list in the Sites pane and click the Right arrow button to move them to the All Sites pane.
- Select the sites to add to the site list in the All Sites pane and click the Left arrow button to move them to the Sites pane
- To Refresh, Save, Load, Create, Delete, Rename, or Synchronise a site list, use the options on the ribbon:
|
|
Click the Refresh button to refresh the site list from the database. You will be prompted to confirm or cancel the refresh: |
|
|
|
|
|
Click the Save button to save the site list. |
|
|
Click the New button to add a new site list. |
|
|
Click the Delete button to remove the currently selected site list. |
|
|
Click the Rename button to rename the currently selected site list. |
|
|
Click the Save to File button to the site identifiers in the current list to a text file |
|
|
Click the Load from File button to load site identifiers from a text file. |
|
|
Click the Connectivity tool to use the Site List to modify the selection of the holes in the Plan View or vice versa (the tool must be enabled in both) - or select a hole that will then be queried (typically to create a downhole or a lease summary) in a Graphic Report. |