Bench Templates
In the Bench Templates step we create the bench height options that can be applied to phases. You may choose a single template to cover all pits, or have multiple templates for different mine areas.
-
The templates defined in this step will be used to slice individual pits and dumps to the heights specified (applies in the Phase Details step > Options > Bench Template).
-
To ensure proper distribution of pit benches and dump lifts, make sure that the template is applied evenly along the phase solid.
-
If the bench is mined by different layers, divide the bench height of the by certain flitches, separated by commas.
-
You can set different bench heights above and below a certain Relative Level (RL).
-
If the heights of one bench vary in different parts of the pit, then it makes sense to divide the pit into stages according to the mining heights.
-
The default bench template is 10 meter increments aligned to the zeroth RL.
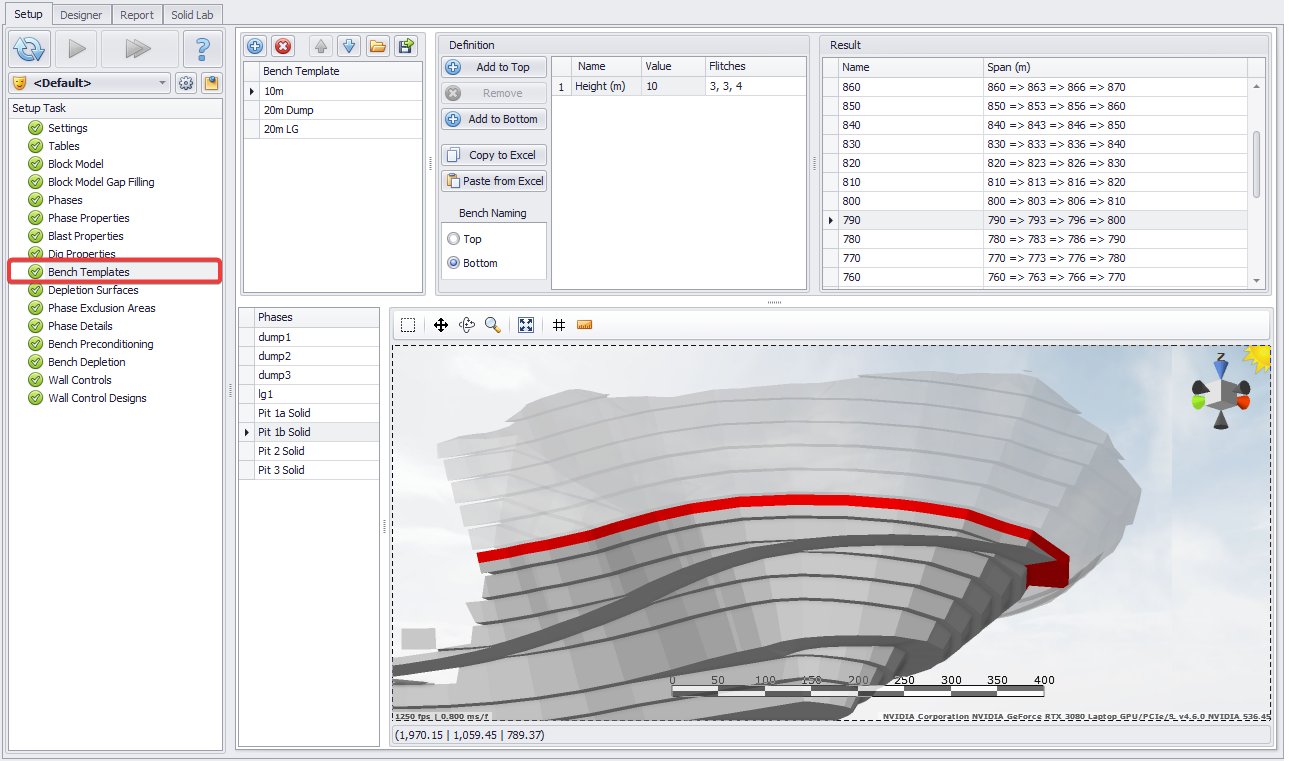
Bench Templates Setup Step
Creating one height template
-
Click the blue plus icon to add a new bench template.
-
Rename the bench template accordingly.
-
In the Definition panel, change the height value.
-
Select a Bench Naming:
-
If the template is to be applied to the dumps > select Top in the Bench Naming field;
-
If the template is to be applied to the pits > select Bottom in the Bench Naming field.
-
Select one of the pits/dumps from the Phases list.
-
Click on different heights in the Result panel and inspect how the template is applied in the 3D viewport.
-
Rotate the phase solid using the toolbar or mouse control to see the template applied from different angles.
-
Creating a mixed-height template
-
Click the blue plus icon to add a new bench template.
-
Rename the template to accordingly.
-
In the Definition panel, click the Add to Bottom button.
-
Change the threshold RL to the elevation where the bench heights change.
-
Set the bench height above the threshold.
-
Set the bench height below the threshold.
-
Select one of the pits/dumps from the Phases list.
-
Click on different heights in the Result panel and inspect how the template is applied in the 3D viewport
-
Rotate the phase solid using the toolbar or mouse control to see the template applied from different angles.
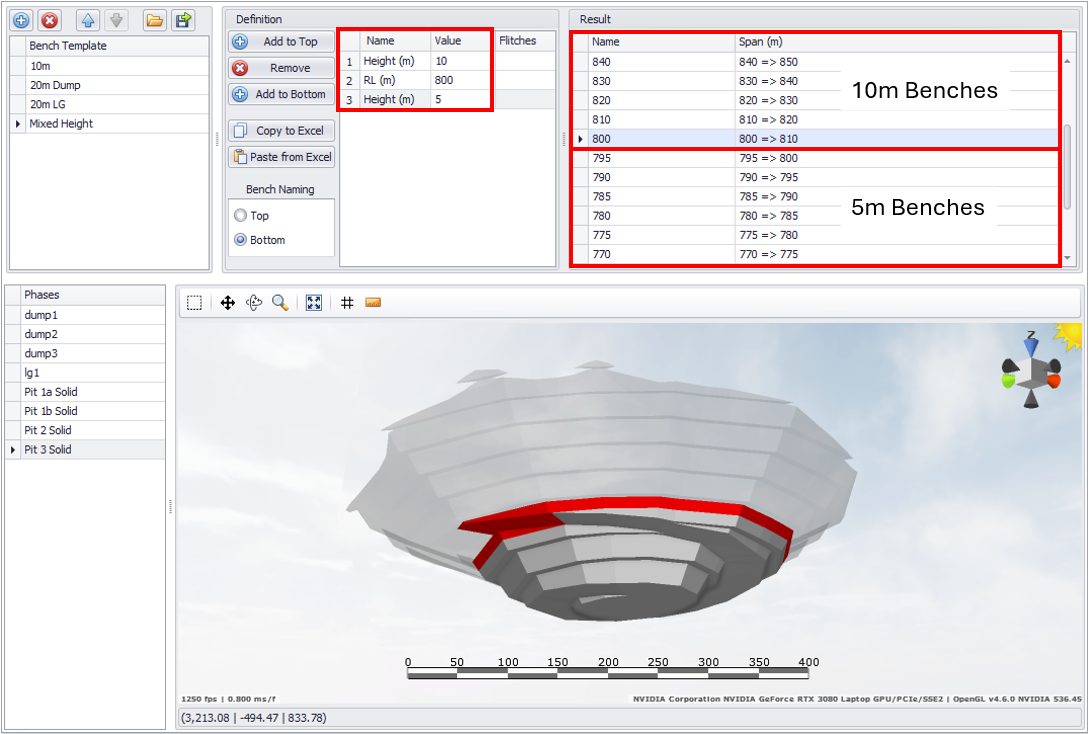
5m benches below the 800RL, 10m benches above the 800RL
Creating benches with flitches template
-
Click the blue plus icon to add a new bench template.
-
In the Definition panel, click the Add to Bottom and set the bench height accordingly.
-
In the Flitches column enter the comma separated flitch heights.
-
Select one of the pits/dumps from the Phases list.
-
Click on different heights in the Result panel and inspect how the template is applied in the 3D viewport
-
Rotate the phase solid using the toolbar or mouse control to see the template applied from different angles.
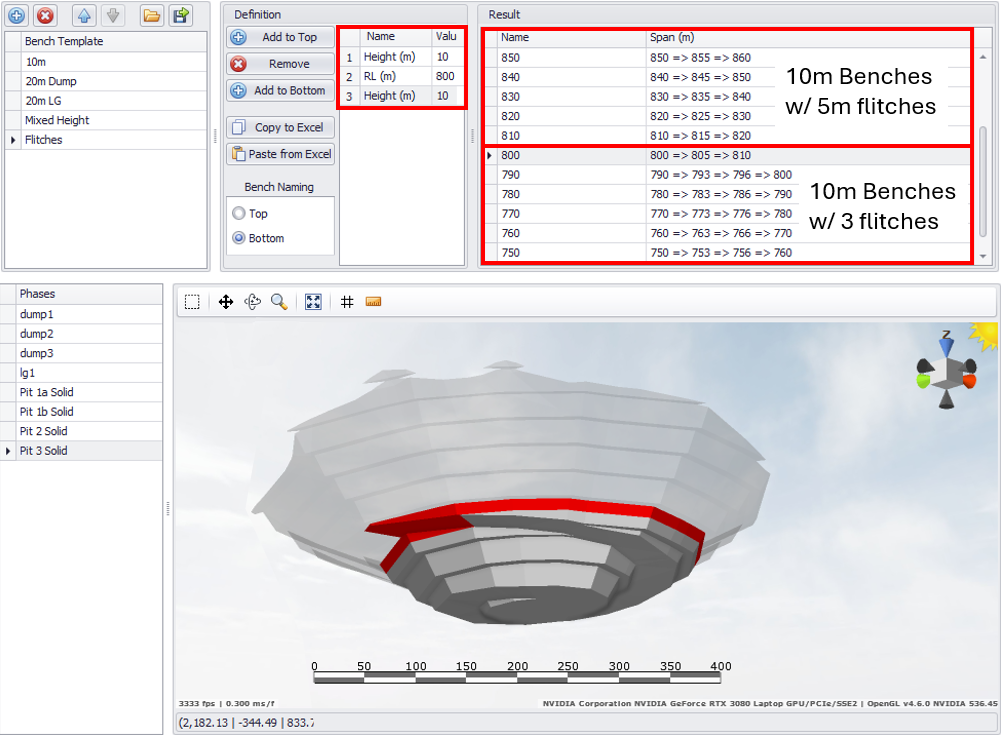
Enter comma separated flitches for each bench height
You can combine the increments with and without flitches in one template, as well as specify different RLs from where the different heights will be applied.
Creating benches from Excel
-
Click the blue plus icon to add a new bench template.
-
In the Definition panel, click the Add to Bottom and then click Copy to Excel.
-
In Excel, paste data and edit as required.
-
Once data in Excel has been setup, copy and paste in RR Paste from Excel to populate the definition.
-
Select one of the pits/dumps from the Phases list.
-
Click on different heights in the Result panel and inspect how the template is applied in the 3D viewport
-
Rotate the phase solid using the toolbar or mouse control to see the template applied from different angles.

Bench Templates: Copy to/Paste from Excel
Once you are satisfied, press the blue play button to proceed to the next step.