Dashboards
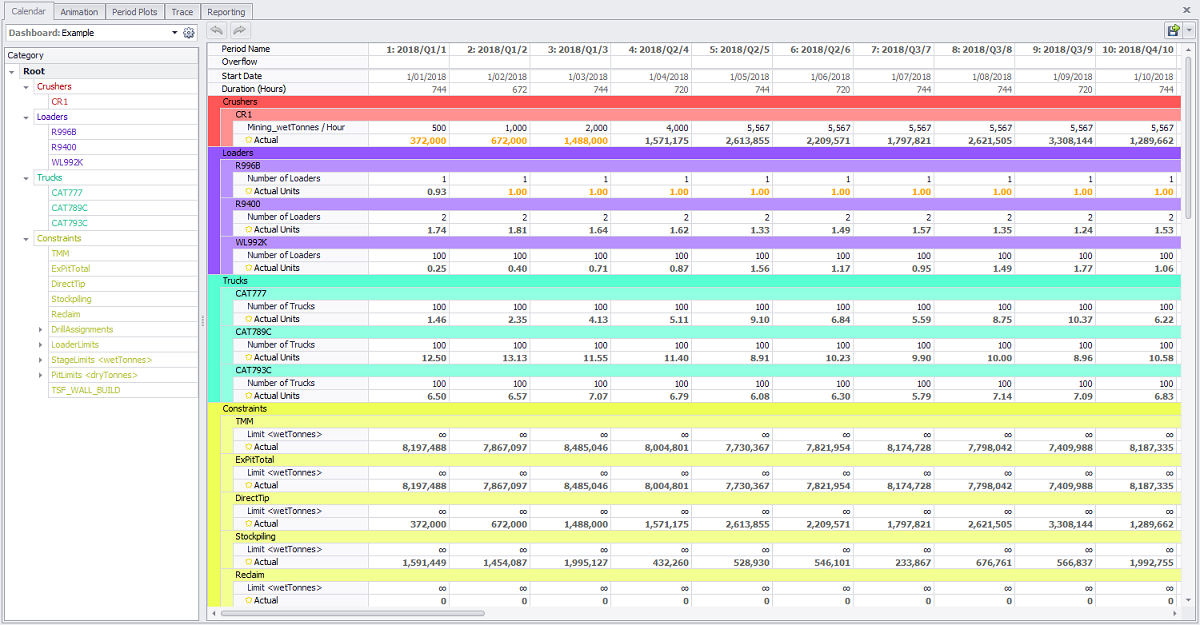
Dashboards allow a user to create custom Calendar layouts. This can be used to organise rows into a concise summary of equipment used, tonnes moved, and grades achieved.

Dashboard setup
To create a dashboard:
-
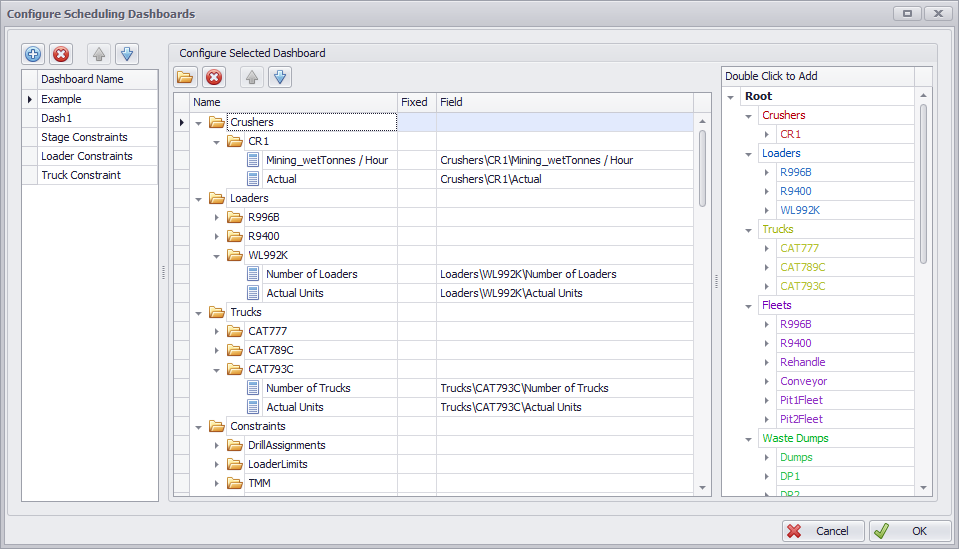
Go to Schedule > Calendar > Dashboard > gear icon > Dashboard dialog.
-
Hit the blue plus button to create a new dashboard.
-
Click in the name field and rename the dashboard to "Scheduling".
-
In the fields list on the right, double click on Crushers to add it to the dashboard.
-
Expand the new Crusher folder to each individual crusher.
-
Delete all child fields except for Capacity and Actual.
-
-
In the fields list on the right, double click on Loaders to add it to the dashboard
-
Expand the new Loaders folder to each individual loader.
-
Delete all child fields except for Number of Loaders and Actual Units.
-
-
Repeat for Trucks.
-
In the fields list on the right, double click on Constraints to add it to the dashboard.
-
Expand the new Constraints folder to see each constraint.
-
Delete any constraints which are not required for scheduling
-
-
In the fields list on the right, double click on Product Specifications to add it to the dashboard.
-
Click OK to finish.

Dashboard display
While iterating over a single period, this dashboard provides an instant summary of inputs and outputs.