Gantt Views
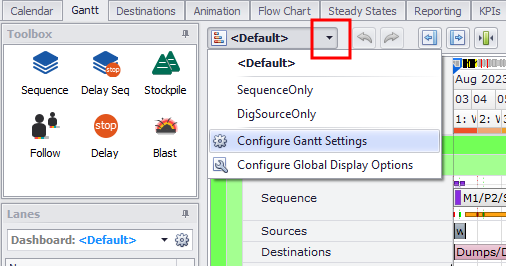
The display of scheduling elements in the Gantt can be changed according to the needs of your project. Select the “Configure Gantt Settings” option from the display view drop-down menu:
This opens the Configure Gantt Display Options window:

Select the settings, labels, shadings and font sizes for each Gantt view
To create a Gantt View:
-
Select the “Configure Gantt Settings” option from the display view button drop-down.
-
Click the blue plus icon to add a new view.
-
Make the necessary settings in the Display Settings panel.
| Other Settings | |
|---|---|
| Split Source On Delay | Toggle to have Source Gantt bars split when there are delays in the schedule. |
| Source Delay Types | Ability to select which Delay types are used to split Sources. |
| Split Destination On Delay | Toggle to have Destination Gantt bars split when there are delays in the schedule. |
| Note: This uses the source agent delay, not the delay at the destination. | |
| Destination Delay Types | Ability to select which delay types are used to split Destinations. |
| Fill Source Delay Gaps | Toggle to fill Source Delay gaps in the Gantt. Delay gaps usually occur when an agent has overlapping delays and only one of the delays is displayed. |
| Show Source Delays | Toggle to display delays on the Source Gantt. |
| Split Source on Level | Drop-down to select what level to display the Source Gantt bars. |
| Split Destination on Level | Drop-down to select what level to display the Destination Gantt bars. |
| Split Stockpiles on Chunk | Toggle to split Stockpiles Source by chunks. |
| Show Period Grid | Toggle to display a vertical line at period start/end. |
| Cascade Settings | |
| Blast Method | Choose when to cascade Gantt bars into multiple rows. |
| Blast Lanes | Choose the max number of cascades rows to display. |
| Source Method | Choose when to cascade Gantt bars into multiple rows. |
| Source Lanes | Choose the max number of cascades rows to display. |
| Destination Method | Choose when to cascade Gantt bars into multiple rows. |
| Destination Lanes | Choose when to cascade Gantt bars into multiple rows. |
| Timeline Options | |
| Title | Edit the Timeline Title at the top left of the Gantt. |
| Show Steady States | Toggle to show Steady States at the top of the Gantt. |
| Show Dates | Toggle to show the Date and Time at the top of the Gantt. |
| Show Periods | Toggle to show Period Names at the top of the Gantt. |
| Period Name | Choose which period label to display. |
| Sequence Bar Labels | |
| Default Name | Choose which label to display on the Sequence bars. |
| Blocks List | Choose a format in which to display the block names in the Block list. |
| Gantt Bar Labels | |
| Tooltip | Choose which label to display as a Tooltip when hovering over an object on the Gantt. |
| Above | Choose which label to display above a Gantt bar activity. |
| Inside | Choose which label to display inside a Gantt bar activity. |
| Right | Choose which label to display to the right of a Gantt bar activity. |
| Below | Choose which label to display below a Gantt bar activity. |
| Gantt Bar Shading | |
| Shading | Choose a shading to apply to the Gantt bars. |
| Font Sizes | |
| Label Above | Choose a font size for the label above a Gantt bar activity. |
| Label Inside | Choose a font size for the label inside a Gantt bar activity. |
| Label Right | Choose a font size for the label to the right of a Gantt bar activity. |
| Label Below | Choose a font size for the label below a Gantt bar activity. |
| Sequence Bars | Choose a font size for the Sequence bar label. |
| Graph Axes | Choose a font size for the Graph Axes. |
| Time Row | Choose a font size for the time and period rows. |
| Headers | Choose a font size for the Left side headers. |
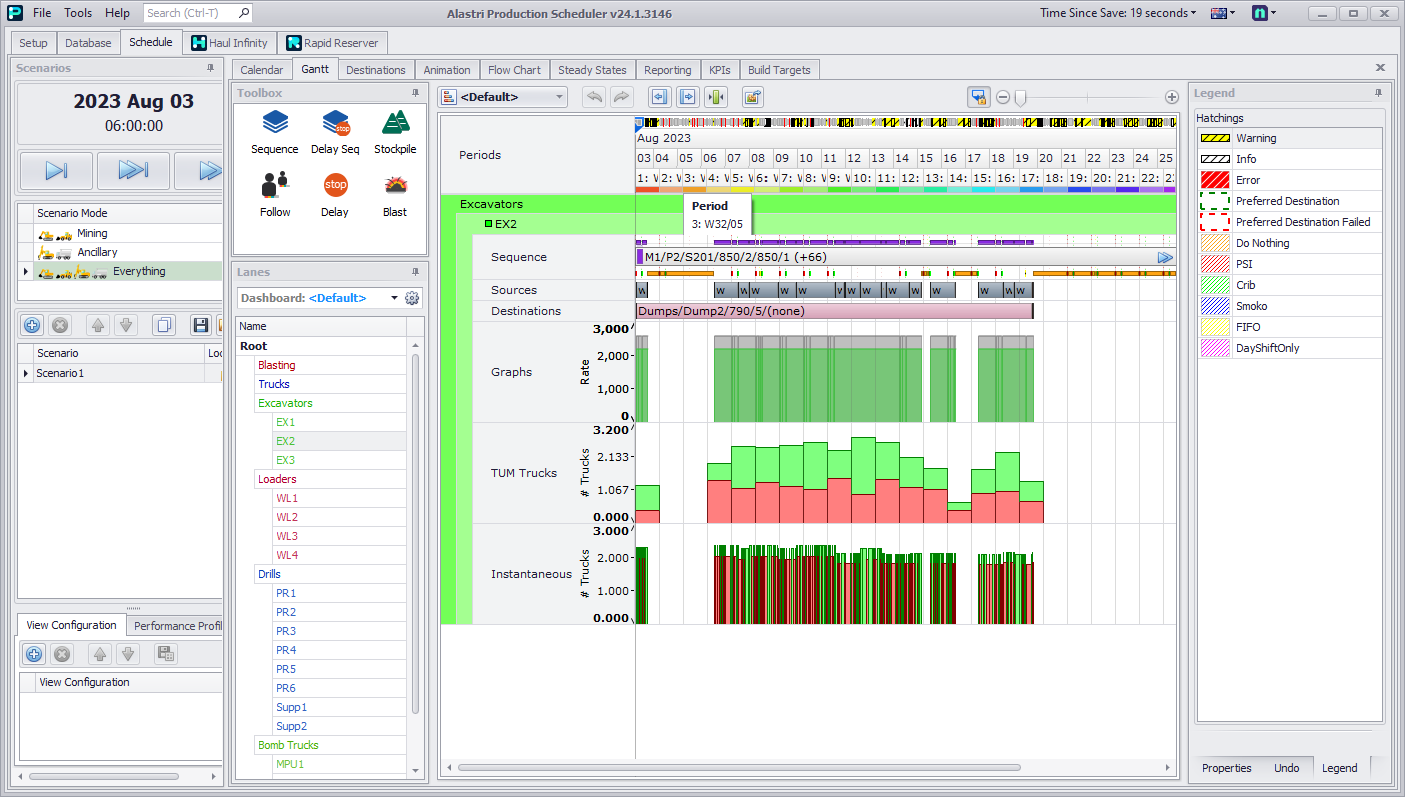
Example Gantt view with custom labels, shadings, and tooltip
In the Configure Gantt Display Options window, you can use the tools on the local toolbar to Copy the added views, Save them in ".ganttDisplayOptions" file format, or Import previously created views:

Copy, Save and Import buttons
At the bottom of the Configure Gantt Display Options window there is an Edit Global Settings button. Click this button to open the Configure Display Options window with Labels, Shadings and Destination Charts tabs (it's the same as selecting “Configure Global Display Options” from the display views button drop-down). In this window you can edit existing templates for Labels, Shadings and Destination Charts, or create new ones.